You can save your spring lawn by doing a few simple fixes now: don’t scalp the grass—cut only about a half‑inch lower than normal and stop when growth stops; clear shredded leaves so blades stay visible, rake up any half‑inch‑thick mats, and remove branches; switch to a low‑to‑moderate nitrogen, higher‑potassium winterizer a few weeks before the first hard frost; shut off and drain irrigation properly; and avoid walking frozen turf or overusing salt. Now follow these tips and you’ll see better green-up — more practical steps ahead.
Some Key Points
- Mowing too short before winter weakens crowns and delays spring green-up; keep cool-season turf at 2–2.5+ inches.
- Applying high-nitrogen fertilizer late encourages tender growth vulnerable to cold and disease; use low-N, high-potassium winterizer instead.
- Leaving wet, matted or thick leaf layers (>½ inch) smothers turf and fuels gray/pink snow mold; rake or shred thinly.
- Failing to shut off and properly drain or blow out irrigation lines risks frozen pipes, cracked valves, and spring leaks.
- Walking or working on frozen, snow-covered turf compacts crowns and breaks blades, increasing winter injury and poor spring recovery.
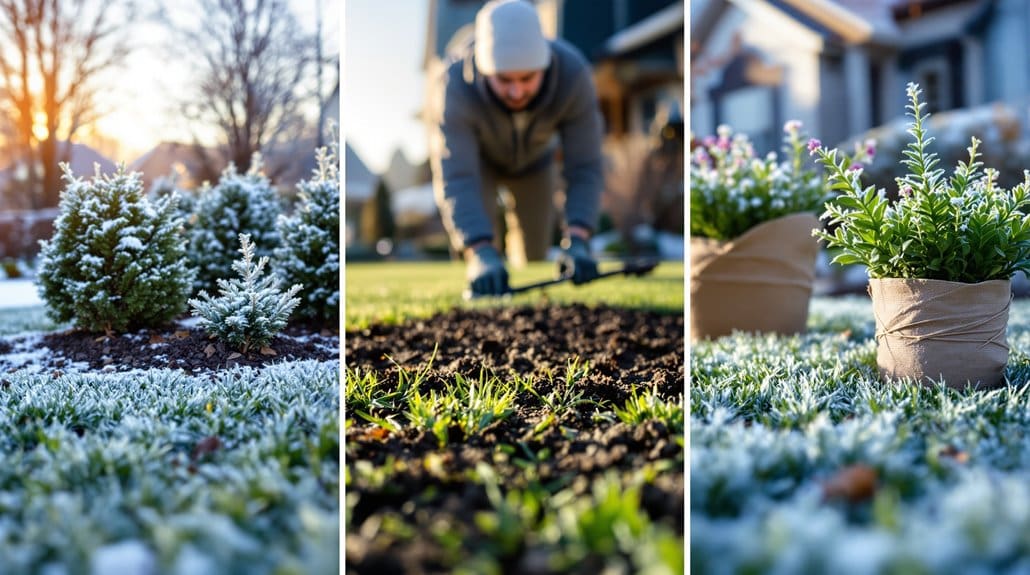
Cutting Grass Too Short Before Winter

Start by resisting the urge to scalp your lawn in late fall — I know it’s tempting to shave things down and call it a season, but cutting cool‑season grasses shorter than about 2–2.5 inches strips away the green tissue they need to store carbohydrates and weakens roots before winter. You’ve probably tried a low final mow to “tidy up,” but scalping thins the canopy, reduces insulation, and actually raises risk of winter injury, weeds, and snow mold. Now, do this: lower only about a half‑inch from your normal height for the final mow, stop when growth stops, and avoid mowing wet or dormant turf. Something to keep in mind: too‑short grass delays green‑up, so be patient and don’t repeat that old mistake. Consider using a dethatcher or scarifier to manage thatch buildup and improve winter resilience by promoting better air flow in the root zone.
Applying the Wrong Fertilizer or Fertilizing Too Late
If you’ve ever tossed down a high‑nitrogen, “feed‑me-now” fertilizer in late fall because you wanted one last lush look, you’re not alone—and that’s exactly the kind of move that’ll bite you come spring. Heading into winter, don’t use a summer blend; pick a winterizing fertilizer with higher potassium and low‑to‑moderate N, so crowns toughen instead of staying tender. Now, time it a few weeks before the first hard frost, while roots still pull nutrients, and make sure at least half the nitrogen is slow-release nitrogen to avoid a late flush that won’t harden off. Something to ponder: if the ground freezes or the lawn’s dormant, skip feeding—uptake’s minimal and nutrients can leach away. Consider using slow-release fertilizers to provide steady nutrition and reduce the risk of late-season flushes.
Failing to Remove Leaves and Yard Debris
Now, don’t let a blanket of leaves smother your grass — if you can’t see the blades, they’re being starved of light and air and you’re inviting snow mold and other fungal trouble. Do this: run a mulching mower and leave a thin, visible layer that feeds the lawn, but don’t do that with whole, matted leaves — rake and bag those, or compost them, because branches, toys, and planters left on the turf will create cold, wet pockets that rot crowns under snow. Something to keep in mind: remove leaves before the first heavy snow and check every 2–3 weeks, because late aeration or overseeding won’t fix months of smothering. Consider keeping an extra lawn rake on hand so you can quickly clear leaves and debris before they cause damage.
Leaves Smother Turf
Shoveling aside the myth that leaves are harmless, you’ve probably learned the hard way that a thick leaf blanket will smother your lawn, blocking sunlight and air so grass can’t harden off for winter and becomes vulnerable to snow mold and other fungi. Now, do this: remove leaves before the first heavy snow, inspect every 2–3 weeks, and clear fallen branches and yard clutter that trap moisture. Don’t do that old “let it sit” trick; continuous mats invite pink snow mold and gray snow mold. Something to keep in mind: shred leaves until green grass shows, then stop — shredded leaves decompose and feed turf, whole mats don’t. Here’s the payoff: better air flow, less disease, and a lawn your neighbors will admire. Consider using grass catchers to make leaf removal faster and reduce yard waste.
Mulching Versus Removal
Mulch or haul — that’s the question most homeowners botch every fall, and it’s worth getting right because the wrong choice can turn a tidy yard into a disease magnet by spring. Step 1, do this: shred leaves with a mulching mower so mulching leaves form a thin, visible layer that will decompose into turf, returning nutrients without smothering grass. Do not let a compacted leaf layer build thicker than ½ inch; that hides blades, traps moisture, and invites snow mold. Now, do this: remove leaves when they clump or mat, and remove leaves and branches before heavy snow to prevent crown damage. Something to keep in mind: regular raking beats one huge, miserable chore later. Trust me, you’ll thank yourself. For best results, pair mulching with proper lawn care gear to make the job quicker and protect your turf.
Debris Harbors Disease
If you let leaves pile up until you can’t see the grass, you’ll be handing fungi a welcome mat—so do this: walk the yard and clear any leaf layer thicker than about a half-inch, plus remove fallen branches, piles of yard waste, and tools that’ve been forgotten on the lawn. Now, don’t beat yourself up if you missed a spot last year; we all have. Inspect every 2–3 weeks through winter, and remove debris promptly after snowmelt to boost airflow and light. Something worth considering: a mulching mower is fine only if shredded leaves work down and you can still see individual blades; if not, rake and haul them away. Do this, not that—clear debris to reduce gray snow mold and other snow mold risks. For regular homeowners, using the right lawn care equipment makes debris removal faster and helps maintain a healthier lawn.
Walking on Frozen or Snow-Covered Grass
When you walk across frozen or snow‑covered grass, you’re not just leaving footprints — you’re risking crowns and leaf cells that have gone brittle in the cold, and that can snap and leave those gray or brown dead patches you’ll curse come spring. Heading out for a quick shortcut? Don’t. Walking on frozen turf, or over snow cover, turns polite foot traffic into compaction and frozen grass damage, and it invites snow mold when things thaw. Now, do this: stick to designated walkways, lay down plywood or stepping stones if you must cross, and keep kids’ sled routes off fragile spots. Something to keep in mind: if matting happens, wait for thaw, then gently rake or blow blades up, don’t attack frozen soil. Also consider using irrigation flags to mark fragile areas so people avoid them.
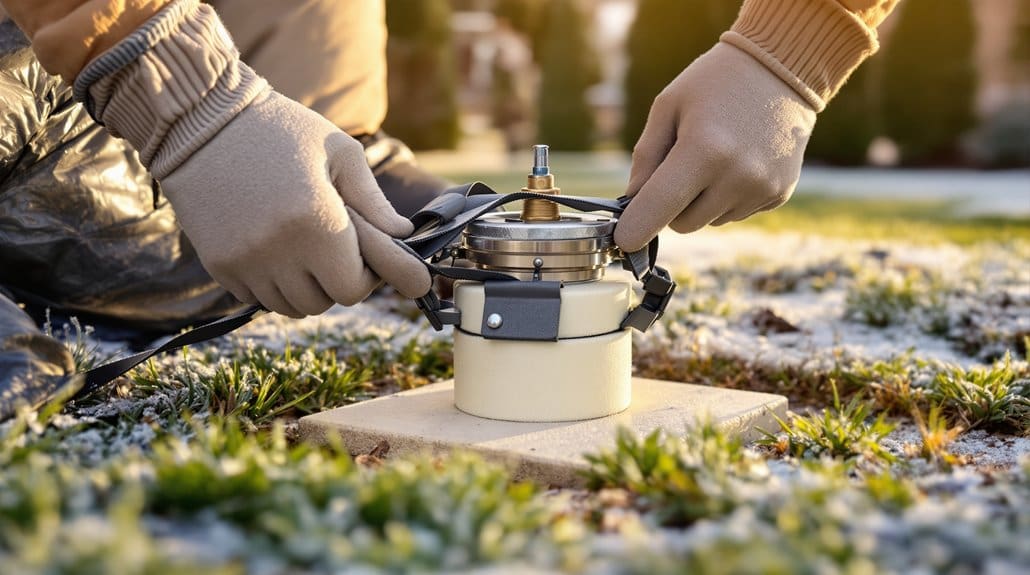
Forgetting to Winterize Your Irrigation System
Now, when nightly temps are flirting with freezing, shut off the water and your controller so you’re not caught watering into a freeze — procrastinating one year is how I learned the hard way. Next, remove water from pipes and heads by opening manual drains or using an air compressor to blow out lateral lines at the manufacturer-recommended pressure (commonly 50–80 psi), but don’t exceed pipe ratings or you’ll trade one repair for another. Something to keep in mind: cover and insulate above-ground parts and the backflow with foam or heat tape, and double-check remote zones and timers so an automatic cycle doesn’t undo all your work.
When To Winterize
Even though you might assume mild nights mean you can skip the prep, don't wait until the ground's frozen to winterize your irrigation system—shut off the water, turn off the controller, and get every line drained long before the first hard freeze, or you risk burst pipes and cracked valves that are expensive to fix. When to winterize? Begin when nighttime temps regularly dip near 32°F, not on a frozen morning. Do this: winterize your sprinkler now, shut off the water at the source, turn off controllers or set “rain,” and drain all lines. Use compressed air or the maker’s blowout steps for underground runs. Now schedule a spring check. Something worth weighing: it’s easy to procrastinate, I’ve been there, but don’t.
How To Drain Pipes
Start by shutting off the main irrigation supply and the controller so you don’t end up forcing pressurized water through frozen pipes — trust me, I learned the hard way. Step 1: open each zone’s manual drain or solenoid, let gravity do its work, don’t leave pressure trapped. Step 2: use an air compressor to blow out sprinkler lines at 30–50 psi, zone by zone, until only a fine mist comes out each head; slow and steady wins. Step 3: drain and open above-ground components but remember the next section covers protecting them more. Something to keep in mind: remove and drain drain caps, filter bowls, and low points. Afterward, label settings, note psi used, and test in spring before full restart.
Protect Above‑Ground Parts
If you skip protecting the above‑ground bits, water left behind will freeze, expand, and wreck valves, backflow assemblies, and even sprinkler heads — I learned that the hard way when a single missed winterization turned into a long, cold repair bill. Protect Above‑Ground Parts: Now, don’t let that be you. First, winterize irrigation by shutting off the water, shut off controller signals, and schedule a pro or rent gear to blow out lines at 50–80 psi, or drain every pipe, valve, and head until dry. Insulate backflow and other exposed gear with foam covers or heat tape to ward off freeze damage. Something to bear in mind: check in spring before reconnecting the controller, and enjoy fewer repairs, promise.
Overwatering or Stopping Watering Too Early
When soil temps start hovering around 40°F and the ground is about to freeze, you’ve got to stop the regular watering routine, because continuing to irrigate past that point just wastes water and invites disease. Now, don’t swing to extremes: quitting too early causes thin turf and shallow roots, which ups winter drought stress and makes spring recovery harder. Aim for a final deep soak a week or two before freeze‑up if the soil temperatures are still warm and dry, then winterize the system. Overwatering late can create soggy, oxygen‑poor soil that feeds root rot and snow mold, so don’t keep sprinklers running out of habit. Something to bear in mind: check soil, not your calendar. You’ll thank yourself in spring.
Using Salt and Chemical Deicers Carelessly

You’ve already learned not to water past the point of usefulness, and the same careful thinking should apply to how you handle ice melt around your lawn. Now, don’t be that neighbor who sprinkles rock salt like confetti and wonders why the grass turns brown come spring; rock salt and many chemical deicers pull moisture from roots and leaves, causing salt damage you might not notice until thaw. Do this: apply deicers sparingly, keep them away from lawn edges, and use the minimum effective rate. Do not that: dump them along turf. After melt, flush grassy areas to leach salts from the root zone. Something to ponder: use chloride-free alternatives, sand for traction, or plant salt-tolerant species where exposure is chronic.
Some Questions Answered
What Is the 150 Rule for Lawns?
The 150 Rule means different things, so first, check which one your local pro means: stop irrigation when soil temp drops toward 50°F, limit late fall watering to about 150 minutes weekly, target 150 ppm salts, or apply 150 lb/acre potassium. Now, focus on soil temp, root growth, seed dormancy, fertilizer timing, moisture levels, and sun exposure — do the right version, not the wrong guess, to protect roots and spring greening.
Can I Put Winterizer on in the Spring?
No — don’t put winterizer on in spring. Now, do this: address timing concerns by waiting for soil temperatures near 55°F, check fertilizer composition and pick a higher‑nitrogen spring mix with at least half slow‑release, and follow proper application rates to avoid waste. Something to keep in mind: do soil testing first, manage water to help uptake, and save that winterizer for fall — lesson learned, we’ve all been there.
Why Does My Lawn Look so Bad After Winter?
Soggy spots, sunken soil, and sad stems. You’re seeing cold damage, soil compaction, fungal disease, winter weeds, salt injury, and poor drainage — often from too much traffic, standing water, or missed winter care. Now, aerate and overseed where compacted, clear debris, treat mold spots, flush salts, improve grading, and use a targeted weed plan. Something to keep in mind: be gentler next fall, you’ll thank yourself.
What Is the 1/3 Rule in Lawn Care?
The 1/3 rule says don’t cut more than one-third of blade height per mow to protect mower height, clipping frequency, and grass physiology. Now, cut less often if growth’s slow, and step down in two cuts if you’ve let it surge. Something to keep in mind: this preserves root depth and aids turf recovery over seasonal timing shifts. Do this, not that—don’t scalp; you’ll thank yourself come spring.