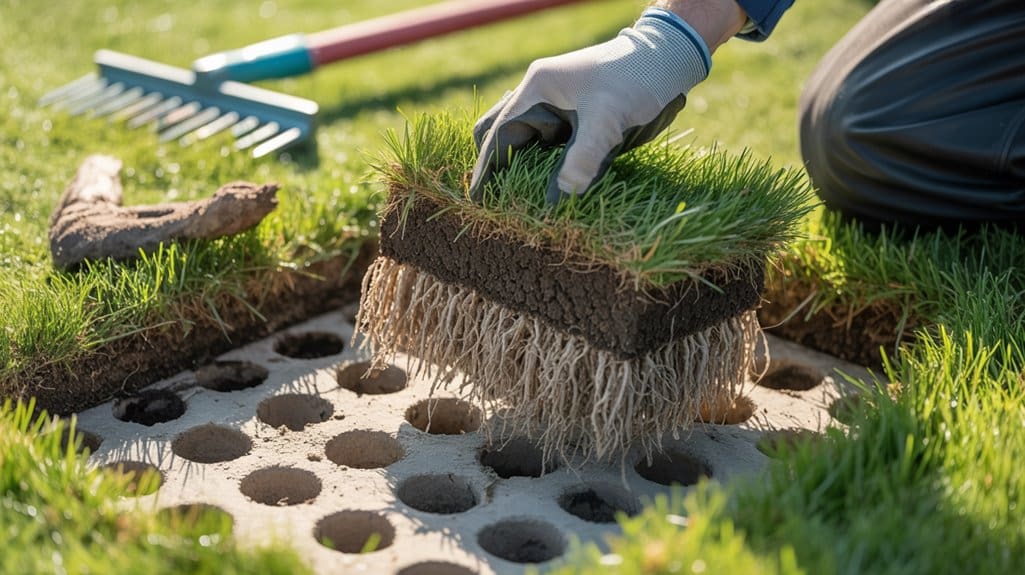
Grab a trowel and cut a few 2–3 inch plugs to see what’s underfoot: healthy thatch is thin (under ½ inch), loose and springy with roots mixing into soil, but problem thatch is a dense, spongy mat over ½–¾ inch that traps roots and water. Now, we may contemplate core aeration first if it’s near the threshold; don’t work wet soil. Something to ponder: proper timing, light topdressing, and slower nitrogen cuts recovery, and there’s more guidance ahead.
Some Key Takeaways
- Cut 2–3 inch plugs in several spots to inspect thatch depth and material rather than guessing by eye.
- Healthy thatch is thin (<½") and springy with roots reaching mineral soil; problem thatch is dense, felt‑like, and over ½–¾".
- Spongy, water‑logged spots indicate excessive thatch trapping moisture and slowing freeze/thaw cycles.
- Dark, matted debris in plugs signals overfertilization, high mowing or slowed microbial decomposition.
- If thatch nears thresholds, core aerate first; only use verticutting or power rakes for severe, confirmed buildup.
How to Inspect Your Lawn This Winter: Quick Tools and the Plug Method
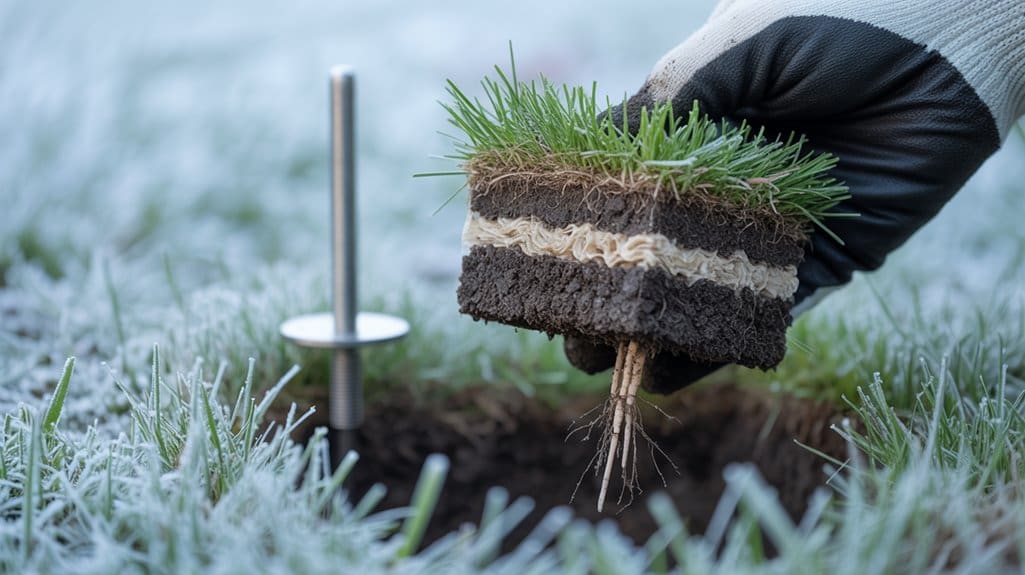
Start by digging in—literally—so you can see what’s going on below the green. Step 1: grab a hand trowel or soil knife and use the plug method to cut a 2–3 inch deep triangular plug, from several spots, you’ll thank me later. Now, we may contemplate this: use a ruler tape measure to record thatch layer thickness, don’t eyeball it like I used to. Something to contemplate, feel for a spongy bounce underfoot, probe with your finger, and note if soil is visible between crowns. If the plug shows moist compacted thatch, that resists decomposition and needs attention. Step 2: brush loose material, compare multiple readings, and avoid calling dethatching machines first—confirm the problem first. Consider choosing a home core aerator appropriate for your lawn size and soil type to make long-term maintenance easier.
What a Healthy Thatch Layer Looks Like vs. Problem Thatch
Now that you’ve pulled a few plugs and measured the layer, we may contemplate what you actually want to see. Step 1 — recognize healthy thatch: thin, generally under a half inch for lawns, loose and springy, with visible soil surface and fine roots mixing through, active microbes breaking debris down. Step 2 — spot problem thatch: a dense, felt-like mat over half to three quarters inch thick, resistant stems and crown bits piling up, thatch buildup you can compress, and roots confined to the mat instead of the soil. Something to contemplate: walk on it, you’ll feel a spongy feel if it’s bad. Do this, not that—aim for looseness, not a compressible, root-trapping wedge. Choose a dethatcher matched to your lawn size and type for best results with equipment selection.
Causes Revealed by Winter Signs: Water, Fertilizer, Mowing, and Soil Clues
When you walk a winter lawn and notice soft, spongy spots or hard, dry patches, you’re seeing clues that point right back to how the turf was treated all season — and that’s good, because clues are fixable. Step 1 — read the surface: sponginess often means a thatch or excessive thatch layer trapped water, preventing normal freeze, while dry, hydrophobic patches suggest overwatering that compacted the layer. Step 2 — check plugs: dark, matted debris signals overfertilization and frantic lateral growth, and high mowing height last season leaves undecomposed stems on top. Now, we may take into account this: compacted soils or poor decomposition, maybe from pH or pesticides, slow breakdown. Something to weigh — aerate, reduce water, ease fertilizer, lower mowing height. Regular blade maintenance with a proper blade sharpener helps ensure clean cuts that speed decomposition and overall turf health.
Symptoms Below the Surface: Sponginess, Shallow Roots, and Disease Hotspots
You’ll want to dig a little to really see what’s going on below that springy surface, because sponginess, shallow roots, and disease hotspots all tell the same story about how the lawn’s been managed and what to fix next. Step 1 — probe gently: a thatch layer over 1/2 inch feels spongy, it traps air and water, and you'll likely see a stringy felt when you pull a 2–3 inch plug. Step 2 — inspect roots: shallow root growth in thatch keeps the root system from reaching mineral soil, so drought and frost hit harder. Now, we may contemplate disease: slimy patches are disease hotspots where moist thatch and compacted areas invite fungi. Something to ponder — aerate soil, don’t just topdress. Regular aeration with appropriate lawn care equipment helps reduce thatch and improves soil contact for roots.
When to Dethatch or Aerate: Thickness Thresholds and Timing for Cool‑ vs. Warm‑Season Lawns
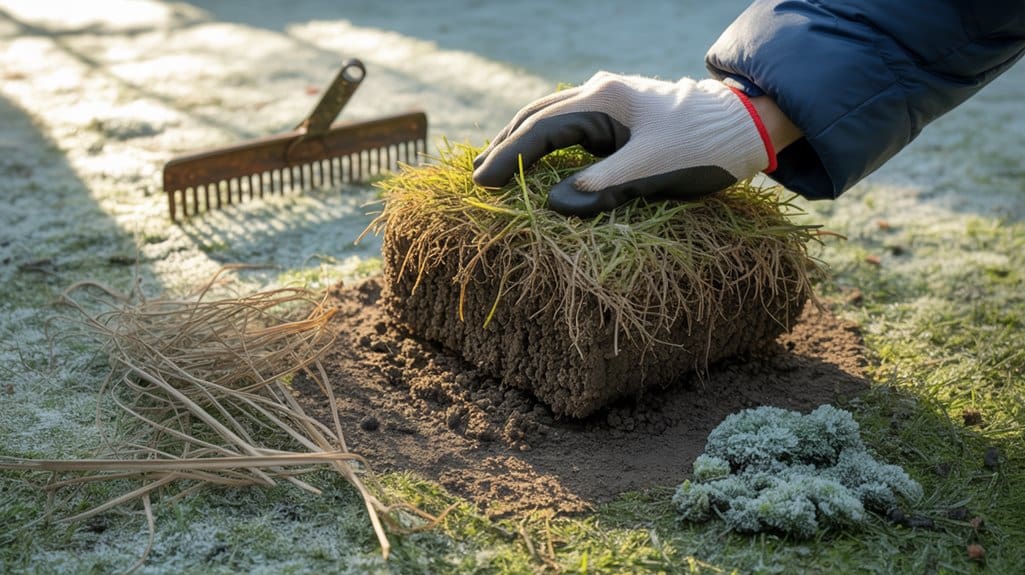
Now, here's what to do: measure the thatch — if it’s over about 1/2 inch in warm‑season lawns (bermuda, zoysia) or over 1/3 inch in cool‑season lawns (fescue, bluegrass, rye), plan mechanical dethatching, but if it’s right around that threshold, aerate first to stimulate microbes and let nature finish the job. For timing, dethatch warm‑season turf in late winter to early spring just before growth resumes, and cool‑season turf in early fall after summer stress; something to bear in mind is never working wet or frozen soil, which will just tear your lawn (yes, I’ve learned that the hard way). If you must remove severe thatch, stage it over a couple seasons, follow with fertilizing, watering and extra aeration, and don’t yank out live turf in one go — do this, not that. Choosing the right mower blade can help produce cleaner cuts and reduce additional turf stress, so consider blade type and sharpness when planning dethatching or aeration, especially mower blade selection.
Dethatch Thickness Guidelines
Grab a soil knife or a sharp trowel and cut a few 2–3 inch plugs around your yard, because seeing is believing: if you find a distinct stringy, felt-like layer thicker than ½ inch in warm‑season grasses (bermuda, zoysia) or thicker than about 1/3 inch in cool‑season grasses (fescue, bluegrass, rye), it’s time to act. Start by judging thatch layer thickness honestly, don’t guess. Now, we may take into account this: if it’s just near the threshold, try core aeration and microbial help first, avoid the vertical mower. Something to weigh: when thatch lies on soil and feels spongy or impenetrable, plan dethatching with a vertical mower, then follow with aeration, light topdressing, overseed, and a modest N feed to aid recovery. Consider using appropriate soil conditioners and lawn equipment to help rebuild healthy soil and turf.
Cool‑Vs‑Warm Season Timing
When you check your lawn this winter, remember that cool‑ and warm‑season grasses need different timing and different thresholds for action, so don’t treat them the same way like I used to do the first few seasons. Step 1: inspect the thatch layer with a 2–3 inch plug or wedge sample, measure the compressed layer. For cool‑season turf, check in late fall or late winter and plan dethatch or core aeration when growth resumes, treat if over about 1/3 inch. Now, we may contemplate warm‑season needs: inspect in late winter (Feb–Mar) before green‑up, dethatch in late winter to early spring if thicker than 1/2 inch. Something to ponder: avoid frozen or saturated soils. If you're doing frequent maintenance, consider using a spike aerator to make regular aeration easier and less disruptive.
Aeration Versus Dethatching
Before you yank out the big guns, take a breath and think about whether your lawn needs aeration or dethatching, because using the wrong tool early on is a mistake I’ve made more than once. Step 1: check the thatch layer by pulling a 2–3 inch plug; if warm-season turf shows over 1/2 inch or cool-season lawns over 1/3 inch, plan mechanical dethatching. Now, we may take into account this: if thatch is thinner but soil’s compacted, choose core aeration, aka plugging, to let air and microbes do the work. Something to weigh: severe thatch may need a power rake then follow-up aeration and topdressing. Do it when soil’s workable, not wet or in drought, and water and fertilize right after.
Post‑Inspection Action Plan: Short‑Term Fixes and Long‑Term Prevention
Start by making a simple plan you can actually follow, because impulse dethatching in the dead of winter is a classic turf-care regret — been there. Step 1: assess the thatch layer; if it’s thin to moderate, do core aeration now, then light topdressing and overseeding in a few weeks to boost soil contact and microbial breakdown. Now, we may contemplate this: if thatch exceeds the warm-season threshold, schedule mechanical dethatching in late winter/early spring instead of ripping it out today. Step 2: when playability or disease forces quick fixes, verticut lightly, remove debris, apply 0.5–1 lb N/1000 sq ft, and water. Something to contemplate: submit a soil test, curb excess nitrogen applications, and adopt deep, infrequent irrigation.
Some Questions Answered
What Does Thatch Look Like in Your Lawn?
You’ll see a brown matting, a spongy layer of grass debris and dead roots, a strawy buildup that feels springy underfoot, and soil separation where crowns sit above the dirt. Now, we may reckon this: pull a plug, measure it. Something to reckon. Do aerate, don’t ignore it. We’ve all waited too long — I have — so act early to stop air restricting and restore healthy soil contact.
Should You Dethatch a Lawn in Winter?
No, you shouldn’t dethatch in winter; dormant turf and frost timing make root damage and equipment freeze real risks. Now, here’s what to do: inspect plugs, measure thatch, plan spring work, and avoid heavy machines that cause soil compaction. Something to keep in mind, if you’ve tried winter dethatching before and regretted it, you’re not alone. Do this, not that — schedule mechanical dethatching with contractor availability in the proper season.
What Is the Layer Under Grass Called?
It’s called the thatch layer, a spongy root mat and sod layer sitting above the mineral soil or soil horizon, part of the organic layer and surface humus that makes your turf base. Now, we may contemplate this: cut a wedge to see it. Do this, not that—don’t confuse quick‑decomposing clippings for persistent thatch. Something to ponder: if it’s over about half an inch, dethatch.
What Is the Average Cost to Dethatch a Lawn?
You’ll typically pay $100–$400 for professional pricing on an average lawn, or $50–$150 for equipment rental if you DIY dethatcher, with labor estimates $40–$100/hr or $0.02–$0.10/sq ft. Now, we may contemplate this: pair mechanical dethatching with lawn aeration for best value, seasonal discounts often cut costs. Something to ponder: do it yourself if you can, but don’t skimp on the right gear.