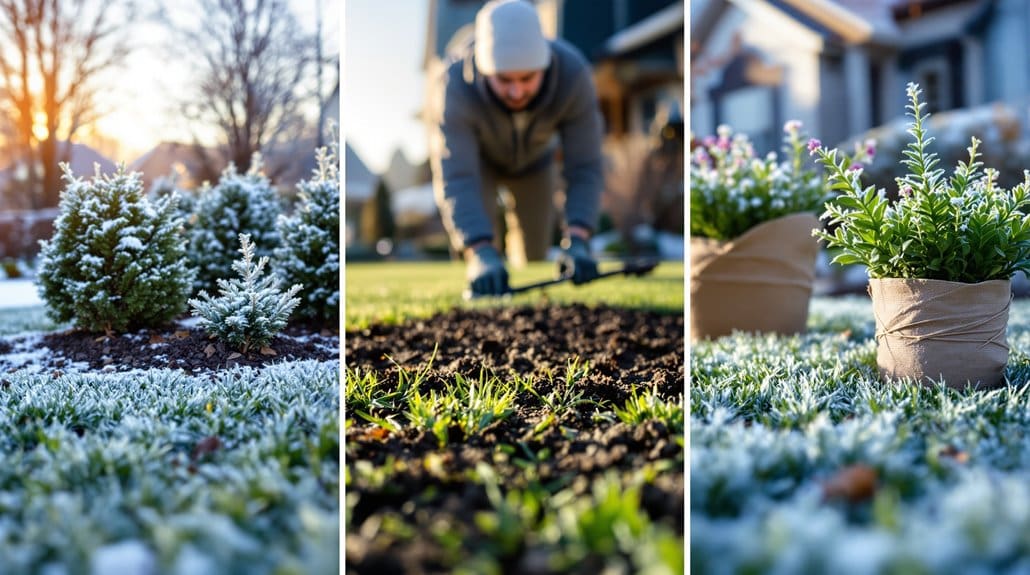
You’ll wait until soil starts to freeze and nights stay below freezing, then apply a loose 2–4 inch mulch—start with a coarse layer for drainage, top with shredded leaves, straw, or pine needles matched to your plants, and keep mulch pulled 2–4 inches away from crowns and stems to prevent rot and rodents; mound more for shallow roots and roses, avoid fresh grass or fine sawdust, and pull mulch back gradually in spring as the soil thaws so shoots aren’t delayed, now learn how to tailor this for each plant.
Some Key Takeaways
- Apply mulch only after soil begins to freeze or after a hard/killing frost to avoid trapping warmth and delaying dormancy.
- Use 2–4 inches of loose organic mulch (shredded leaves, straw, or pine needles) to insulate roots and reduce frost‑heave.
- Keep mulch pulled back 2–4 inches from crowns and woody stems to prevent rot and rodent damage.
- Layer a coarse base (wood chips) under finer material to maintain drainage and airflow while reaching ~3 inches total.
- Remove mulch gradually in spring over several sunny days, leaving a 1–2 inch insulating layer until new growth appears.
When to Apply Winter Mulch for Best Protection
If you want your perennials to wake up healthy next spring, the key is to wait until the ground has started to freeze and nighttime lows are reliably below freezing before you lay down winter mulch, because applying it too early can trap warmth and coax tender shoots into growth that a late warm spell will then doom. Now, you’ll check for a hard freeze or killing frost, especially for marginal or newly planted perennials, and only then add a layer of winter mulch about 2–4 inches deep—2–3 for most, a bit deeper for shredded leaves—to insulate roots without smothering them. This is where timing matters: when to apply hinges on consistent freezes and soil dormancy, then you’ll push mulch back in spring as soil thaws. Using the right material and tools helps maintain a healthy lawn and beds, so consider choosing mulch types suited to your landscape.
Which Mulch Materials Work Best for Perennial Beds
Now that you’re protecting perennials for winter, focus on organic mulches that actually help: shredded or whole leaves at 5–6 inches add insulation and organic matter as they break down, straw at 3–4 inches shields crowns and prevents frost‑heave (just don’t use hay with seeds), and wood chips or shredded bark at 2–4 inches are best around woody perennials because they resist compaction and slowly improve soil. The key is to match the material to the plant — use pine needles for acid‑loving species like rhododendrons and blueberries because they let air and water through and won’t mat, and avoid fine, compactible materials like fresh grass clippings or fine sawdust that can go anaerobic and rot crowns. Now check root depth and plant type, adjust your depth to the guidelines above, and you’ll get insulation without suffocating the crowns. For homeowners, having the right tools makes mulching easier and more effective, especially using essential compost gear to apply and manage organic materials.
Best Organic Options
When you’re choosing an organic winter mulch for perennial beds, think of it as picking the right coat for each plant, because the goal is to protect roots from freeze–thaw cycles while adding long-term benefits to the soil; the key is matching material, depth, and placement to the plant type. Start with shredded leaves at 3–6 inches around herbaceous perennials, they insulate, resist compaction when shredded, and feed the soil as they break down, now that’s gentle, effective protection. Use wood chips or shredded bark, 2–4 inches, around woody perennials and shrubs to prevent erosion, pulling mulch 2–3 inches from stems to reduce pests. For crowns or shallow roots, add straw at 3–4 inches; combine materials for colder sites. Slow-release fertilizers can complement organic mulches by providing steady nutrients as the mulch decomposes and improves soil structure, especially for regularly maintained lawns and beds with slow-release fertilizer.
Materials To Avoid
Because mulches that seem convenient can end up hurting your perennials, it’s important to know which materials to avoid and why, so you’ll protect crowns, roots, and spring growth. You’ll want to skip fresh grass clippings and soft maple leaves, they mat and compact, exclude air, trap moisture against crowns, and invite rot and fungal problems; now, pull them away from beds or compost them first. This is where dyed or treated wood chips and colored playground mulch fail you, they can leach chemicals that harm soil life and sensitive roots, so choose natural, untreated options instead. Also avoid allelopathic debris like black walnut and heavy, uncomposted whole leaves over bulbs, because they delay warming and can inhibit young growth. The key is loose, breathable mulch and a 2–4 inch clear space at stems. For best long-term results, consider pairing mulch with the right lawn and garden tools like a dethatcher to maintain healthy soil structure and prevent compaction from the surface; see dethatcher selection for guidance.
Application Depth Guidelines
If you want your perennials to come through winter healthy, aim for a loose, breathable blanket of mulch about 2–4 inches deep, with 3 inches a good target for most beds, because that thickness tucks roots into steady insulation without smothering them; the key is to use the right material for the plant type—shredded or whole leaves and straw work best for shallow-rooted herbaceous perennials, while wood chips or shredded bark are better around woody shrubs and trees. Now, when you apply winter mulch, wait until soil begins to freeze or put it over snow, keep mulch away from crowns and stems to prevent rot and rodents, and avoid fine, compacting materials that will exclude oxygen. Choose organic mulch products that support soil health and microbial activity, like composted bark or leaf mulch for a healthy soil.
How Deep to Mulch: Layering and Placement Guidelines
Now you'll set mulch depth to match plant needs, usually 2–4 inches for most perennials or 5–6 inches if you’re using whole leaves, because the key is insulating roots without cutting off air and water exchange. This is where placement matters: keep material pulled back 2–4 inches from crowns and woody stems to prevent crown rot and rodent damage, and when you layer, use lighter materials like shredded leaves or pine needles over denser wood chips to maintain airflow. Start after the soil has begun to freeze so plants are fully dormant, and plan to thin or remove mulch gradually in spring as soils warm to avoid delayed emergence and fungal issues. Use proper tools and products from reputable suppliers to make mulch application easier and more effective for typical homeowners lawn care.
Mulch Depth Recommendations
When you’re getting ready to mulch your perennial beds this fall or winter, think with respect to an insulating blanket that still needs to breathe, and aim for about 2–4 inches of loose organic mulch (3 inches is a good target) to protect roots without smothering them; for very shallow‑rooted perennials or new transplants increase that to 4–6 inches to lessen frost‑heave, and add an extra inch or two over exposed soil or after a light snowfall for added insulation. You’ll mulch to help roots stay steady, and the key is a consistent layer of mulch that balances insulation with air exchange, now apply evenly, avoid compacting it, and plan to thin or remove gradually in spring as soil warms. Consider also edging beds before mulching to keep a clean barrier between lawn and bed edging methods for easier maintenance and a tidier appearance.
Mulch Placement Around Stems
Around the base of your perennials and shrubs, think of mulch as a protective blanket that needs to keep roots warm without touching vulnerable stems, so you’ll lay it down and then pull it back a couple inches to avoid problems. Now apply 2–4 inches of winter mulch across the root zone, this insulates without smothering and lets air move, and for shallow‑rooted or newly planted specimens you can mound up toward the upper limit while you still keep mulch pulled back 2–4 inches from stems and crowns. This is where you leave a visible 1–2 inch collar of bare bark at trunks to prevent decay, the key is preventing rodent chew and stem rot, and in spring gently thin from the stem outward as soil thaws. Consider choosing lime‑safe mulches and proper application techniques to complement soil pH management with soil pH for healthier lawns and beds.
Layering And Airflow
If you want mulch to protect roots without choking them, think about layering and airflow from the start: lay a coarse base like wood chips to promote drainage and keep air channels open, then top it with finer materials such as shredded leaves, straw, or pine needles until you reach about 2–4 inches (3 inches is a good target) so the soil stays insulated but still breathes. Now follow a clear layering strategy: begin with that coarse layer, add the finer mulch to reach about three inches, and keep mulch pulled back 1–2 inches from crowns and 2–4 inches from stems to prevent rot and rodents. This is where Winter mulching pays off, preserving roots while allowing oxygen exchange and easier spring adjustment.
Mulching Techniques for Different Plants (Perennials, Roses, Bulbs)
Cold winters can be harsh on tender roots, so you’ll want to mulch thoughtfully to protect perennials, roses, and bulbs without inviting problems; start by waiting until the ground has frozen, then apply a 2–4 inch layer of shredded leaves, straw, or bark around perennials to insulate roots and prevent the freeze–thaw heaving that pops plants out of the soil. For roses, mound 6–8 inches of straw or shredded leaves or soil around the graft union, keeping mulch a few inches away from canes to reduce rot and rodent damage, and the key is to protect plants now while leaving space for airflow. For spring bulbs, add 3–6 inches to moderate temperature swings, and in spring remove mulch gradually as soil thaws so shoots can emerge.
Avoiding Problems: Rodents, Rot, and Over-Insulation
You’ve taken care to mulch at the right time and in the right amounts, now the work shifts to preventing the problems that can undo those benefits: rodents, rot, and over‑insulation. You’re part of a community that values healthy beds, so the key is simple, practical care: leave a 2–4 inch gap at crowns and trunks so moisture won’t pool and invite voles or stem rot, and apply 2–4 inches of loosely laid mulch (5–6 inches if you’re using leaves) to insulate without smothering. Choose a type of mulch that’s coarse—shredded leaves, straw, or wood chips—because fine materials can mat and suffocate crowns. Now, check beds as seasons change, thin or remove mulch if soils stay wet, and you’ll keep problems at bay.
Spring Removal and Reuse: When and How to Take Mulch Off
When soil temperatures creep into the 40–45°F range and night frosts have mostly passed, it's time to start pulling back winter mulch so plants can wake up without getting caught by a late freeze, and the key is to do it slowly and deliberately rather than ripping everything off at once. Start by pulling mulch back from crowns in increments over several sunny days, leaving a 1–2 inch insulating layer until new growth appears, now you’ll protect tender stems while letting soil warm. As you remove winter mulch, screen usable leaves, straw, or chips for disease-free material to reuse in pathways, around shrubs, or as compost feedstock, and store removed mulch dry so it finishes decomposing for later reuse.
Some Questions Answered
Should I Cover My Perennials With Mulch for the Winter?
Yes, you should mulch perennials for winter, now that soil has frozen or after hard frosts, because mulch provides soil insulation and reduces freeze‑thaw heaving. The key is to apply 2–4 inches of insulating material, keep mulch pulled back from stems to protect from rot and rodents, and choose coarser or finer mulch for woody or herbaceous plants respectively. In spring, push mulch back gradually to restore root aeration.
What Is the 3-3-3 Rule for Mulch?
The 3-3-3 rule means you place about three inches of mulch depth over the bed to provide root insulation, leave a three-inch gap around stems or trunks to prevent rot and rodents, and apply or remove mulch timing over three weeks as soil freezes or thaws; now, this is where careful spacing protects grafts and crown tissue, so follow the gap and depth, and you’ll see healthier, less winter-damaged perennials.
Does Mulch Protect Plants From Freezing?
Yes, mulch does protect plants from freezing, because its insulation benefits moderate root temperature, reducing freeze-thaw cycles that cause frost heave, and it improves moisture retention so roots don’t desiccate. Now, this is where timing matters: wait until ground’s frozen, pull mulch a few inches from crowns, and remove it gradually in spring. The key is consistent thickness and good placement, and you’ll help perennials survive colder snaps.
Should You Mulch Flower Beds in Winter?
Yes — you should mulch flower beds in winter, but selectively and with timing. Now, wait until plants are dormant and soil starts to freeze, then apply 2–4 inches of insulating mulch, keeping it away from crowns to prevent rot and rodent issues; this reduces freeze–thaw heaving. The key is to monitor winter watering needs and plan gradual mulch removal in spring as temperatures warm, so new shoots emerge healthily.