You’re going to winterize so you’re ready for a crisp first cut: first, disconnect the spark plug (and remove battery from electrics), add stabilizer to a full tank or drain fuel, then tip the mower carburetor‑up and remove the blade for inspection. Now clean the deck, sharpen and balance the blade, check belts, cables and tire pressure, and store elevated in a dry spot. One thing to keep in mind: label parts for easy reassembly. Keep going and you’ll get the full step‑by‑step plan.
Some Key Points
- Remove the spark plug or disconnect the battery, tip mower safely, and secure blades before inspecting or removing them.
- Sharpen mower blades every 25–50 hours or at season’s end, removing equal metal and preserving blade balance.
- Replace blades with bends, cracks, or more than 1/8" material loss rather than attempting repairs.
- Clean and dry the undercarriage, discharge chute, and blade mounting area before reinstallation to prevent rust and imbalance.
- Reinstall blades with correct orientation and torque, and run the engine briefly to confirm smooth operation and no leaks.
How This Guide Helps You Winterize Lawn Equipment (How‑To/To‑Do List)
If you want your mower and other power tools to wake up in spring without drama, start here: this guide walks you through the exact, step-by-step winterizing tasks you'll actually do—no vague advice, no guessing—so you can avoid common mistakes like leaving old gas in the tank or shoving a damp machine into the shed and hoping for the best. Think of this as a how‑to checklist, friendly and precise. Now, start by tipping the mower correctly, remove blades to Sharpen blades and balance or replace damaged ones, scrape and dry the deck to stop rust. One thing to keep in mind: add stabilizer, run then drain fuel, check spark plug and air filter, and store in a dry spot. Here’s the thing: do these, not that. Homeowners who sharpen and balance blades regularly see better cut quality and longer blade life, so make blade maintenance a seasonal habit by using proper sharpening tools and techniques for blade care.
Decide What to Service: Gasoline Mowers, Electric Mowers, Trimmers, and Blowers
Decide what to service next by taking a quick inventory of every gas mower, electric mower, trimmer, and blower you own, because knowing what’s in your shed saves time—and prevents that embarrassing “I forgot the battery” scramble in spring. Now, go machine by machine: for gasoline mowers, stabilize fuel, change oil per the manual, replace the spark plug yearly, and clean or swap the air filter so the carburetor doesn’t gum up. One thing worth noting, two‑stroke trimmers and blowers need fresh premix, a fuel filter check, and the same spark plug/air filter attention. For electrics, remove and store batteries at about 40%, inspect cords and chargers, and clean connections. Here’s the thing: check blades, clean undercarriages, sharpen or replace as needed. Also consider the type of two‑cycle oil your small engines require by choosing the correct two‑cycle oil for optimal performance.
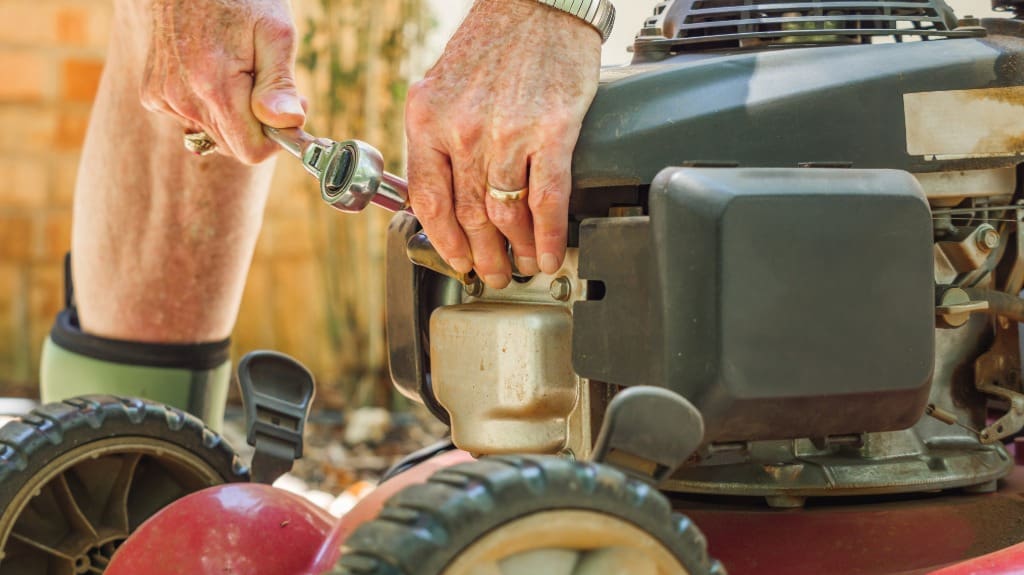
Safety First: Disconnect Spark Plugs, Remove Batteries, and Secure Fuel
Now, start by disconnecting the spark plug wire and tucking it somewhere safe so the engine can't accidentally start while you're working—trust me, you don't want that surprise. One thing to take into account is removing batteries from electric mowers and storing them indoors at about 40–60% charge, following the manufacturer's advice to keep them healthy; here’s the thing, I’ve learned the hard way that leaving batteries in a cold shed shortens their life. Finally, if you’re dealing with gas, either add stabilizer and run the engine to circulate it, or drain and run the mower until it stalls, letting the engine cool first and keeping parts labeled and secured for an easy, safe reassembly in spring. Regular carburetor care, including cleaning and inspection, helps ensure reliable starting and performance after storage carburetor care.
Disconnect Spark Plug
Start by cutting the risk: before you touch anything, pull the spark plug wire off and tuck it well out of the way, or better yet, remove the spark plug entirely after the engine's had 15–30 minutes to cool; you don’t want an accidental start while you’re under the deck — I learned that the hard way once when I thought the choke was idle. Now, disconnect the spark plug, label the wire so you and your crew know it’s off, and wear insulated gloves and eye protection. One thing to keep in mind, don’t rush: try pulling the starter cord with the plug out to verify the ignition’s dead. Here’s the thing, follow your manual for torque and replacement steps, and don’t skip this basic safety move. Regular maintenance of blades and belts helps keep your mower running efficiently and prevents premature wear on riding mower components.
Remove And Store Battery
Before you pull the battery, cut the power by disconnecting the spark plug wire and tuck it somewhere obvious so nobody accidentally yanks the starter while you’re working — I learned the hard way that a careless hand and a spinning blade don’t mix. Now, wear gloves and eye protection, then remove the battery carefully, clean terminals with baking soda and a wire brush, and coat them lightly with petroleum jelly so corrosion won’t bite next spring. One thing to keep in mind: for lead‑acid, store it indoors at about 40–60% charge and check recharge every month or two; for lithium, follow the maker’s guidance, aim for similar mid charge, and keep it temperate. Here’s the thing—store it away where kids or tools can’t short the terminals. Consider purchasing battery chargers designed for homeowners to keep batteries at the correct storage charge.
Blade Care: Remove, Inspect, Clean, and Sharpen for a Spring‑Ready Cut
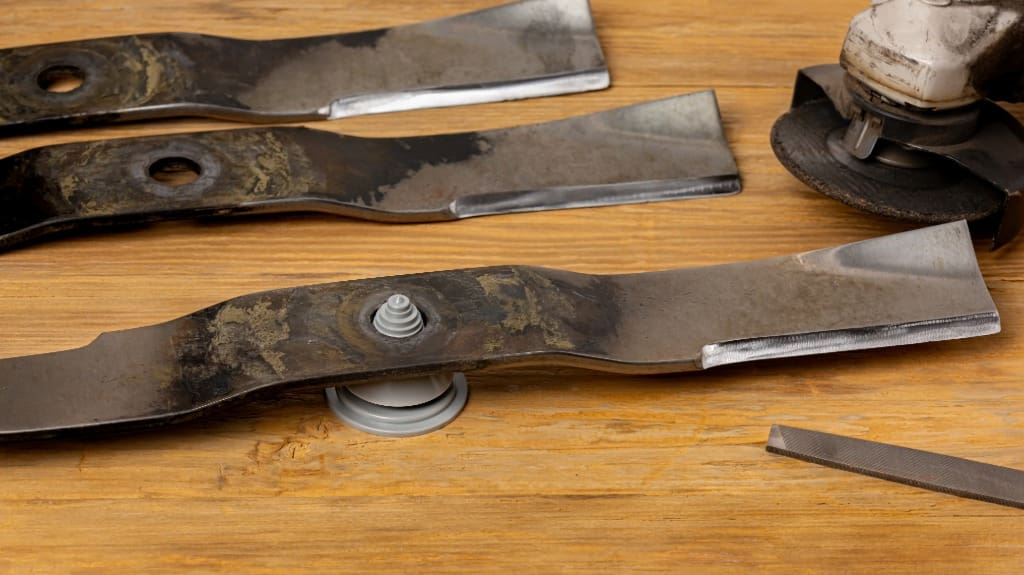
Give the blade some respect — it’s the part that actually does the cutting, and a dull, bent, or rusty blade will trash your lawn faster than you can say “skips a season.” Step 1: Tip the mower carburetor-up, disconnect the spark plug, and unbolt the blade; you’ll inspect for bends, cracks, deep nicks, or rust, and replace any blade with over 1/8 in material loss. Now clean with a wire brush and hot, soapy water, dry completely. One thing to keep in mind: sharpen blades at season’s end or every 25–50 hours, using a grinder or file to restore the edge, remove equal metal, and then check balance on a screwdriver shaft. Here’s the thing—reinstall with correct orientation and torque, replace bad hardware, and you’re ready. For homeowners, choosing the right blade type and material can improve cut quality and durability — consider high-carbon steel options when selecting replacements.
Undercarriage and Deck Cleaning: Scrape, Wash, and Prevent Rust
Now, tip the mower according to the manual so upward-facing parts like the carburetor stay safe, then use a stiff wire brush to scrape away that stubborn, caked grass and mud under the blade — I’ll admit I’ve skipped this and paid for it with a rusty deck later. One thing to keep in mind: after you’ve scraped thoroughly, rinse with hot, soapy water or a low-pressure washer, dry everything well, and treat small rust spots with a wire brush and rust converter before touching up paint to slow corrosion. Here’s the thing — remove and clean the discharge chute and any baffles, check bolts and welds, and do this at least once before winter storage so trapped moisture and imbalance don’t bite you come spring. Regular use of protective covers can help prevent rust and reduce the need for frequent deep cleaning.
Tip Mower For Access
Flip the mower onto its side so the air filter and carburetor point up, and you’ll get the clean, safe access you need to scrape and wash the undercarriage without dumping oil or fuel where it doesn’t belong. Now, before you tip the mower onto its side, disconnect the spark plug and make sure the carburetor faces upward, you’ll thank yourself later—been there, ruined a lawnmower once. One thing to keep in mind: use a putty knife or wire brush to loosen clippings and dirt from seams and the discharge chute, then wash with hot, soapy water or a low-pressure washer and a stiff brush. Here’s the thing, dry everything thoroughly, inspect for rust or loose bolts, sand, treat, and touch up with enamel to protect your deck.
Remove Caked Grass
Before you tip the mower onto its side — with the carburetor facing up and the spark plug disconnected, as you just learned — get ready to tackle the worst of the gunk stuck under the deck. Step 1, scrape: grab a putty knife or stiff scraper, and chip away compacted grass clippings and debris, working around the discharge chute and cutting chamber, yes it’s tedious, but you’ll thank yourself later. Now wash: use hot, soapy water and a wire brush to loosen what’s left. One thing to bear in mind, dry thoroughly after cleaning, using compressed air or a rag, because moisture hides in crevices. Here’s the thing, inspect for damage, sand small rust spots, and touch up paint so your mower lasts.
Dry And Rustproof
Usually you’ll want to tip the mower with the carburetor up, scrape away the worst of the caked grass, then give the deck a proper wash so you don’t trade one problem for another — moisture hidden under gunk is the number one way rust sneaks in. Now, scrub the undercarriage with a putty knife or wire brush, pressure-wash or use hot, soapy water, then dry thoroughly with rags or compressed air so you don’t lock in dampness. One thing worth weighing: inspect seams, chutes, and mounts for paint loss, treat any surface rust with converter and primer, then touch up paint. Here’s the thing, spray a light corrosion inhibitor on exposed metal, store the mower elevated in your garage or shed, and cover it with a breathable tarp.
Fuel System Winterizing for Gas Engines: Stabilize, Siphon, and Run Dry
If you want your gas-powered mower to start without a fight in spring, tackle the fuel system now with a clear plan: add stabilizer to a full tank and run the engine so treated fuel reaches the carburetor, then siphon or drain most of the gas and finally run the engine dry so leftover fuel clears from the lines. Step 1: add a fuel stabilizer per directions (usually 1 oz per 2.5 gal), run five–ten minutes so it circulates. Now, let it cool, then siphon or drain the fuel tank into an approved container, aim for ~90% gone. One thing to keep in mind: restart and run until it stalls, repeat until it won’t restart. Here’s the thing, follow your manual, disconnect the spark plug, store fuel safely.
Engine Tune‑Up: Oil Change, Spark Plug Replacement, and Air Filter Service
Now, start by changing the engine oil before storage or every 25–50 hours, using the grade your manual calls for so you don’t sit on corrosive contaminants—yes, I’ve skipped this and paid for it. One thing to bear in mind is swapping the spark plug about once a year (or sooner if it’s fouled), checking for carbon buildup, cracks, or worn electrodes and gapping to spec so the engine fires cleanly. Here’s the thing: service the air filter at least yearly—wash and oil foam filters, replace paper ones—and then run the engine briefly to confirm smooth idling, keep a spare plug and filter on hand, and log the service date.
Change Engine Oil
Start by warming the engine for a few minutes so the oil thins out and drains cleanly, because trust me, you don’t want to wrestle with cold, sludge‑thick oil—been there, hated that. Change the oil at season’s end or every 25–50 hours: park level, drain into a proper container, and refill with the engine oil type and viscosity your manual calls for, commonly SAE 30 or 10W‑30. Now, one thing to keep in mind: use the exact capacity listed, don’t guess. Here’s the thing, old filters and oil aren’t trash—take them to a recycling center. After filling, run the engine briefly to check for leaks, recheck level, snug fasteners, and you’ll feel proud you did it right, not rushed.
Replace Spark Plug
Replacing the spark plug is one of those small jobs that makes a big difference, and you’ll be glad you did it when the mower fires right up without coughing—trust me, I’ve wrestled with stubborn starters before. Step 1: Here’s what to do now — pull the right Spark,Plug type from your owner’s manual, replace yearly or about every 100 hours, don’t guess the heat range. Step 2: One thing to ponder — gap the new plug to the spec (often 0.030–0.035 in) with a feeler gauge, and torque it to spec (usually 10–15 ft‑lb), or you’ll risk poor firing or thread damage. Step 3: Now start the engine, listen for a smooth idle.
Clean Or Replace Air Filter
You'll want to check the air filter every season, because a clogged one will quietly steal power and hike fuel use—trust me, I learned that the hard way after fighting a sluggish mower all summer. Step 1: Safety first, disconnect the spark plug wire so the engine can't start while you work. Step 2: Inspect the filter at season’s end; if it’s discolored, compressed, or packed with debris, replace it—don’t argue with dirt. One thing to keep in mind, for foam filters you can tap, wash in warm soapy water, fully dry, lightly oil, and reinstall only if the manual allows. Now, when you clean or replace the air filter, replace the spark plug about once a year for reliable starts and efficient combustion.
Batteries and Electrical Components: Remove, Store, and Mid‑Winter Charging
When winter rolls in, pull the battery out and give it a proper place to rest, because letting it sit in the mower is one of those “I’ll deal with it later” moves that comes back to bite you. Step 1 — remove the battery, label it with model and date, and store it upright on a non‑conductive shelf indoors, around 50–68°F. For lithium‑ion, aim for 40–60% charge and check every 1–2 months, topping up if it drops below about 30%. For lead‑acid, fully charge, then refresh every 4–6 weeks to avoid sulfation. Clean terminals with a wire brush, apply a thin film of dielectric grease, and keep batteries away from heat or metal tools. Now, that’s winter proofing done right.
Belts, Cables, Tires, and Moving Parts: Inspect, Lubricate, and Adjust

Now, before you shove the mower into storage and call it a season, take a clear-eyed look at the belts, cables, tires, and other moving parts—this is where small neglect turns into big headaches come spring. Step 1 — Inspect belts and cables: check drive and deck belts for cracks, glazing, or fraying, replace any with more than hairline fissures, and test throttle, choke, and blade-engagement cables for smooth action; sticky or rusted cables usually need replacement. Step 2 — Tires and bearings: measure tire pressure, inflate to the manual’s PSI for even cuts, and spin pulley and wheel bearings, replacing any that grind or wobble. Step 3 — Lubricate moving parts, grease pivots and spindles per Mower Maintenance regular maintenance intervals, and adjust to prevent misalignment.
Parts, Supplies, and Spares to Stock Before Storage
Think ahead and gather the parts and supplies that save you from a springtime scramble — trust me, I’ve learned the hard way that one bad spark plug or a clogged filter can turn a quick tune-up into a full afternoon of troubleshooting. Step 1: keep at least two spare spark plug types per gas mower, swap annually or every ~100 hours, don’t wait. Step 2: stock new air filters for each engine, replace when discolored. Step 3: maintain fresh engine oil and a quart of the right grade for each machine, change oil before storage or at spring start. One thing to bear in mind: have a spare balanced blade per deck, and store fuel stabilizer, an approved container, plus a siphon pump.
Proper Storage Setup: Indoor vs. Covered Outdoor and Positioning Tips
You’ve got the right parts and supplies stacked up, so the next move is to park the gear where it’ll survive the winter without a fuss.
Step 1 — Choose indoor first: Store your mower indoors in a dry garage or shed when you can, it cuts rust and corrosion, and you won’t regret it. Now, one thing to keep in mind — if space’s tight, don’t just drape plastic over it.
Step 2 — Covered outdoor setup: Use a breathable waterproof cover, elevate the mower on pallets or shelving to keep ground moisture and freezing out, and leave 12–18 inches of clearance for airflow and access.
Step 3 — Positioning tips: Tip gasoline mowers with carburetor and air filter up, remove batteries from electrics and stow them at moderate charge indoors. Here’s the thing — cover blades or remove them, safety first.
Post‑Storage Checklist: What to Check When Bringing Equipment Out of Winter Storage
When you pull your mower or trimmer out of storage this spring, start with a slow, methodical walk‑around so you don’t miss the small stuff that trips you up later; we’ve all jumped straight to the start switch only to curse a dead battery or a gummed carburetor five minutes in. Step 1, check the battery terminals for corrosion, measure voltage — you want about 12.4–12.7 V — recharge if below 12.4 V. Now, inspect the spark plug and replace it if fouled or worn, don’t skip that yearly swap. One thing to keep in mind: fresh gasoline in the fuel tank or drained/stabilized fuel choices, add stabilizer and run briefly. Here’s the thing, clean the air filter, scrape the deck, tip carefully, then sharpen and balance blades.
Some Questions Answered
Does a Sharp Lawn Mower Blade Make a Difference?
Yes — a sharp blade makes a real difference. Now, check blade balance and cutting angles, because a balanced edge with proper angles gives a clean cut, less plant stress, and better fuel use. One thing to keep in mind: sharpen more often if you mow a lot, and replace bent or nicked blades. Here’s the thing, I’ve skipped sharpening before and regretted it; do this, not that — keep blades sharp and balanced.
How to Start Your Lawnmower After Winter?
You start by reinstalling the sharpened blade, torquing bolts to spec, then reconnect the spark lead and add fresh gas or fuel stabilized if you used a stabilizer, since cold starts hate old fuel. Now set the choke, prime if needed, and pull or hit the electric start while holding the safety lever; expect a couple tries. One thing to keep in mind: check spark plug and air filter if it balks — been there, it’s fixable.
How Often Should Lawn Mower Blades Be Sharpened?
Sharpen mower blades about every 20–25 hours of run time, roughly every 6–8 weeks during a typical season. Now, inspect after every 10 hours or any rock strike, and sharpen or replace if you see nicks, bends, or heavy chipping. One thing to keep in mind: don’t over-grind, watch steel hardness so you don’t weaken the blade, and always rebalance—blade balance matters, or you’ll vibrate bearings and regret it.
What Mower Blades Stay Sharp the Longest?
Forged, high‑carbon blades stay sharp the longest, not stainless steel, though stainless resists rust and helps between sharpenings; powder coating fights pitting. Now, pick heat‑treated or forged high‑carbon blades, thicker where needed, and avoid cheap stamped ones. One thing to keep in mind: balance and coating matter as much as steel grade. Here’s the thing, you’ll learn from past dull mistakes—replace smart, sharpen regularly, don’t overgrind.