Here's what to do now: water deeply before the first hard freeze so roots stay moist, then apply 3–4 inches of shredded mulch pulled a few inches from the trunk, not piled against bark. Wrap the south side or paint with diluted white latex to prevent sunscald, and install a 1/4‑inch hardware cloth cylinder 18–24 inches tall to stop rodents. Use burlap windbreaks for winter winds, prune weak branches, and avoid heavy late pruning—keep going for more tips.
Some Key Points
- Water deeply before ground freezes and during dry fall spells to keep roots moist and insulated.
- Apply a 2–4 inch mulch ring extending at least 2 feet from the trunk, but keep mulch 2–3 inches away from bark.
- Install a 1/4-inch galvanized hardware cloth guard, buried 2–3 inches and 18–24 inches above expected snow depth, to block rodents.
- Wrap or paint the lower trunk (white latex 50:50 or breathable wrap) on south/southwest sides to prevent sunscald, removing in spring.
- Erect temporary burlap windbreaks on windward sides and prune weak branches before winter to reduce snow and ice damage.
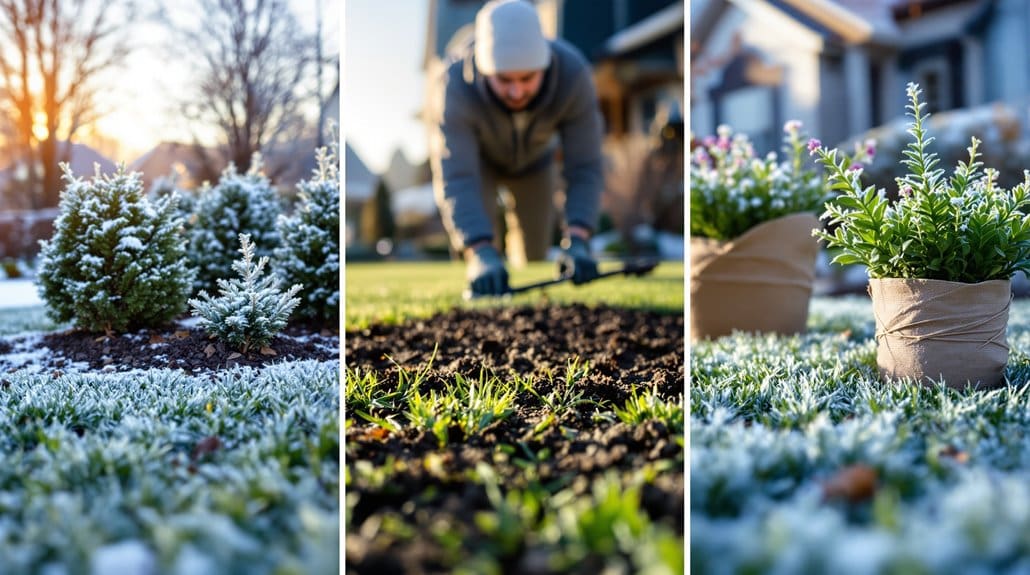
How to Prepare Young Trees Before the First Freeze

Now’s the time to get your young trees ready before the first hard freeze, because if you wait until the white shows up you’ll be playing catch‑up and likely losing sleep over broken branches and chewed trunks. Now, start by watering newly planted trees deeply, ten to fifteen gallons, repeat until the ground freezes so the root zone stays moist and holds heat; you’ll thank yourself later, trust me. Next, spread three to four inches of shredded wood mulch around a two to three foot radius, keeping it pulled six inches from the bark to avoid rot. Something to keep in mind: wrap thin bark or paint the sunny side to prevent sunscald, and install buried trunk guards against mice and voles. Do this, not that—don’t pile mulch on the trunk. For routine tasks like mulching and cleanup, keep a few durable essential buckets handy for hauling materials and tools.
Watering and Mulching Strategies to Protect Roots
Tending the root zone properly will save you headaches come spring, so start by getting the soil and mulch working for the tree, not against it. Step 1 — water newly planted trees deeply in autumn, about 10–15 gallons per small tree or soak until soil’s moist 12–18 inches down, and repeat during warm dry spells until the ground freezes. Now mulch correctly: apply 3–4 inches of shredded wood mulch, extend at least 2 feet from the trunk, but keep mulch pulled 6 inches away from bark to avoid rot and girdling. Something to keep in mind: moist soil holds heat, so give one last thorough soak before freeze-up. Fill backfill voids so cold air won’t creep into the root system. Using the right tools and amendments can improve root health and soil structure for long-term success, especially when maintaining lawn and soil care around young trees.
Trunk Protection: Wraps, Paint, and Hardware Cloth
Now you'll protect the trunk itself, because wraps, paint, and hardware cloth each solve different winter problems and you don't want to repeat my mistake of leaving things on too long. Use a light commercial tree wrap or a diluted white latex paint on the lower 2–3 feet to reflect harsh sun and prevent rapid bark temperature swings, but remove wraps in spring and don't wrap tightly or pile mulch against the trunk. Something worth pondering: add a 1/4‑inch hardware cloth cylinder, buried a few inches and rising 18–36 inches, to keep mice, voles, and rabbits from girdling the bark. Many homeowners also find rabbit repellents helpful as part of an overall strategy to keep rabbits out of the yard.
Tree Wraps And Paint
When you’re wrapping or painting trunks, think of it as giving the tree a lightweight winter coat—one that reflects sun and keeps critters at bay without smothering the bark. Step 1: wrap young trees in late fall with a light‑colored commercial tree wrap or white paper wrap, especially on the south and southwest side, and remove it each spring after last frost; you can repeat for a couple winters, longer if bark’s very thin. Step 2: paint the lower trunk with a 50:50 mix of water and white latex paint to reflect harsh midday sun and cut cracking. Now, do this loosely for airflow, avoid dark tight wraps that trap moisture, pull mulch back six inches, and check your work each season. Using proper products from a trusted lawn care equipment supplier helps ensure safe, effective trunk protection.
Hardware Cloth Trunk Guards
You’ve already given the trunk a light coat or paint to cut down on sunscald, and now you’ll add a tougher layer against rodents and gnawing. Hardware cloth cylinders, 1/4‑inch galvanized, 6–12 inches across, give reliable rodent protection for young tree trunks; bury 2–3 inches and extend 18–24 inches above expected snow depth. Now secure the cylinder with durable stakes or ties, keeping it 1/2–1 inch from the bark so it won’t abrade or girdle as the trunk grows. Something to bear in mind: leave it through late spring, but remove snug ties and check annually. Combine with a loose outer wrap or south‑side paint, and keep mulch pulled back 6 inches so pests and moisture aren’t invited. Trust me, you’ll sleep better. For best results, consider pairing trunk guards with equipment covers and other protective gear designed for homeowners who maintain their property regularly.
Wind and Evergreen Shelter: Using Burlap and Temporary Windbreaks
If winter winds have chewed away at your evergreens before, let’s not repeat that mistake — a simple burlap windbreak can make a big difference without fuss. Step 1: place the burlap windbreak on the south and prevailing‑wind side, stretch it 3–4 feet high, and secure to stakes 2–4 feet from the trunk so air and light still reach the top. Now, for young evergreens keep the fabric 2–3 feet from outer branches to avoid rubbing, trap insulating snow, and protect roots. Step 2: combine with thorough fall watering and a 3–4 inch mulch ring, kept a few inches from the trunk. Something to ponder: remove temporary windbreaks in spring, after one or two winters, to avoid mold and rodents. Consider adding a hose timer to automate fall watering and ensure consistent moisture through autumn.
Preventing and Repairing Snow, Ice, and Branch Damage
Snow and ice can pile on branches fast, so act before the load becomes a disaster — you don’t want to be the person who waits until everything’s dangling or snapped. Step 1: prevent problems by pruning weak attachments and narrow crotches before storms, since heavy snow and ice love those spots; tie together leaders on small trees two‑thirds up the stem with soft cloth or stockings to reduce splitting. Step 2: during storms, gently shake snow upward from below, don’t yank. Step 3: after events, wait until mid‑spring to judge damage; when you see broken branches or torn bark, prune cleanly to sound wood with a sterilized tool, round edges, leave wounds open, mulch and water roots. Something to keep in mind: call an arborist for big fixes. Also consider using landscape fabric around the root zone to reduce competing weeds and help retain soil moisture.
Protecting Trees From Salt and Animal Browsing
Usually, protecting young trees from winter salt and hungry rodents means thinking ahead and doing a few simple, sensible things now so you don’t have to fix bigger problems later. Step 1 — keep salts low: don’t plant where runoff collects, clear snow promptly, and use the minimum deicing salts or gentler alternatives like calcium chloride or calcium magnesium acetate; rinse or irrigate in spring to flush salt from roots. Step 2 — encourage health: add mulch and proper fertilization so trees tolerate stress better, I’ve learned the hard way that healthy trees bounce back. Now for animals: use tree guards or 1/4‑inch hardware cloth cylinders, buried a few inches and 18–24 inches above snow, and keep grass and brush away so rodents won’t shelter.
Some Questions Answered
How to Cover Young Trees for Winter?
Wrap young trees like tucking a friend in: start with a mulch ring to keep soil warm, then add a burlap shelter around the crown, securing edges so wind can’t pry it off, and use tree wrap on the trunk for sunscald protection. Now, don’t use plastic, don’t let fabric touch buds, and remove covers on sunny days. Something to ponder: stake supports to keep fabric off branches — lesson learned the hard way.
Why Do People Put Saran Wrap Around Trees?
People use plastic wrap to shield young trunks from rapid temperature swings and critter gnawing, but it can cause moisture trapping and even trunk suffocation if left on. Now, wrap late fall with breathable, light-colored materials, not dark Saran wrap, and remove after last frost. Something to keep in mind: hardware cloth works better against rodents. I’ve overwrapped before, learned the hard way — do this, not that, and check the bark regularly.
What Is the Best Protection for Young Trees?
The best protection is to guard root collars, manage soil insulation, and handle water management together. Now, wrap trunks lightly and mulch in a donut, don’t pile mulch at the collar; water deeply through fall so roots stay hydrated, don’t let soil dry out. Something to keep in mind: add trunk insulation and a rodent guard. You’ll learn from slip-ups, we have — but do this, not that, and your trees survive.
Will a Baby Tree Survive Winter?
Yes, your baby tree can survive winter if you act. Now, water deeply before freeze-up and add root insulation like 3–4 inches of mulch, not piled at the trunk. Something to ponder: transplant timing matters, do it in fall or early spring, not midwinter. Modify the microclimate with a temporary burlap windbreak or trunk wrap to reduce desiccation and sunscald. Trust yourself, learn from mistakes, keep checking.