You can prevent costly freeze damage by shutting the supply, opening bleeders/test‑cocks to relieve trapped pressure, and fully draining or removing the backflow before cold nights, because trapped water expands and cracks valves or housings; now wrap exposed PVC and the assembly with closed‑cell foam or use an ASSE‑1060 heated enclosure for longer freezes, set heaters to thermostatic control, and after thaw slowly pressurize while watching for leaks—keep going to learn step‑by‑step how.
Some Key Takeaways
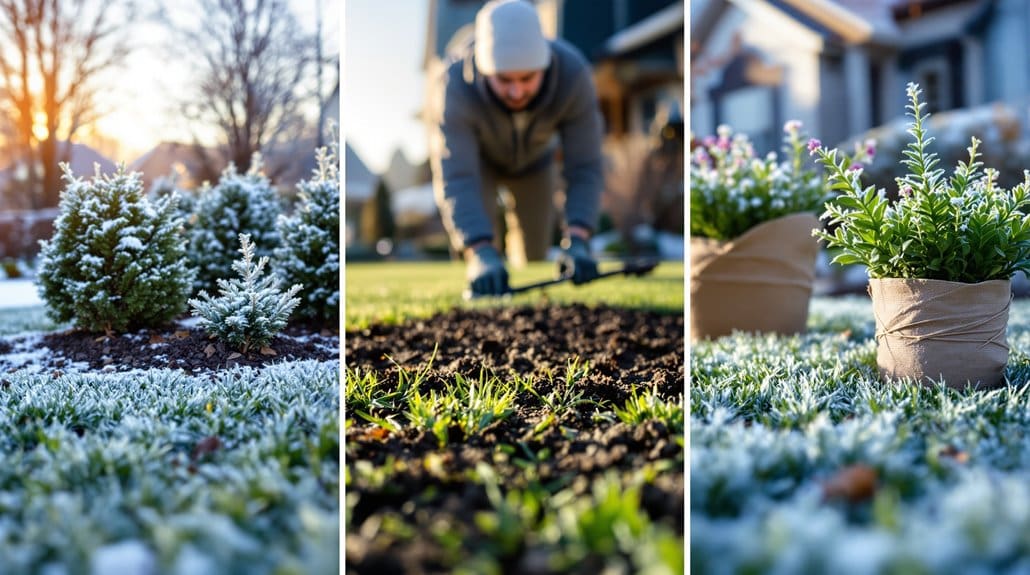
- Winterize before the first hard freeze (≤32°F), ideally when forecasts show nights near or below ~28°F.
- Shut supply, open bleeders/test cocks, relieve pressure, and confirm no water remains trapped in the device.
- Drain and/or remove above-ground PVBs; professionally drain or relocate DCVs and RPZs to protected spaces.
- Use heated enclosures, ASSE 1060 boxes, or closed-cell insulation and heat tape for permanent or temporary protection.
- Blow out zones with regulated compressed air (40–60 psi typical), watch farthest heads and backflow bleeders until only air exits.
What Happens When a Backflow Preventer Freezes and Why It Matters
When temperatures dip below freezing, trapped water inside your backflow preventer expands and can crack brass or plastic parts, and when that happens you need to pay attention because the damage isn’t just cosmetic—broken checks, valves, gaskets, or housings can let contaminated irrigation water flow back into your potable supply. You’re part of a community that protects shared water, so now you’ll learn what to watch for and what to do next: freeze can seize or rupture internal parts, even if the body looks fine, causing warped seats, worn springs, or microcracks that impair operation, and RPZ assemblies can stick relief valves open and dump water when thawed. The key is inspection and pro service, test before use, and replace damaged components promptly to keep everyone safe. Regular maintenance of backflow devices and proper winterization practices help prevent costly failures and protect public health, so schedule routine inspections with a qualified provider.
Which Backflow Types Are Most Vulnerable to Freeze Damage (PVB, DCV, RPZ)
Now you need to know which backflow types are most at risk from freezing so you can prioritize protection: pressure vacuum breakers (PVBs) sit above ground with small brass chambers that trap residual water and crack easily when ice forms, so you’ll want to insulate or move them quickly. This is where double-check valves (DCVs), with two spring-loaded checks, and reduced pressure zone (RPZ) assemblies, whose relief valve can dump water and suffer internal seat damage if ice jams the chamber, demand careful attention, especially if they’re above grade or in shallow, uninsulated vaults. The key is to treat every device as vulnerable—even below-grade units can split housings or blow gaskets if not properly drained or placed in heated ASSE 1060 enclosures—so act now to add insulation or heat before the next hard freeze.
Pressure Vacuum Breakers Vulnerability
Because PVBs (pressure vacuum breakers) sit above ground and use a single check and vent assembly, they're one of the easiest backflow devices to freeze and crack, so you need to treat them like fragile, exposed plumbing that can fail quickly in a hard freeze. You rely on these for irrigation, so when temperatures drop, freeze damage can split the brass body or vent, letting water and contaminants escape; the key is to drain your backflow completely, now, and inspect for trapped pockets. This is where simple winterizing pays off: close supply, open downstream drains, and remove or insulate the vent hood if allowed, then verify no residual water stays in the chamber, because prompt action prevents cracks and keeps your system part of a community that cares. Consider using equipment covers or insulation specifically designed for outdoor plumbing to add protection during cold snaps.
RPZ And Double-Check Risks
Even though all backflow preventers can suffer in a hard freeze, RPZs (reduced pressure zone assemblies) and double-check valves (DCVs) need special attention because their internal complexity hides failure points that can cost you water and safety; RPZs can dump continuous relief flow if the first check leaks or freezes, wasting lots of water and risking contamination if a housing cracks, while DCVs rely on two spring-loaded checks that can both seize or split if water is trapped in their chambers. Now, this is where you step in: the key is recognizing that RPZs and DCVs are prone to freeze damage, they rarely survive poorly drained boxes, and you should hire pros to drain or install an ASSE 1060 heated enclosure, because proper drain procedures and enclosures protect your device and your community. Homeowners should also consider installing rain sensors and winterizing controls to reduce unnecessary irrigation during freeze events.
When to Winterize: Timing by Region and First-Hard-Freeze Rules
When nights start flirting with freezing, it’s time to take action so your irrigation backflow preventer doesn’t crack or seize; the rule of thumb is to have winterization finished before the first “hard freeze” hits—defined as the first night at or below 32°F (0°C), and ideally before several nights are forecast at or below about 28°F to give you a safety margin. You’ll want to winterize your backflow based on your climate, now—if you’re in New England or the upper Midwest schedule early, often in October, because repeated freezes deepen risk; if you’re in Texas or the Southeast don’t wait, sudden freezes can arrive overnight. The key is monitoring 7–10 day forecasts, adding insulation or heat to boxes ahead of that first hard freeze. For best year-round performance, also inspect and maintain your sprinkler components regularly to prevent failures and extend equipment life, including choosing the right lawn care equipment for your system.
Step-by-Step Shutoff and Pressure‑Release Procedure Before Winterizing
You’ve watched the forecast and picked your moment, and now it’s time to protect the backflow itself by shutting off and depressurizing the system before the first freeze arrives. Start by locating the supply-side shutoff, usually the lower valve with a blue rubber cover, and turn it about 45 degrees to stop flow; the key is a firm, decisive move so water stops feeding the assembly. This is where you loosen the two bleeder/test-cock screws under the plastic top, removing any rubber plugs first, and open them with a flat-head until spurting stops, relieving trapped pressure. Leave the smaller bleeders open during freezing spells, cycle the outlet briefly to drain by gravity, and re-check shutoff tightness if you see persistent spitting. For homeowners maintaining their property, consider storing your watering tools and equipment in a dry place to prolong their life and prevent freeze damage to accessories like hose-end attachments and cans, including watering cans.
How to Drain and Blow Out Lines Safely : Tools and Checklist
Now that you've shut off the supply and isolated the backflow, take a breath and confirm pressure's fully released by opening the bleeder/test cocks before you disconnect anything, because safety comes first. This is where a high‑volume air compressor (30–80 psi for most homes) and a proper blow‑out adapter earn their keep, you'll cycle each zone individually and run air through until only air or clear water exits every head to push lines and the backflow outlet bone‑dry. The key is to verify and drain completely, wear eye and ear protection, keep pressure within the pipe rating, leave shutoffs at 45 degrees with bleeders open for residual drainage, and inspect fittings and checks before you store or restore the device. For routine homeowners maintaining their property, choosing the right hose timer and compatible fittings can simplify future winterization and maintenance tasks, especially when paired with reliable hose timers.
Shut Off And Isolate
Before you start, shut off the supply-side valve feeding the backflow (usually the lower valve with the blue cover) and confirm the flow has stopped—this is the key first step, because if pressure’s still coming in you’ll just drive water into the device while trying to relieve it. Now, close that shut off valve, then loosen both bleeder/test-cock ports, remove any rubber inserts, and wait until spitting stops so trapped pressure’s fully relieved; this is where you avoid damage and protect neighbors’ systems too. If you’ll drain the backflow for removal, empty it completely and store indoors, otherwise set valves per the device instructions and leave small bleeders open so residual water can expand without freezing. Choosing the right sprinkler valves and related components helps ensure reliable operation and easier winterization for typical homeowners; consider quality sprinkler valves when planning maintenance.
Use High‑Volume Air
When you’re ready to blow out your irrigation zones, start by sizing up your compressor and settings so you don’t overdo it—this is where the right tool and a steady hand keep pipes and valves safe. Use a high‑volume compressor rated about 80–100 psi and 8–10 CFM, then set the regulator to 40–60 psi for typical residential PVC, this is where you protect pipe integrity and avoid water hammer. Shut the supply, open bleeders and test cocks, then cycle one zone at a time while an assistant watches the farthest heads and the backflow preventer bleeder until only air exits, usually 30–60 seconds. Now relieve pressure, partially close the supply per device instructions, leave test cocks slightly open for freeze protection, and disconnect. For homeowners, choosing the right rain gauge and related tools helps you monitor irrigation effectiveness and protect your system with proper winter care rain gauge basics.
Verify And Drain Completely
Because a single stubborn pocket of water can spell trouble come cold weather, you’ll verify and drain the system completely before calling the job done, and the key is to work methodically so nothing gets left behind. First, half‑turn the supply shut‑off (usually the lower blue valve) to cut water, then open the backflow preventer’s bleeder/test cocks to relieve pressure and confirm flow stops, this is where you’ll see if the supply really closed. Next, use a high‑volume compressor and blow‑out adapter at the controller to purge each zone until only air exits the furthest sprinkler, now open the bleeders and leave them open, or remove and fully drain the unit and store it indoors. Watch for spitting bleeders—if they spit, the shut‑off isn’t sealed—and always wear eye protection.
Temporary Insulation: Wrap, Bleeder Access, and Short‑Term Protection
Even if a hard freeze is only forecast for a night or two, you’ll want to act fast and wrap exposed piping and the backflow body with closed‑cell foam insulation so the system keeps its heat and the vulnerable parts stay protected. Now, fit pipe insulation snugly around runs, secure seams with waterproof tape, and leave a 1–2 inch cutout so bleeder valves and test cocks stay accessible; the key is you can still vent pressure while keeping most surfaces shielded. This is where a fitted insulated pouch or fiberglass plumbing wrap helps on odd‑shaped RPZ or PVB assemblies, overlap and tape seams, then add a reflective emergency blanket or folded tarp to trap soil heat overnight, anchor edges, and after the threat passes, close bleeder valves and inspect for moisture or damage.
Permanent Protection: Choosing ASSE 1060‑Rated Aluminum Enclosures and Heated Covers
You’ve already done the quick fixes for a one- or two-night freeze, but for long-term peace of mind you’ll want a permanent enclosure that handles cold, service access, and any relief discharges without you having to suit up every time frost is forecast. Now choose an ASSE 1060-rated aluminum enclosure, because it resists corrosion, holds up in severe freezes, and can be fabricated with inspection clearances for your backflow preventers, the key to easy servicing. This is where a cover backflow solution with a drain port matters, it routes RPZ relief discharges away and prevents indoor flooding while keeping the device insulated. Consider models that accept integrated heat cable or heated covers to keep internal temps above freezing, verify certification and fit, then install confidently.
Heating Options: Heat Cable, Wall‑Mounted and Slab‑Mounted Heaters - How to Pick One
Start by matching the heater type to how your backflow is installed, because the right heat source takes the guessing out of freeze protection and keeps your RPZ accessible and safe. If pipes and valves are exposed or irregularly shaped, use self-regulating heat cable, which wraps or clips on, boosts wattage where it’s colder, and won’t overheat, now size it by pipe length. This is where a wall-mounted heater fits, for enclosed vertical boxes with power nearby, place it to circulate warm air without blasting plastic parts. Choose a slab-mounted heater when the assembly sits on a flat base or relief valve discharge pools, it warms from below by conduction. The key is verifying power, GFCI protection, and thermostatic or self-regulating control to save energy and prevent damage.
Post‑Thaw Inspection, Restoring Service, and When to Call a Professional
Now that you’ve picked and installed the right heater, don’t let the work stop there — after a freeze and any thawing effort you need to inspect and bring the backflow assembly back online methodically, because hidden damage can defeat even the best protection. Begin a careful post‑thaw inspection by checking the backflow preventer housing, shut‑offs, test cocks, relief valve and piping for cracks, bulges, leaks, or corrosion before you add pressure, you belong to a group that cares for shared water safety. With bleeders open, slowly pressurize the supply, watch for leaks or continuous discharge at the relief port for 2–3 minutes, now if water escapes, reduced downstream pressure, or odd sounds occur, shut it down and call a professional. Close test cocks, reopen fully, cycle a zone, confirm normal flow; if flow’s poor or erratic, leave it off and get certified help.
Some Questions Answered
How to Protect Backflow Preventer From Freezing?
You prevent a backflow preventer from freezing by draining it, isolating it, and adding heat and insulation: now shut the supply, open bleeders, and confirm it’s drained, this is where valve coverings and heat tape come in, wrap exposed piping and use self-regulating heat cable, the key is drainage modification like adding bleeders or slope for gravity drain, and if needed remove the device for storage, then inspect for damage before restoring service.
What Temperature Does a Backflow Preventer Freeze At?
A backflow preventer will start to freeze at the freeze point, around 32°F (0°C), and it can sustain damage even in the low 30s when trapped water hides in cavities, so now you should expect pipe expansion and valve seizure as temperatures dip. This is where you act: drain or insulate exposed parts, use heat tape or local warming, and check again after cold nights, because proactive steps stop cracks and stuck valves.
How to Winterize Backflow Preventers in Winter?
You winterize backflow preventers by shutting the supply, opening bleeders and using drain plugs and pipe caps to clear water, then insulating exposed piping with foam and securing an ASSE‑1060 enclosure if you can; this is where heat tape or a self‑regulating cable helps inside the enclosure, keep power on all winter, and if you can’t heat it, remove or fully drain RPZ/DCA assemblies, then test and inspect when thawed.
Do I Need to Insulate My Backflow Preventer?
Yes, you should insulate it: now, insulating reduces freeze risk, but the key is full coverage and valve access so you can still service and bleed the device. Use pipe wrap or an ASSE 1060 heated enclosure for high-hazard RPZs, and keep an inspection schedule so you catch displaced wrap or ice. This is where draining or opening bleeders complements insulation, giving you reliable, year-round protection.