Mulch volcanoes are piles that bury the tree’s root flare, and they’ll slowly smother feeder roots, hold moisture against bark, and invite rot, pests, and shallow adventitious roots that can girdle later. Pull the mulch back now to expose the flare, keep a flat 1–3 inch layer 1–2 inches from the trunk, and don’t pile new mulch on top. Easy fix if caught early, harder if roots are already deformed—keep going for how to prevent and correct it.
Some Key Points
- Piling mulch over the root flare buries the trunk base and simulates planting the tree too deep.
- Thick mulch suffocates feeder roots by reducing oxygen and causing root stress and decline.
- Mulch held against bark traps moisture, promoting bark rot, pests, and fungal disease.
- Trees grow shallow adventitious roots in mulch that can become girdling roots and weaken stability.
- Fix by pulling mulch away to expose the root flare, keeping 1–3 inches of flat mulch and never mounding at the trunk.
What Is a Mulch Volcano and Why It’s Wrong?
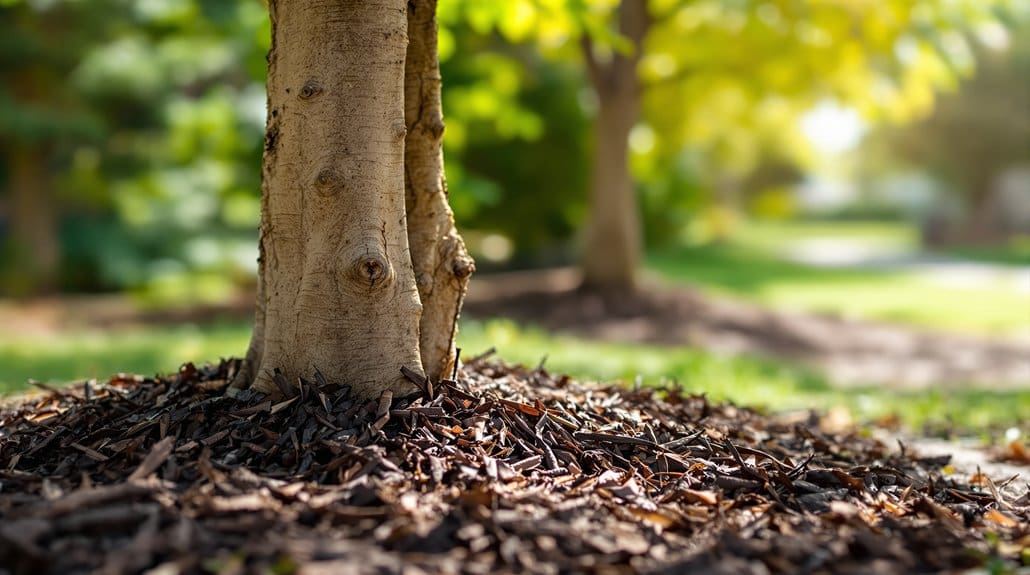
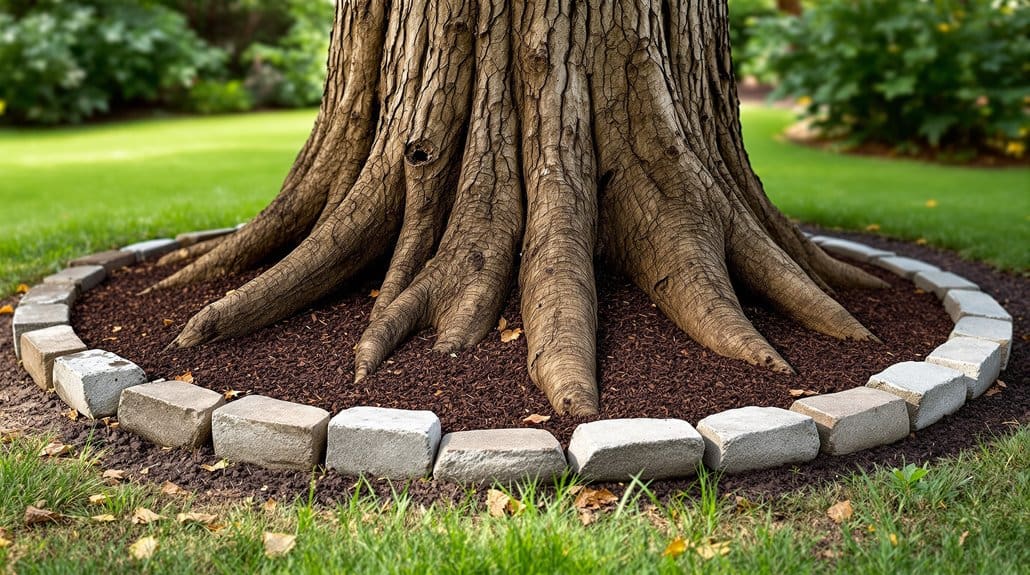
What Is a Mulch Volcano and Why It’s Wrong? You’ve probably heaped mulch up against a trunk, thinking it looked neat and protected, and hey, we’ve all been there. A mulch volcano is that conical pile that buries the root flare, sometimes several inches to over a foot high, and it simulates planting too deep. Now, we may contemplate this: when you cover the root collar and upper roots, you cut off oxygen, encourage adventitious roots in the mulch, and set the stage for stem girdling roots later. Something to reckon with, too, is that deep, mounded mulch holds moisture against bark, invites decay and pests. So do this: pull mulch back, expose the root flare, keep it 1–3 inches deep, not heaped. Consider adding plastic edging to keep mulch contained and prevent it from piling up against trunks.
How Mulch Volcanoes Damage Roots and the Trunk Collar
How mulch volcanoes hurt roots and the trunk collar becomes clear when you pull that mound back and look: by burying the root flare and smothering the upper roots, you’re basically planting the tree too deep, and that starts a chain reaction you’ll wish you hadn’t helped along. You’ve seen mulch piled high against the trunk, and now you know it reduces oxygen, encourages roots to grow up into the mulch, and creates elevated secondary roots that can become stem‑girdling roots, which choke the tree over time. Now, we might deem this: loosen and remove excess mulch to reveal the root flare, don’t scrape bark, and avoid reapplying thick layers. Something to weigh: early correction helps, but some damage can’t be fully reversed. Proper mulch depth and material choice are essential for tree health, so aim for a 2–3 inch layer using organic mulch.
Common Signs a Tree Is Suffering From Excess Mulch
When you pull back that volcano of mulch and the tree’s base looks like it’s hiding, you’ve got a pretty clear sign something’s wrong, and it’s one you can fix if you act soon. Step 1 — look for a buried root flare, if the trunk’s flared base is covered by more than an inch or two, mulch piled too high is the culprit, and you’ll want to remove it. Step 2 — check for black mushy bark and a damp smell, that’s bark rot from prolonged contact. Step 3 — note twig dieback, small leaves, or roots growing into the mulch, signs of stress. Now, we may consider pests too; vole chew marks or collar lesions mean thicker mulch is inviting trouble. Also consider using proper equipment covers to protect nearby lawn tools and keep mulch management tidy.
Short- and Long-Term Consequences for Tree Health
If you’ve been piling mulch up against the trunk because it looked neat or you thought it would help, you’re not alone — but it’s time to stop. Short-term, that mulch volcano buries the root flare, smothers feeder roots by cutting oxygen, and keeps the lower trunk wet, which invites bark decay and pests, so you’ll see slowed growth and branch dieback. Now, we may ponder this: over months, adventitious roots try to save the tree by growing into the mulch, but they make shallow, circling systems that can girdle the stem. Something to ponder, even after you change practices, those deformities are often permanent, leaving trees stressed, disease-prone, and sometimes doomed to removal. Don’t beat yourself up—fixing habits helps future trees. Proper storage and use of yard supplies like shed organizers can make it easier to maintain good mulching practices.
How to Correct an Existing Mulch Volcano Safely
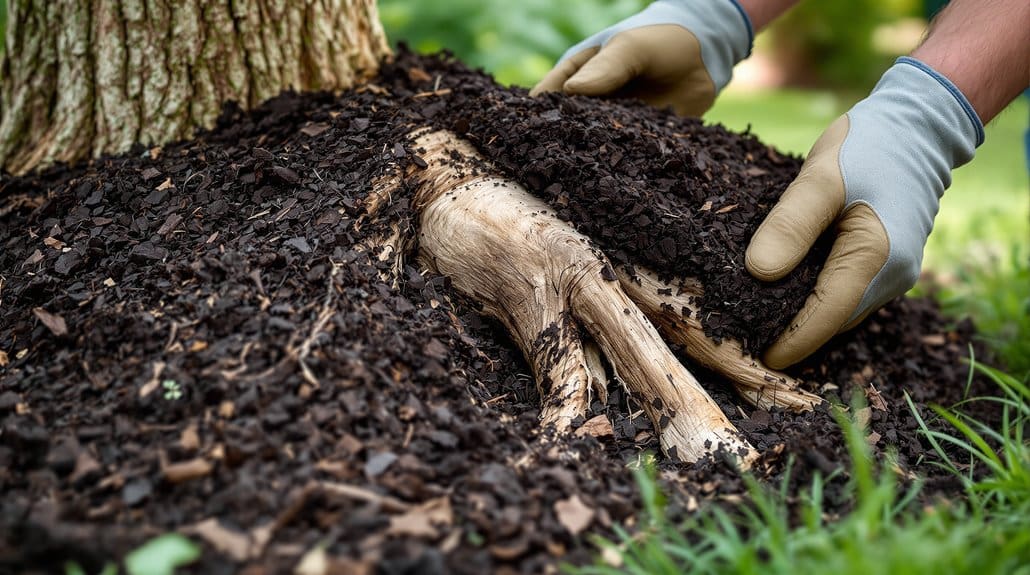
You can fix a mulch volcano without panicking, but you’ll need to go slow and be deliberate—this isn’t time for big, hurried shovels and more harm. Step 1: gently rake or shovel back when mulch is piled high, uncover the root flare and first roots, exposing mineral soil and leaving mulch 1–3 inches deep in a flat ring, pulled 1–2 inches from the trunk. Step 2: if packed for years, carefully wash or use a trowel to loosen compacted mulch and reveal any girdling roots. Something to keep in mind: don’t cut girdling roots alone; call an ISA-certified arborist. Finally, replace with a thin layer of shredded bark, monitor annually, and don’t recreate the mound. For comfortable cleanup and to protect your knees while tending beds, consider using garden kneelers when fixing mulch.
Proper Mulching: Depth, Distance, and Coverage Rules
Now that you’ve fixed any mulch volcanoes, here’s what to do next to keep roots healthy: keep mulch shallow, about 1–3 inches (2–3 inches is best for most trees and shrubs), and never pile it against the trunk where moisture and pests love to hang out. Pull the mulch back 1–2 inches from the trunk or root flare so the bark stays dry and exposed, and spread a flat ring at least 3–6 feet wide for small plants or out to the drip line for larger trees. Something worth thinking about: refresh with a light top-dressing once a year, use chunky wood chips that resist compaction, and resist the urge to keep adding layers—yes, I’ve been guilty of that too. For long-term lawn and soil health, consider testing soil pH and using lime products to adjust acidity as needed for healthy turf.
Correct Mulch Depth
Frequently, gardeners mean well but pile mulch too high, and that well-intended mound can do real harm—so let’s fix that now by keeping the layer flat, thin, and pulled away from the trunk. Start by aiming for 1–3 inches of mulch, 2–3 inches being ideal for most trees and shrubs; too deep and you suffocate roots, too shallow and you lose moisture. Now, pull mulch back 1–2 inches so the root flare stays visible, and keep material off the tree trunk to prevent rot and adventitious roots. Something to bear in mind: spread mulch wide, at least a 3–6 foot circle for small plants, more for larger trees, and replenish annually with a light top-dressing, checking depth before you add more. Consider using the right tools like a wheelbarrow and sturdy rake to make spreading mulch easier and more even, which is especially helpful for homeowners maintaining lawns.
Trunk Clearance Distance
When mulch piles up against the trunk, it looks tidy but it’s actually doing real damage, so pull that ring back and give the root flare room to breathe. Trunk Clearance Distance: first, don’t pile mulch around the trunk; pull it back until the root flare shows, leaving a 1–2 inch clear gap so bark stays dry and rot can’t creep in. Next, spread mulch around the root zone flat and even, 1–3 inches deep, extending at least 3–6 feet for small trees and to the drip line for larger ones. Now, we may take into account this: avoid berms or volcano shapes. Something to bear in mind: check depth yearly, top-dress lightly, and remove built-up layers that creep up the trunk.
Alternatives to Mulch Rings and Landscape Design Tips
If you’ve been guilty of the classic mulch volcano — I sure have — here’s what to do now: pull that mulch back and switch to a thin, flat layer that won’t suffocate the trunk or trick roots into growing upward. Step 1 — do this, not that: replace thick mulch rings with 1–3 inches of shredded bark spread flat, keeping the root flare exposed so the trunk breathes. Step 2 — do this, not that: extend mulch out 3–6 feet or to the drip line for big trees, or plant low groundcovers like Vinca or native perennials to hold moisture without burying stems. Something worth pondering: use compost topdressing or leaf mulch in beds, avoid rocks or tires, and shape gentle berms to catch water.
Preventing Problems: Maintenance Schedule and Seasonal Checks
Now, you should set a simple seasonal check routine so small mulch problems don’t turn into big ones, and yes, we’ve all been guilty of piling it on “just once more.” Start by inspecting trees and shrubs in spring and late fall, and after heavy storms or work, making sure mulch stays 1–3 inches deep and the root flare is visible; if it’s piled up, rake it back to leave a 1–2 inch clear space at the trunk and spread the rest into a flat 2–3 inch ring. Something to keep in mind: mid-summer, break up any crusted, water-repellent mulch and add only a light 0.5–1 inch top-dressing if needed, and every fall remove debris and re-measure before adding so you never exceed 3 inches — consult an arborist if you spot soggy bark, girdling roots, or chewing.
Seasonal Mulch Inspections
Regularly check your trees and shrubs each spring after the thaw and again in the fall before the ground freezes, because that twice-yearly habit will catch most problems before they get serious; you‘ll avoid the slow, sneaky buildup that turns a tidy bed into a mulch volcano. Step 1, inspect the base: make sure mulch stays 1–3 inches, don’t let a mulch mound touch the trunk, and keep the root flare exposed 1–2 inches. Now, we may contemplate summer checks for soggy soil, mushy bark, or fungi, and pull back mulch if the ground stays wet more than a week. Something to ponder when pruning: scrape mulch back 2–3 feet to spot girdling roots, remove excess, and call a pro if you see trouble.
Mulch Depth Adjustments
You’ve already learned to look for the telltale cone of a mulch volcano during spring and fall checks, so here’s what to do next: focus on getting the mulch depth right and keeping it pulled away from the trunk. Step 1 — check mulch depth annually, especially in spring or fall, and remove excess so the root zone is 1–3 inches deep, not the mulch piled 6–17+ inches we sometimes inherit. Step 2 — pull mulch 1–2 inches from the trunk or root flare each season to prevent moisture against bark. Now, replenish sparingly: add thin 1–2 inch top-dressings only when under 1 inch, don’t just pile new mulch on. Something to bear in mind: after storms, rake flat outward, watch for adventitious roots, consult an arborist if needed.
Some Questions Answered
Why Do Mulch Volcanoes Kill Trees?
They kill trees because deep roots form in the mulch, leaving the true root flare unanchored, and moisture trapped against the trunk invites stem rot and fungal growth. Now, we may regard this: pull mulch away from the trunk, keep 1–3 inches, and let the flare breathe. Something to ponder: you and I probably overdid it before, but fixing it now saves trees; do this, not that—thin the pile, don’t mound.
Is It Bad to Pile Mulch Around Trees?
Yes — piling mulch around trees can harm them. You’ll cause soil compaction, root suffocation, and insect attraction if you mound too high. Now, we may contemplate this: pull mulch back to a flat 1–3 inch layer, an inch from the trunk, and extend to the drip line. Something to ponder: you probably meant well; undoing it’s simple, and your tree will thank you (and you’ll sleep better).
What Is the 3-3-3 Rule for Mulch?
Like a knight with a pocket watch, you’ll follow the 3-3-3 rule: keep mulch depth to 3 inches, leave a 3-inch gap at the trunk, and extend the ring 3 feet (or to the dripline) for best root health and moisture retention. Now, we may contemplate this: do this, not that—don’t pile mulch high, don’t touch the bark. Something to ponder: you’ll avoid rot and girdling.
Why Is Mulch Killing My Plants?
Your mulch’s killing plants because it’s suffocating roots, causing soil compaction, encouraging root girdling, and feeding fungal growth that rots bark. Here’s what to do now: pull mulch back to expose the root flare, thin it to 1–3 inches, and keep it off the trunk. Now, we may reflect on this — check for girdling roots and loosen compacted soil. Something to ponder: don’t top‑dress without measuring, lesson learned.