You’ll want to start by prioritizing safety first—light paths and steps with low-glare, warm 2700–3000K LEDs, then add uplights for trees and soft downlighting from porches; don’t overdo brightness, aim for layers. Walk the yard at dusk, mark winter-interest plants, and group circuits on timers or motion sensors so you’re not burning cash. Something worth weighing: use cold-rated drivers and waterproof splices to avoid flaky winter failures. Keep going and you’ll pick up practical layout and fixture tips next.
Some Key Takeaways
- Prioritize safety first: install pathway, step, and entry lighting with low-glare fixtures every 6–8 feet.
- Use warm 2700–3000K LEDs with CRI 80+ to flatter snow, bark, and stone while reducing glare.
- Layer lighting: secure circulation and downlighting before adding uplights and accent washes for focal plants.
- Place uplights 1–3 feet from trunks, aim 20°–45° for winter silhouettes, and use narrow beams for tall trees.
- Choose cold-tolerant, IP65+ LED fixtures and size transformers/wiring to avoid voltage drop and ensure reliable winter operation.
Plan Your Winter Lighting Goals: Safety, Beauty, and Budget
Plan your winter lighting goals with safety first, then beauty and budget, because if you skip the basics you’ll end up with pretty lights that don’t keep people safe — and I’ve done that myself. Step 1: prioritize pathway lighting with low-voltage LED fixtures every 6–8 feet and add step/edge lights on stairs, that simple move cuts slip risk. Step 2: layer in three to five accent uplighting for trees or focal points, use warm white (2700K–3000K) to keep things cozy against cold nights. Now, we may contemplate reliability and cost: choose outdoor-rated fixtures, energy-efficient bulbs, safety timers, motion sensors, or smart lighting systems. Something to ponder: basic installs cost less; layered smart setups cost more, plan accordingly. Don’t forget appropriate personal protective equipment like face shields when installing fixtures to protect your eyes from debris and glare.
Map the Property: Identify Paths, Entrances, and Winter-Interest Features
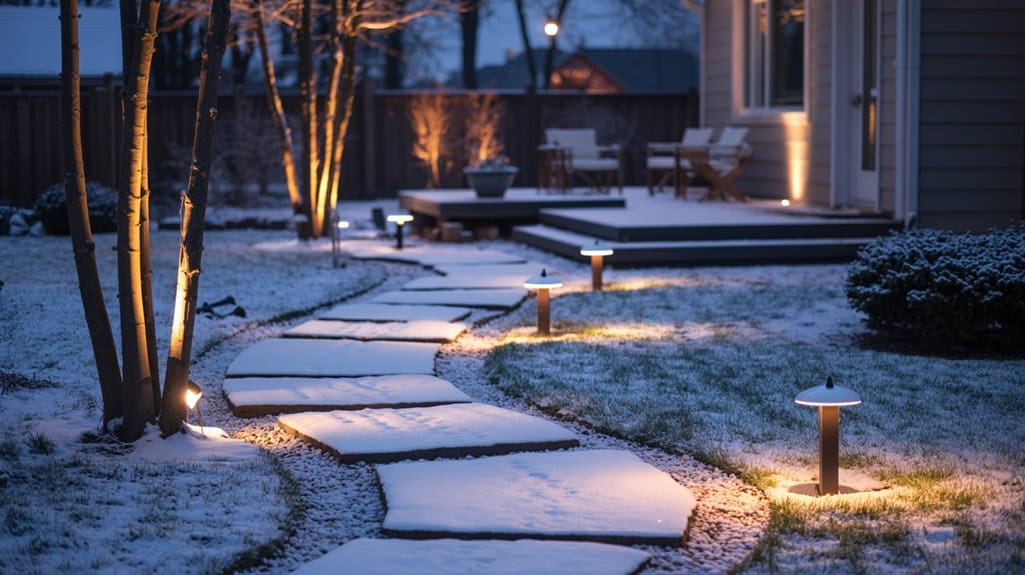
Start by walking the property at dusk and marking every primary and secondary route—driveway, main walkway, side paths—so you can place pathway lights every 6–10 feet for even illumination and fewer stubbed toes (trust me, I’ve learned the hard way). Next, note all entrances and steps, plus winter-interest plants like evergreens, specimen trees, ornamental grasses and walls, recording their height and distance from the house so you can plan downlights, step lights, and uplights placed about 8–12 feet from trunks for a smooth wash and dramatic shadow. Now, we may consider sightlines and power access too, because you want safe, attractive lighting that doesn’t blind the neighbors or leave you short on cable—do this, not that. Also consider how equipment choices like a durable hose reel can keep cables and hoses organized and untangled to maintain a neat, safe lighting installation.
Walkways And Entryways
When you walk the property at dusk, take it slow and think like someone who’s had one too many trips over a hidden curb—measure the main and secondary routes, note steps and grade changes, and mark turning points so you can space pathway lights correctly; typical spacing is about 6–10 feet for low-level bollards and 8–12 feet for stake lights. Start by mapping entry points and plan brighter 300–500 lumen, warm glow downlights 3–6 feet from doors so guests feel welcome and you stop fumbling. Now, mark hazards and add low-glare step lights to fight icy conditions, non-slip where possible. Something to keep in mind: place accent lighting at 15°–30° to lift features without blinding walkers, group circuits with timers or smart lighting, and size transformers for extras. Also consider keeping common maintenance tools and replacement parts handy to simplify upkeep and repairs, like spare bulbs and basic lawn care gear.
Highlight Winter-Interest Plants
As you walk the yard in daylight and then again at dusk, look for the plants that hold the scene through winter—evergreens that give shape, bare-branch trees that throw graphic silhouettes, ornamental grasses that catch frost, and shrubs with berries—and mark those on your map so you know what to light first. Now, map sight lines from windows and seating, rank focal points, and note distances to power so fixture placement feels intentional, not random. Do this: choose uplighting for trunks and evergreens, narrow beam width for tall trees, wider beams to wash shrubs and ornamental grasses. Something to bear in mind: space pathway lights 6–10 feet, angle fixtures to avoid glare, aim for layered accents, not light pollution. Consider the placement relative to irrigation and sprinkler valves to avoid conflicts with lawn-care equipment and to ensure easy access for maintenance.
Identify Safety And Access
Before you sketch a single light, walk the yard at dusk and trace the real routes people use, because you’ll inevitably overthink an elegant layout if you don’t first know where folks actually step; I’ve learned the hard way that a pretty-lit bed means nothing if guests stub their toes on an unlit step. Step 1 — Map circulation: mark driveway, front walkway, back patio, and steps, note surface changes and hidden curbs, and plan pathway lights every 6–10 feet and step lights at each riser for winter safety. Now, we may contemplate entrances: mark doors and garage, aim motion-activated or downlighting to cover 180° and 10–15 feet. Something to ponder: create zones for circulation, focal features, and entertaining, assign timers or smart controls. Also consider placing lighted seating or kneeling areas near work spots so homeowners can tend plants comfortably with garden kneelers and proper illumination.
Choose the Right Light Types and Techniques (Uplighting, Downlighting, Accent)
Start by picking the right light types and techniques for the job, and don’t worry if you’ve overlit a patio once or twice — we’ve all been there. Step 1: lay path lighting or downlighting first to keep everyone safe, you’ll thank yourself. Step 2: add uplighting at the base of evergreens or bare branches, angle 20°–45° to create depth and dramatic winter silhouettes. Step 3: place small accent lighting on sculptures, stone walls, or specimen plants, use focused low-watt LEDs so focal points pop without overwhelming the scene. Now, we may contemplate this: choose warm color and outdoor-rated fixtures, use LED lights for reliability, and layer techniques so you get balance, not glare. Something to ponder: start simple, tweak, repeat. Consider organizing and protecting your fixtures and gear with smart storage to extend their life and streamline maintenance.
Pick Fixture Specs for Cold Weather: LEDs, CRI, and 2700–3000K Color Temperature
Now you’ll pick fixture specs that actually survive winter and make your landscape look great, not washed-out or sad. Choose cold-tolerant outdoor LEDs with cold-start drivers and surge protection, favor warm 2700–3000K color to contrast icy tones, and insist on CRI 80+ (90 if you care about true color); don’t skimp for cheap chips that dim in the cold. Something worth weighing: use low-voltage or properly rated line-voltage housings with sealed gaskets and durable metals so you’re not fixing frost-damaged lights next spring. Consider also protecting equipment with durable covers designed for lawn and garden tools to extend the life of your outdoor gear.
Cold-Tolerant LED Types
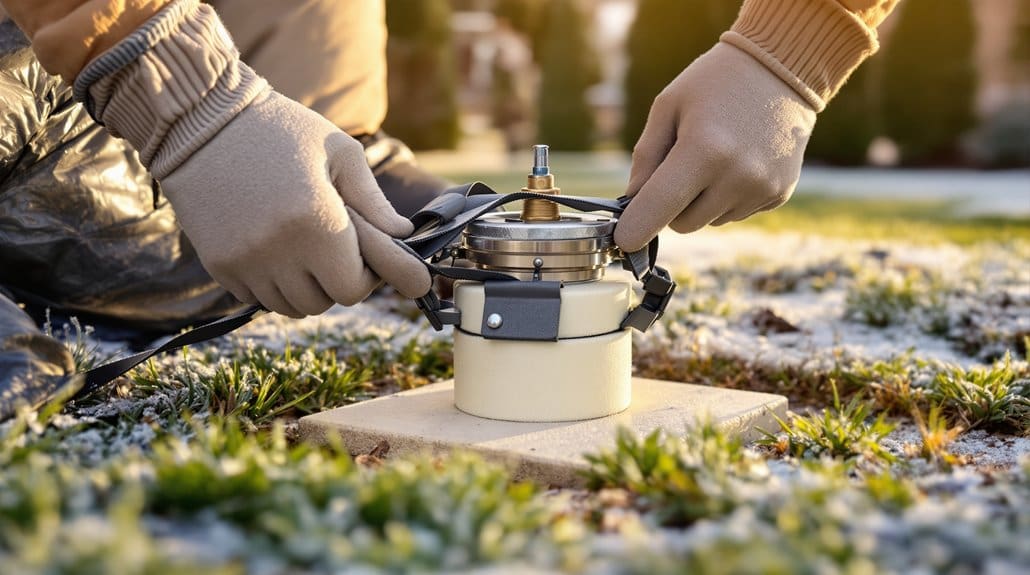
You’ll usually want to specify LEDs that don’t sulk in the cold, because outdoor lighting that refuses to start on a frosty morning will make you look bad and cost you time fixing it. Step 1 — pick LED fixtures rated for cold-start performance to at least −20°C, many drivers even specify −30°C; trust me, I learned that the hard way after one freeze. Now, we may weigh color: choose 2700K–3000K for warm winter tones, and insist on a high Clique Color Rendering Index (CRI) — 80+ generally, 90+ for close accents. Something to ponder: get IP65 weatherproofing, low-voltage (12V) options with constant-current drivers, and temperature-compensating power supplies to keep output steady in icy conditions.
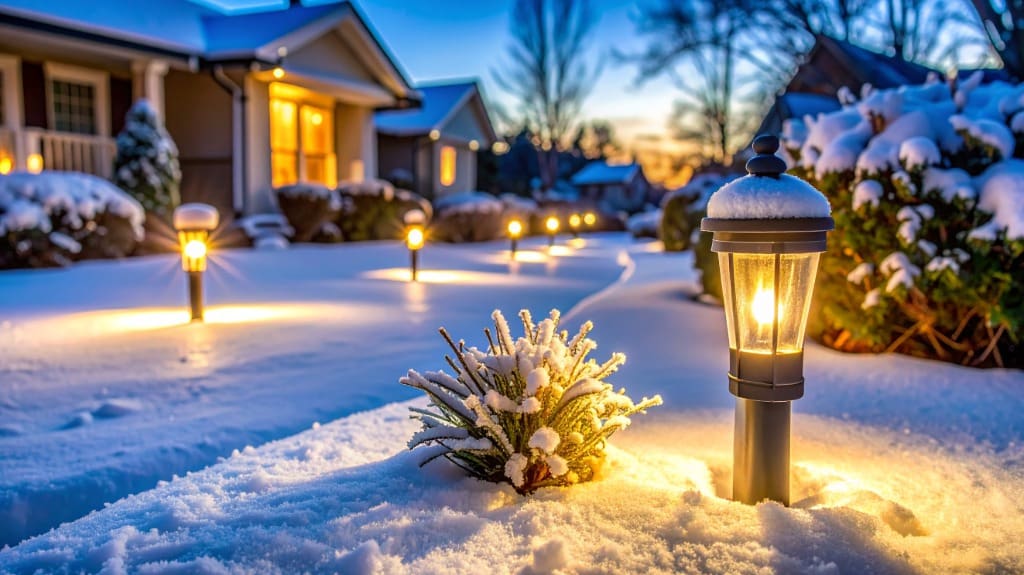
Warm Color Temperature
Comfort matters in lighting as much as in clothing, and for winter landscapes that means choosing a warm 2700K–3000K LED that gives you an amber-white glow which flatters snow, bark, and masonry without feeling orange or washed-out. Step 1, pick warm lights, Color and warmth matter; aim for 2700K–3000K LED fixtures labeled Cozy Outdoor to get that inviting tone. Now, we may contemplate durability: choose outdoor-rated LEDs that work to −20°C, with sealed housings and thermostable drivers so your lights don’t die on winter nights. Something to ponder: aim lumens and beam angles to match targets, don’t overlight paths or underwhelm trees. Do this, not that—select CRI 80+ for natural look; higher for accents. You’ll thank yourself.
High CRI Choices
If you want winter plantings and stonework to look rich and real, pick LEDs with a high CRI and a warm 2700K–3000K color temperature, because cheap, cool lights will wash everything out and make your yard feel sterile. Start by choosing LED fixtures rated CRI 90+ so bark, evergreens, and paving read naturally, not like a museum display. Now, we may take into account cold: pick outdoor LEDs specified for low-temperature operation, down to at least -20°C, and insist on IP65+ weather rating for snow and damp. For drama, use uplighting with a narrow beam (10°–25°) on trunks; for paths, wider washes work. Something to ponder: buy dimmable low-voltage (12V) gear, avoid non-dimmable bargain fixtures, and aim for long life.
Decide Power Options: Low-Voltage, Solar, or Line-Voltage Pros and Cons
When you’re choosing how to power your landscape lights, think of it like picking a vehicle for a trip: some routes need an efficient hybrid, some need raw power, and some are best done on a bike — each has trade-offs you’ll want to know before digging. Step 1: Choose low-voltage if you want safer DIY installs, long-life LED fixtures, and a transformer that runs 40–60 small lights; don’t skimp on size or wire, or you’ll face voltage drop. Now, we may contemplate line-voltage for bright, long-run tasks, but hire a pro, expect heavier wiring, and more energy use. Something to ponder: solar lights are easy, but winter cuts runtime to 2–6 hours unless battery-backed and cold-tolerant, so combine systems.
Create a Layered Lighting Plan: Placement, Angles, and Zoning for Depth
Now that you’ve picked your power strategy, it’s time to plan how the light will actually work around the yard, and trust me, good placement beats fancy fixtures every time. Step 1: create three zones — pathways/steps for safety, focal plantings or architecture for accents, and seating for ambient use — this keeps controls sensible, you’ll thank me. Step 2: place uplighting 1–3 feet from trunks, aim 20–45° to lift branches without harsh silhouettes; don’t shove lights up against bark, been there, looked odd. Now, we may contemplate downlighting from high branches or roof edges at 30–60°, it makes gentle, natural pools. Pathway lights belong 6–10 feet apart, 12–18 inches high. Something to contemplate: zone circuits with timers so you can dim and schedule each layer.
Install for Safety and Performance: Wiring, Waterproofing, and Anchoring Tips
Because a gorgeous lighting plan can fall apart with sloppy wiring, you’ll want to tackle installation with the same care you used picking bulbs and angles, and yes, that means doing a few boring but essential things right. Step 1 — run direct-burial low-voltage cable sized to distance, 14 AWG for short runs, 12 AWG for longer, keep runs under 100–150 feet to avoid voltage drop. Step 2 — protect every splice with waterproof connectors, place them in buried junction boxes above frost, don’t skip that. Step 3 — use conduit for line-voltage runs and where traffic crosses, seal and label circuits at the breaker and transformer housing. Something to bear in mind: mount fixtures on corrosion-resistant anchors, set tops just below grade.
Add Controls and Security: Timers, Motion Sensors, and Smart Systems
If you want your yard to look good and actually help keep you safe, add controls and sensors that do the thinking for you, not the other way around — trust me, I’ve left timers set wrong more than once. Step 1: choose dusk-to-dawn or astronomical timers so lights come on at sunset and save energy, don’t guess. Step 2: add motion sensors on drives and doors, adjust sensitivity and runtime so they light only when needed, bright but not blinding. Now, we may contemplate smart lighting controllers that work with low-voltage LED systems, let you schedule, dim, and group zones from your phone. Something to contemplate: pair photocells and weatherproof (IP65+) sensors, use battery-backed transformers, and skip manual switches when you can.
Maintain and Winterize Your System: Seasonal Checks, Snow Care, and Troubleshooting
You’ve set up smart timers and motion sensors, but the job isn’t over once the lights are installed; winter will test everything, and you’ll want to be ready. Step 1 — Inspect and tighten waterproof wire connections and junctions, check transformers and timers before the first freeze, and replace any weak units; do this now, not after a blizzard. Step 2 — Replace cracked fixture seals and reseal exposed splices, and raise fixture heads for snowplow risk to avoid crushed lights. Now, snow care: clear snow off fixtures and wipe lenses with a damp cloth to keep beams bright. Something to ponder — if lights flicker, check voltage at the transformer and review LED driver temperature ratings, then swap failing drivers.
Some Questions Answered
Can Landscape Lighting Damage Delicate Tree Roots or Trunks?
Yes — poorly done lighting can hurt roots or trunks, but you can fix that. Start with shallow trenching and root safe wiring, not deep gouges that cause soil compaction; use low heat fixtures and contemplate fixture mulching to protect nearby soil and roots. Now, we may ponder this: run wire pathways outside the main root zone, aim root zone lighting gently, and schedule seasonal pruning. Something to ponder: do this, not that.
How Do I Prevent Ice Buildup on Fixtures and Lenses?
You prevent ice by adding fixture heating or hydrophobic coating, and by fitting lens covers, snow shields, and drip edges to force water away. Now, we may contemplate angled mounts so ice sloughs off, and use low voltage fixtures to reduce heat risk. Something to ponder: regular maintenance beats panic, check seals and clean lenses—learned that the hard way. Do this, not that: don’t let debris trap meltwater.
Can Colored Lights or RGB Be Used Tastefully in Winter?
Yes — you can use colored lights tastefully in winter. First, pick cool hues for snow and warm accents for paths, use subtle shifts, and choose seasonal palettes that feel familiar, not flashy. Now, we may contemplate fixture concealment and dimming strategies to keep things gentle, landscape accents that guide, and safety considerations like glare and trip hazards. Something to consider: I’ve overdone colors before, so start small and tweak.
What Permits Are Needed for Outdoor Lighting Installations?
You’ll usually need electrical permits for wiring, check land use and zoning setbacks, and get utility approvals for connections; condo or homeowner association sign‑offs can block projects, and historic district rules often add reviews. Now, we may contemplate special inspections or low voltage exemptions for low‑power systems. Something to ponder: I’ve learned to ask early, don’t assume approvals, and keep neighbors in the loop to avoid surprises.
How Do I Integrate Lighting With Holiday Decorations?
You blend holiday lighting into existing fixtures, so it feels intentional: start with a festive pathway, add porch spotlighting for focal pieces, and use garland uplighting and accent wreaths to layer warmth. Now, we may contemplate tree wraplighting for rhythm, use cold safe plugs and timer coordination, and pick matte fixturecolors to avoid glare. Something to contemplate: do this, not that—hide excess cords, don’t over-brighten, and ask for help when needed.