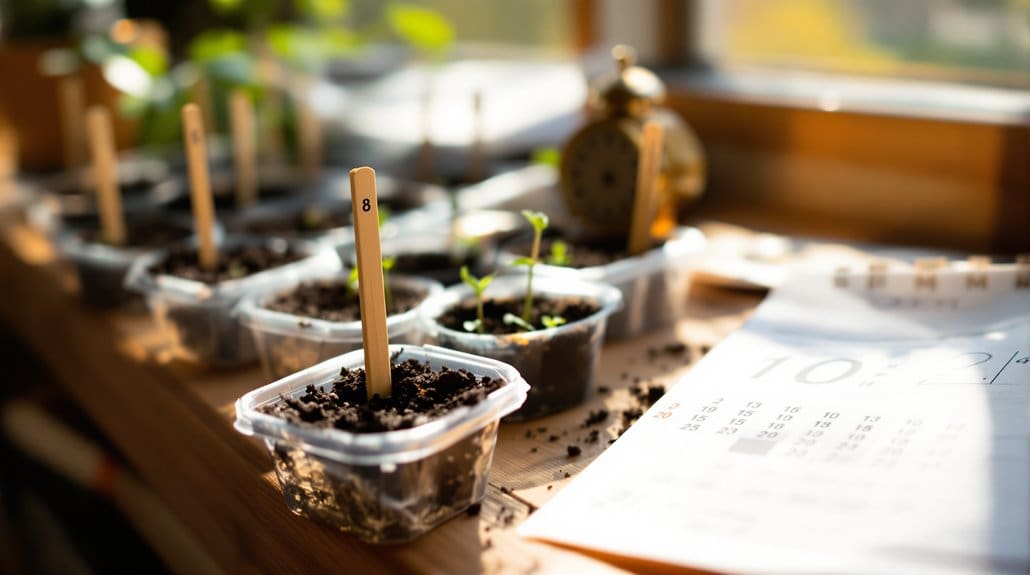
Start by finding your average last frost date and count back—give long‑season crops extra weeks, and favor the shorter sowing window so seedlings don’t go leggy. Now set up trays with a light, airy seed mix, place seeds at about 3–4× their diameter (surface‑sow tiny seeds), use a heat mat for peppers, provide LED light 4–6" above for 12–14 hours, remove domes at emergence, harden off 7–10 days, and transplant when roots fill cells; keep going for more tips.
Some Key Points
- Start seeds 4–8 weeks before last frost, counting back from packet timing and favoring the shorter window to avoid legginess.
- Use a sterile, well‑draining seed‑starting mix in 72‑cell or 1020 trays and pre‑moisten to a wrung‑out‑sponge consistency.
- Provide 12–14 hours under full‑spectrum LED lights 4–6 inches above seedlings, with a heat mat for warm germinators.
- Sow seeds at 3–4× their diameter (surface‑sow tiny seeds) and keep medium evenly moist using bottom‑watering.
- Harden off seedlings 7–10 days before transplanting by gradually increasing outdoor sun, wind, and time each day.
When to Start Seeds: Count Back From Your Last Frost Date
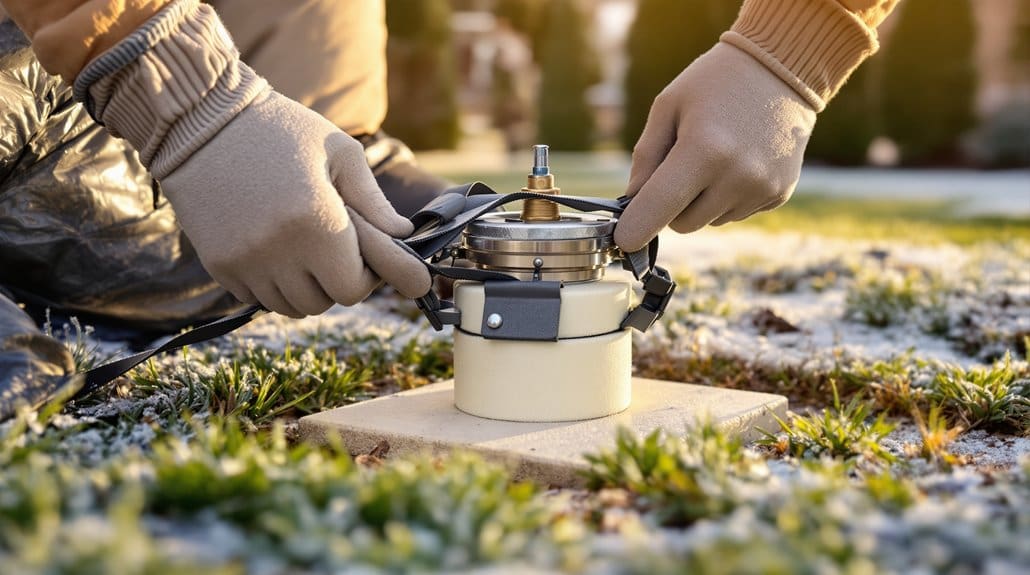
If you want seedlings that aren’t stretched and sad, start by finding your average last frost date and working backward from there. Step 1 — check that last frost date with your extension or an almanac, then grab the seed packet and count back the packet’s recommended window to know when to start seeds indoors. Now, favor the shorter end of the range for most crops, don’t overdo it and end up with leggy plants. Something to ponder: for long‑season crops count back to the transplant date 8–12+ weeks so they’ll mature. Also check soil temperature before you plant out; warm crops need about 60–65°F. Stagger sowings in small batches, and keep a spare tray for failures. For a resilient home lawn you can also include overseeding with ryegrass varieties to fill bare spots and support healthy turf.
Which Vegetables and Flowers to Start Indoors First
Starting seeds indoors wisely saves you time and disappointment later, so pick the easy winners first and leave the drama queens for when you’ve got practice. Step 1: do tomatoes and peppers early, about 4–6 weeks and 6–8 weeks before your average last frost, respectively, so they develop true leaves and are ready for transplanting outside after hardening. Step 2: sow brassicas 6–8 weeks ahead to give heads a good start in cool soil. Now, add marigolds for early color and pest help, start them 6–8 weeks before final frost. Something to bear in mind: use a heat mat for peppers and eggplants to germinate reliably, but don’t bother starting long-season melons unless you can give serious light and time. For best results with any of these plants, pay attention to soil quality when potting and transplanting.
Choose Containers, Soil Mix, Lights, and Heat for a Small Indoor Setup
Now you’ll set up the basics that actually make seeds behave: pick sturdy containers, a fine seed mix, and the right light and heat, then treat them like tiny, needy athletes rather than magical mystery plants. Step 1 — containers: use rigid 1020-style seed trays or 2–3-inch biodegradable pots, or 72-cell plug trays if you’re raising dozens, to avoid root shock later. Step 2 — soil: fill with pre-moistened seed-starting mix, coir or peat with perlite so it’s like a wrung-out sponge. Step 3 — light and heat: hang full-spectrum grow lights 4–6 inches above, 12–14 hours on a timer, and add a thermostat-controlled heat mat for warm germinators. Something to keep in mind: bottom watering works, remove humidity domes at emergence, and harden off before planting out. For eco-conscious homeowners, consider organic fertilizer options and environmentally friendly tools for transplanting and ongoing care, such as organic fertilizers that support healthy lawns and gardens.
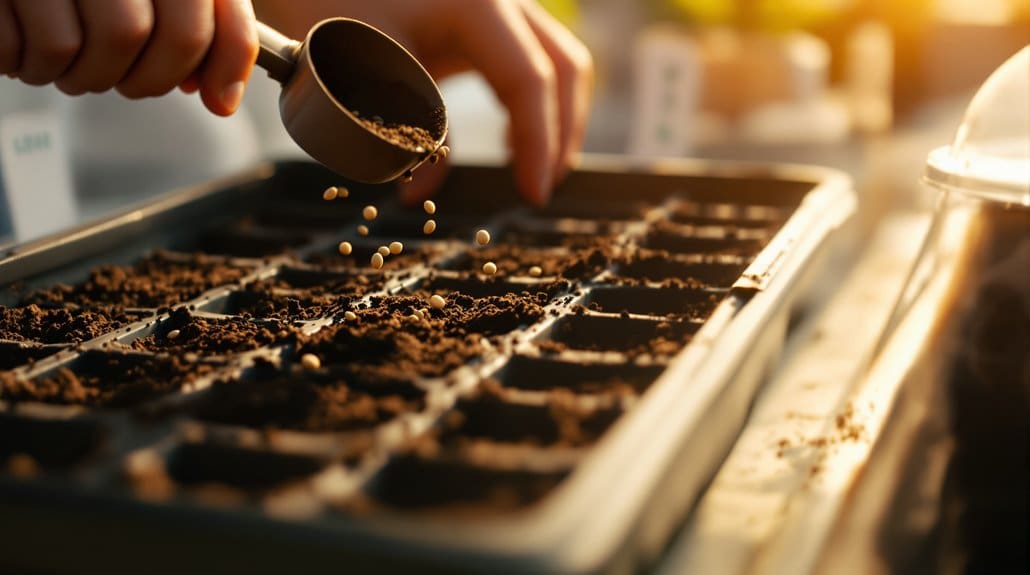
How to Calculate Seed Depth and Sowing Timing (The 3–4× Rule)
You’ve got your trays, the right mix, lights and heat set up, and that’s when the next question hits: how deep do you bury each tiny seed and when should you sow it?
Step 1 — Measure and apply the 3–4× rule: use seed size to set seed depth, planting round seeds about 3–4 times their diameter (a 2 mm seed → 6–8 mm). Now, for oblong seeds, use 1–3× their length so the sprout reaches light.
Step 2 — Check seed packets first, defaulting to the shallower end. Something to keep in mind: surface-sowing tiny lettuce or basil means leave them uncovered or dust with vermiculite.
Do this, not that: err shallower, use a ruler or pencil eraser for accuracy, keep medium moist, and don’t over-press—learned that the hard way. Homeowners who care for their yards can also benefit from proper tools and seed choices to get consistent results, like selecting quality lawn care equipment that matches the job.
Step-by-Step Sowing: Filling Trays, Placing Seeds, and Covering
Get your hands a little messy—moisten the mix first so it’s evenly damp but not dripping, then fill and lightly pack your trays or blocks to the brim to avoid air pockets that dry out tiny seeds; trust me, I learned the hard way when I underfilled trays and lost a whole batch to drying. Step 1, fill seed trays and lightly tamp, using 8–12 inch mixing trays for blocks or standard cells for plugs. Step 2, poke holes about 3–4× seed diameter for depth, surface-sow tiny basil or thyme, and drop larger seeds one per cell. Step 3, cover lightly with moisten mix or vermiculite, do careful labeling, and use a humidity dome until most seeds emerge. Something to keep in mind: don’t overwater. For healthy, low-maintenance lawn options consider adding clover seed to areas where you plan transplanting seedlings to reduce fertilizer needs.
Speed Germination Tips: Heat Mats, Light, and Soil Temperature Targets
If you want faster, more reliable sprouting, focus on keeping the soil at the right temperature and giving seeds consistent warmth—I've learned the hard way that air temperature lies and cold mix kills patience. Step 1 — Heat where it counts: use a seedling heat mat, set to species targets, and measure soil temperature with a probe, not the room thermometer, so peppers and eggplant sit around 75–85°F and tomatoes in their 61–86°F range. Now sow seeds, cover until most germinate, then remove domes. Step 2 — Light and posture: place an LED grow light 4–6 inches above the canopy for 12–14 hours to stop legginess. Something to contemplate: bottom-watering warmed trays keeps moisture steady. Later, harden off gradually. Many home gardeners find that pairing seed-starting gear with proper outdoor maintenance tools like a hose reel makes ongoing garden care much easier.
Watering, Ventilation, and Preventing Damping-Off
Now start by treating moisture like a teammate: keep your mix consistently moist — think “wrung-out sponge,” not soggy — and use bottom-watering or a wicking mat so you’re wetting roots, not leaves, which helps cut surface humidity that causes damping-off. Something worth pondering: give seedlings constant, gentle airflow with a small oscillating fan after they emerge, remove humidity domes once cotyledons open, and don’t crowd or forget to thin, because good air movement strengthens stems and lowers fungus risk. I know it’s tempting to baby every tray (guilty!), but sterilize trays and tools between uses and start with clean mix — do that, not the opposite, and you’ll dodge most damping-off headaches. Also consider testing your water and soil pH with a reliable pH test kit to ensure nutrients are available to seedlings.
Moisture Management Basics
Moistly but steadily, you’ll learn that controlling water and air is the single biggest thing that keeps tiny seedlings alive — and it’s where most of us used to mess up, drowning a few promising sprouts before we figured it out. Step 1, do this: use a sterile mix and keep the seed-starting mix evenly damp, not soggy, by bottom-watering or using a wicking tray, lift trays to judge weight. Now, do not do this: leave a sealed humidity dome too long; vent it or remove it once most seeds sprout to prevent damping-off. Something to keep in mind: thin seedlings when they have two true leaves so air circulation reaches the soil. Clean trays, gentle feedings, and a small fan after emergence help.
Airflow And Seedling Health
Because tiny seedlings live and die on the air they breathe, you’ll want to get ventilation and watering right from the start, not after you’ve lost a tray or two to soggy soil and gray mold. Step 1 — water smart: use bottom-watering or a wicking tray so the seed-starting mix stays moist, not soggy, and always remove standing water to reduce damping-off; been there, cleaned that mess. Step 2 — vent early: lift humidity domes as soon as cotyledons open, run an oscillating fan several hours daily to create gentle airflow, dry leaf surfaces, and strengthen stems. Something to keep in mind: keep temps sensible, sterilize trays and don’t reuse old mix. Finally, space or pot-up seedlings, and harden off before transplanting.
When and How to Pot Up or Thin Seedlings
Now, when roots are peeking out of the cell or you see white circling at the edge—usually a couple weeks for fast growers—pot up to the next size to prevent root-binding, don’t jump to a huge container and waterlog the plant. Something to ponder: thin to the strongest seedling once true leaves appear by snipping weaker stems at soil level (avoid pulling), and for tomatoes bury stems deep or lay them sideways to form extra roots for sturdier plants. After potting, give them a day or two in lower light to recover, then resume diluted feeding when new growth appears—trust me, it saves you from babying limp plants later.
When To Pot Up
By the time those first true leaves unfurl, you’ll want to act — potting up and thinning at the right moment keeps seedlings from getting leggy or root-bound, and trust me, it’s worth the small fuss. Step 1: check the first set of true leaves and peek for roots through drainage holes; when you see them, pot up. Now, move transplant seedlings into clean pots with fresh seed-starting mix, handle leaves not stems, firm soil around the root ball, water gently. Something to bear in mind: wait until stems are sturdy, usually 2–4 weeks, or when plants feel top-heavy. Do this, not that—don’t let roots circle or plants compete. After potting, give strong light and a half-strength feed once true leaves fully expand.
How To Thin
You’ve just potted up and admired those first true leaves, and here’s what to do next: thin and pot up with purpose so the strongest seedlings get space, light, and roots to grow into sturdy transplants.
Step 1 — When to thin: Now, at the first true leaves (usually 1–3 weeks), pick the healthiest seedling and thin seedlings by snipping weaker stems, not yanking. Do this at soil level; cutting at the soil line keeps roots of the keeper safe, and you avoid disturbing roots.
Step 2 — Pot up: When roots show at drainage holes or plants get top-heavy, pot up into the next size container. Something to ponder: bury leggy stems when potting up to encourage new roots. Trust yourself — imperfect, but effective.
Transplanting Timing And Technique
Timing your transplanting and thinning right will save you headaches later, so pay attention to roots and leaves before you act. Step 1 — When to pot up seedlings: you’ll pot up seedlings when roots show at drainage holes or when true leaves appear, usually 2–4 weeks; doing it sooner avoids root-binding. Step 2 — How to thin crowded plugs: thin crowded plugs by cutting extras at soil level, don’t pull, keep soil on roots, reduce disease. Step 3 — Transplanting to larger pots: use a sterile well-draining potting mix, bury tomatoes deeply (50–75% or lay stem horizontal), handle leaves only. Now, harden off your seedlings before moving outdoors, wait 24–48 hours before fertilizing, then feed diluted.
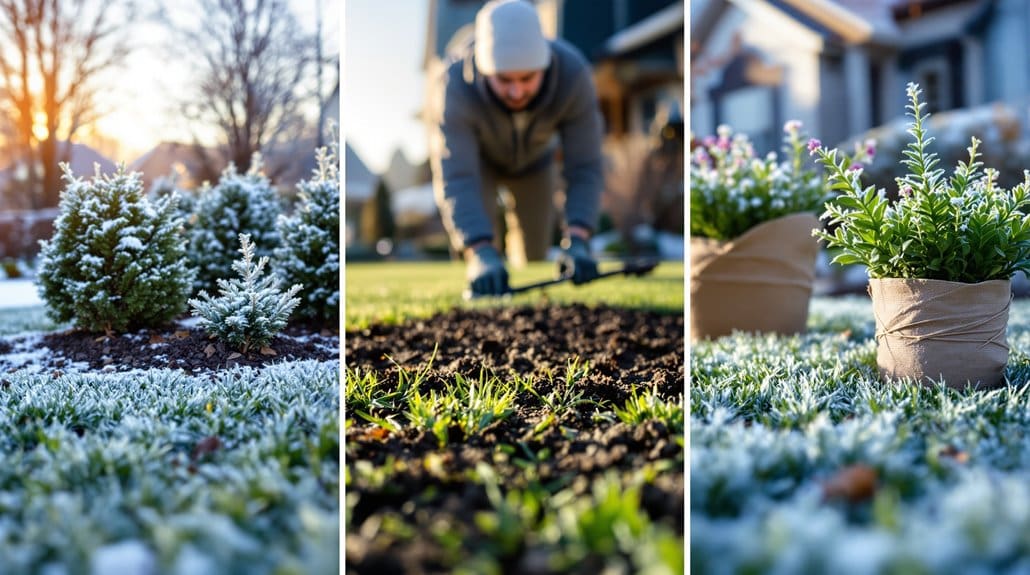
How to Harden Off Seedlings in 7–10 Days for Smooth Transplants
If you want your seedlings to shrug off transplant shock instead of collapsing at the first gust, start hardening them off about a week before you plan to plant out, easing them into outdoor life for 1–2 hours the first day and adding an hour or two each day while gradually increasing sun and wind exposure. Now, place trays in a sheltered, shady spot, then slowly move them to brighter, breezier locations over 7–10 days, watching temps and avoiding frosty nights. Reduce watering a bit so roots toughen, but don't let them wilt — keep soil just moist. Something to bear in mind: protect tender plants on hot or windy days with shade cloth, bring them in if nights drop, finish with an overnight outdoors before transplanting.
Transplant Timing and Aftercare: Minimizing Shock and Setting Plants Up to Thrive
Now that you’ve hardened off your seedlings, pick the right day and don’t rush the move — this is where a little patience pays big dividends. Step 1, timing: transplant when soil temperatures and nights are safely in range for your crop, and aim for an overcast afternoon so you won’t fry tender leaves. Step 2, lift and plant: water seedlings before you lift, keep the root ball intact, and don’t disturb roots — lift by leaves if you must. For tomatoes, bury stem up to the first true leaves; firm soil to remove air pockets. Step 3, aftercare: expect slowed top growth, keep soil evenly moist, protect from wind and sun, and start diluted fertilizer after new growth. That’s it — you’ve got this.
Some Questions Answered
Can I Start Seeds From Old or Saved Seed Packets?
Yes, you can, but expect lower germination rate as seeds age, and hybrid stability may be unpredictable. Now, check seed viability by a simple water test, and note age thresholds printed or guessed, because storage conditions matter. Something to keep in mind: viability testing saves time, and old seed revival tricks sometimes help, though results vary. Here’s what to do now — test, sow extras, and don’t blame yourself for a few misses.
How Do I Label Seedlings to Avoid Plant Mix-Ups?
Label seedlings clearly: use waterproof tags and pencil labels on laminated stakes so names don’t smear, and color coding for quick group ID. Now, tie string tags to small pots if you shift trays, and try seed tape for tiny rows to avoid lost labels. Barcode stickers work if you track varieties digitally. Something to bear in mind, I’ve mixed up basil and parsley before—double-check handwriting, and photograph labels for backup.
Can I Reuse Potting Mix From Last Season?
Yes — you can reuse used mix?, but be careful: pathogens and nutrient depletion hide there. Allusion to old kitchens teaches patience; you can’t just reheat a dish and expect perfection. Now, sterilize soil sterilization with heat or solar, adjust pH adjustment, and add compost enrichment to rebuild fertility; contemplate peat alternatives to improve texture. Something to contemplate: sift out roots, watch for disease, and don’t be stingy with fresh amendments.
Are Grow Lights Safe to Leave on Overnight?
Yes, you shouldn’t leave grow lights on overnight, because continuous light can cause photoperiod disruption and plant stress. Now, do this: set light timers to mimic natural day length and use LEDs with proper LED spectrum to avoid excess heat buildup and lower energy costs. Something to keep in mind: follow safety standards for fixtures, don’t oversize bulbs, and trust the routine — I once left lights on and learned the hard way, don’t repeat me.
How Do I Prevent Leggy Seedlings Without Increasing Heat?
You stop legginess by giving seedlings strong, steady light and airflow. Now: set an adjustable light close, raise it as they grow, space seedlings wider, and keep even moisture with gentle watering, not soggy or bone dry. Something to bear in mind: use low fertilizer after true leaves, add support sticks when needed, and boost air circulation gently with a fan. You’ll avoid stretching, learn from mistakes, and feel proud.