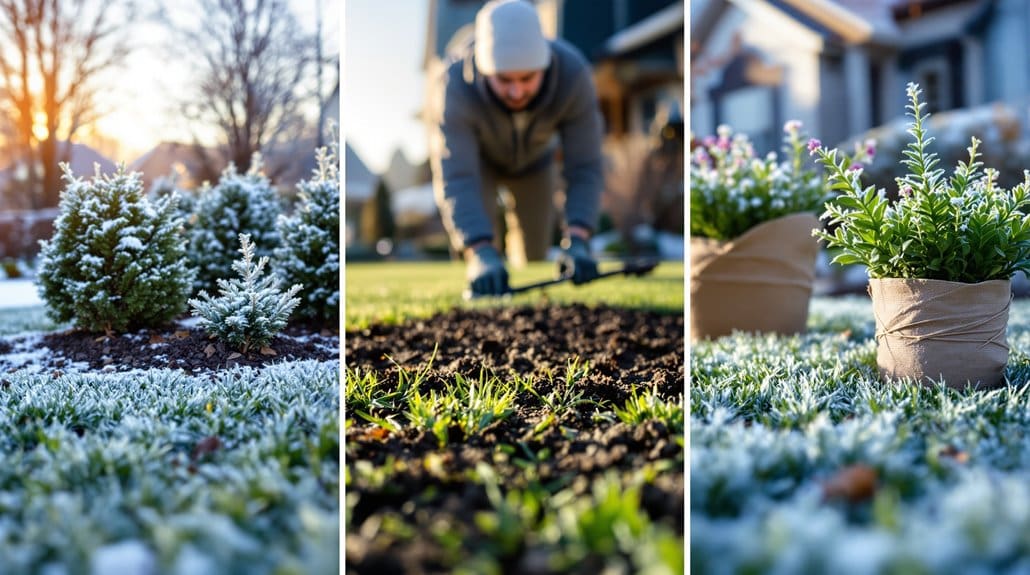
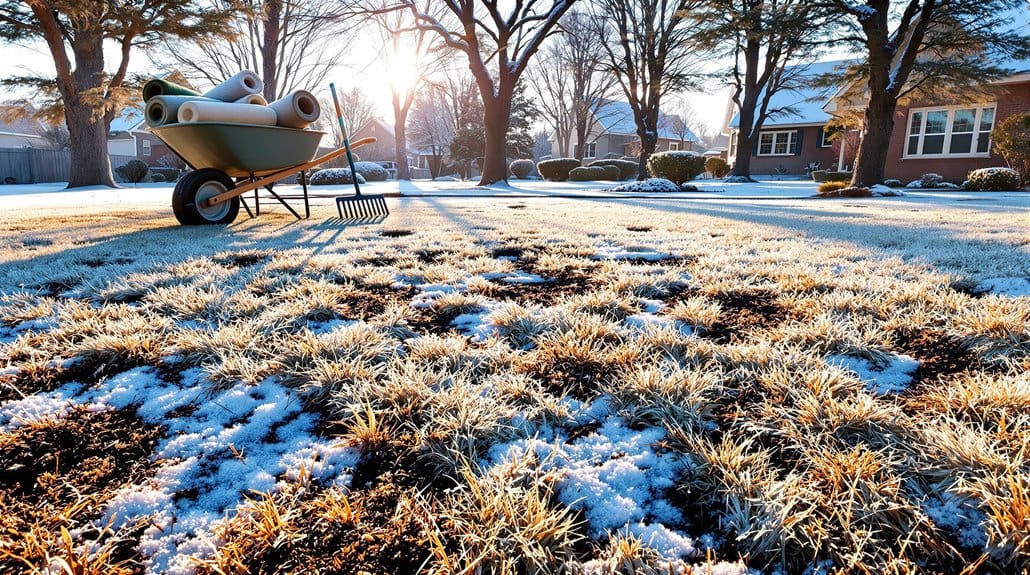
Now that snow’s gone, walk the lawn and tug at brown patches — if the turf lifts clean it’s likely frost/ice heave, not disease, so don’t spray prematurely. Check roots, thatch depth, compaction, and grub signs; loosen soil and match seed to your grass before you patch. For small damage, rake, press seed shallow, add starter fertilizer and keep the surface moist; bigger or recurring issues need aeration or rehab. Keep going for full step-by-step guidance.
Some Key Points
- Do a calm post-thaw walkaround and map bare spots before any seeding or treatments.
- Use a tug test and soil probe to distinguish frost heave, disease, pests, or compaction.
- If damage is under ~40%, plan targeted spot repairs; larger or recurring damage needs rehab.
- Prepare patches by removing debris, loosening top inch, matching seed to existing grass, and pressing seed ~1/8" deep.
- Apply a light screened-compost topdressing, starter fertilizer, and keep seeded areas consistently moist until established.
Quick Spot-Check: What to Look for as Snow Melts
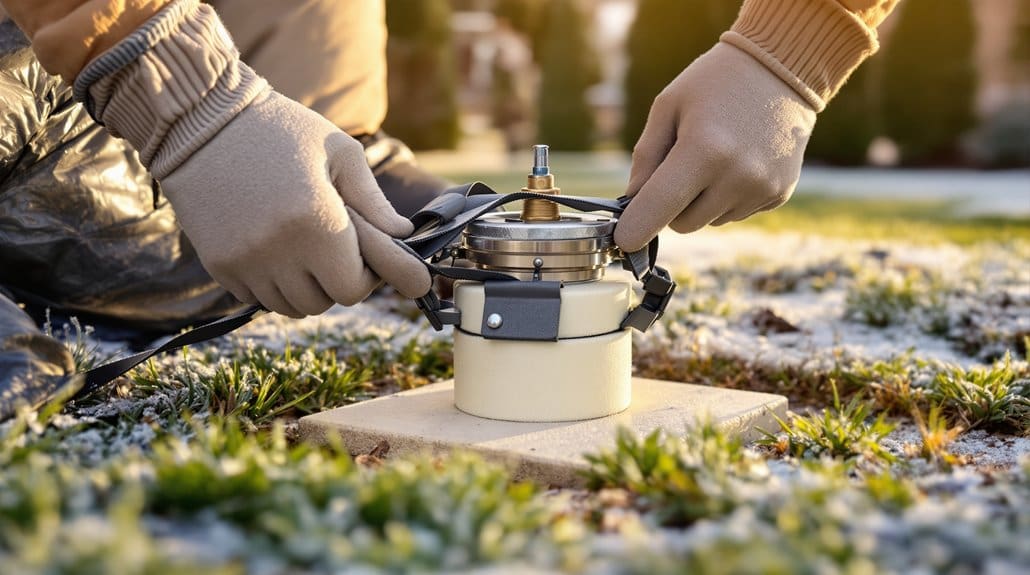
Now that the snow’s finally pulling back, start with a calm walkaround and a plan—don’t rush in with seed and fertilizer until you’ve diagnosed what’s actually wrong. Now, do a tug test on brown patches: if dead turf pulls out, plan to reseed; if it resists, leave it be, it may be dormant. Something worth noting: check thatch depth, because more than about half an inch blocks seed-to-soil contact and means dethatch instead of overseed. Press the soil surface to feel for compacted soil or crusting, and probe the top inch—hardness or exposed roots calls for aeration or topsoil. Inspect drainage too; low spots that pooled under snow can suffocate crowns and need grading or soil amendments to fix. Consider using a core aerator to relieve compaction and improve seed-to-soil contact before overseeding.
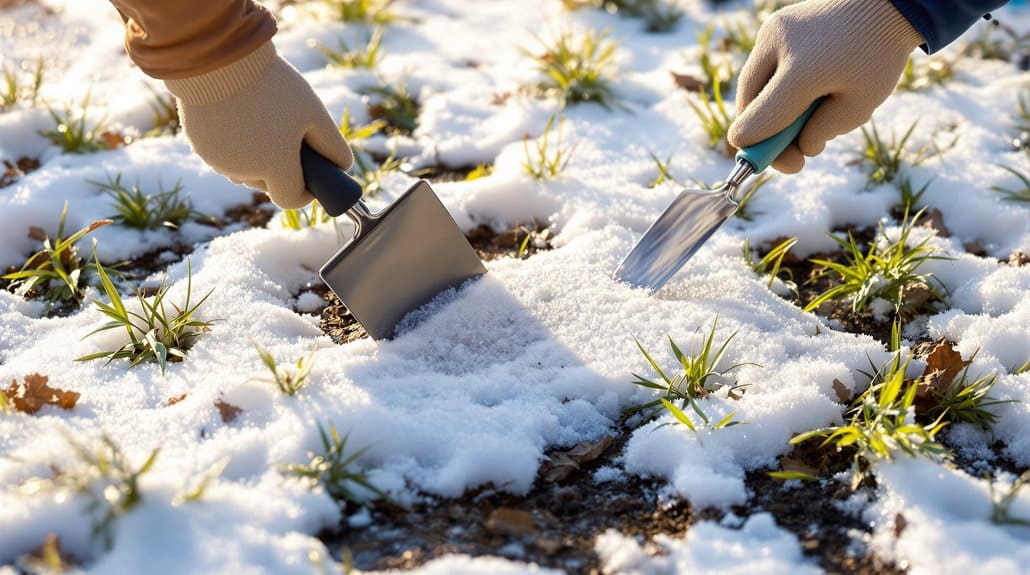
How to Tell Frost/Ice Damage From Disease, Pests, or Traffic
Now, start with a tug test: if the grass pulls out cleanly in straw-colored mats, you’re probably looking at frost or ice heave, not a fungus, and that’s a lot easier to fix than I always hoped. Something to keep in mind — if patches lift like a carpet and you find white, C‑shaped grubs an inch or two down, it’s pests; if you spot gray or pink fuzzy mycelium after thawing, it’s snow mold; and if soil is hard-packed along paths with thin, worn turf, it’s wear from traffic, not root loss. Do this, not that: map where the damage is, check the soil and roots, and resist guessing — the signs are usually clear once you look closely. Consider improving compacted areas with soil aeration to help turf recover come spring.
Frost Versus Disease Signs
When you see dead patches in winter, don’t assume it’s a fungus right away; start with a few simple checks that save you hours and bad guesses. Step 1 — Look closely: frost usually leaves irregular, straw-colored dead grass that lifts easily, while snow mold shows grayish-pink fuzzy mats that smear. Now do a tug test: if crowns pull free, you likely had freeze-thaw heave, not a pathogen. Step 2 — Inspect for mycelium or circular patterns after snow melts; that points to disease. Something worth weighing: probe the soil — compacted, hard ground hints at traffic issues, not frost. Do this, not that: don’t reach for fungicide before you check patterns, timing, and simple tests. Consider also correcting drainage and compaction problems in spring to reduce future winter damage.
Pests And Traffic Clues
Take a close look before you assume snow or fungus is to blame — you’ll save time and a few unnecessary products — because pests and traffic leave different fingerprints on turf. Step 1, tug test: if grass pulls up clean with intact soil, you likely have frost/ice damage; roots look straw-colored and limp. Step 2, dig two to four inches: if you find brown roots and white C-shaped grubs, that explains bare patches, treat grubs, not fungus. Something to keep in mind: disease often shows rings or fuzzy mycelium, edges recovering while centers die. Now check for traffic compaction where turf is flattened, thin, with divots and surviving green nearby — fix compaction, not pesticides. Do this, don’t guess. Also, keep your blades and tools sharp for clean cuts and easier maintenance with sharpening stones to protect turf health.
Prioritize Repairs: When to Patch vs. Plan a Full Rehab
If your lawn shows just a few thin patches, don’t jump straight to a full overhaul—patching small areas is faster, cheaper, and usually gets you back to green by early summer, but if the damage is widespread or keeps coming back, you’ll just be throwing seed at the symptom, not the cause. Now, do this: diagnose first with the tug test, look for thatch, grubs, salts, or vole runways, then decide. If under ~40% is affected, choose spot repairs—loosen the top inch, match seed or sod, add starter fertilizer, and watch soil temps for reliable seed germination. Something to weigh: recurrent problems or compaction mean plan a full rehab, not more patches. When unsure, partial rehab (aerate + overseed) often wins. Consider adding regular lawn aeration to your maintenance routine to relieve compaction and improve seed-to-soil contact.
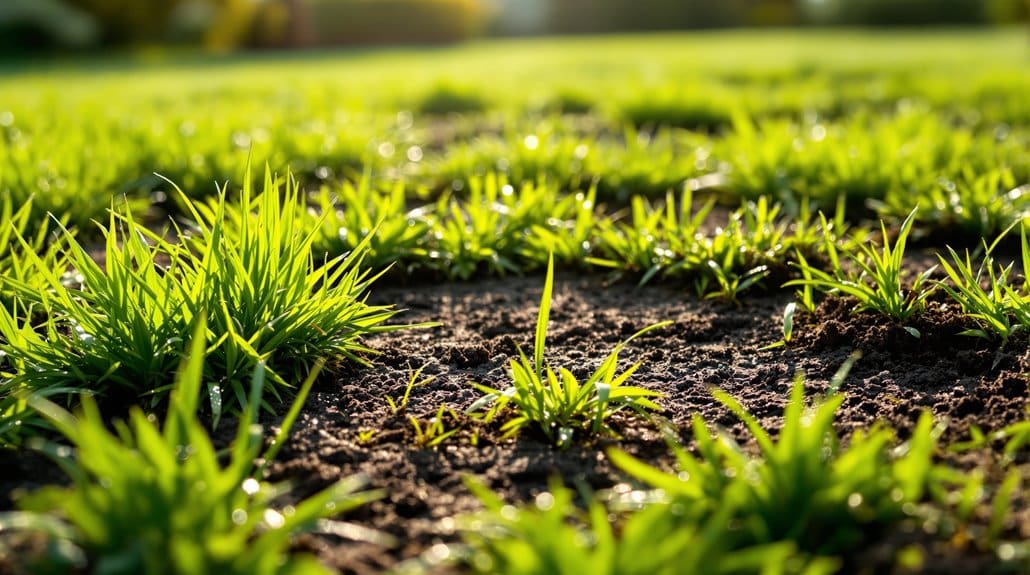
Clear and Prepare Bare Spots for Seeding (Raking, Grading, Loosening)
Now clear the area so seed actually touches soil: rake away dead grass, sticks, and any thatch over half an inch, because I’ve learned the hard way that seed sitting on fluff just fails. Next, loosen the top inch with a garden rake or fork and lightly grade the patch to match the surrounding turf, aiming for no low spots where water pools or high ridges that shed it. Something to ponder — press seed about an eighth inch into the loosened soil and add a thin quarter-inch of screened compost to hold moisture, and if you get frost heave or erosion, use a breathable mesh to keep everything put. Choose an appropriate garden rake for homeowners and small lawns to make these tasks faster and more effective, since the right tool can reduce effort and improve results garden rake.
Remove Debris Thoroughly
Before you spread seed, clear that bare spot down to firm soil so the new grass actually has a chance to grow, not just sit on a pile of dead grass and leaves. Step 1: rake out all dead grass, thatch, and leaves until you expose firm soil, because seed needs good contact, not a cozy mattress of debris. Now remove stones and compacted clods; you’ve probably left a few last season, I have too. Step 2: roughen the surface lightly so seed won’t sit on a hard crust that stops shoots. Something to bear in mind: gently press seed in with the back of the rake or a light walk, but don’t over-compact, you’re helping roots, not making bricks. For best results, consider using quality lawn care equipment to ensure proper grading and seed-to-soil contact.
Loosen And Grade Soil
Start by loosening the top inch of soil with a garden rake or cultivator so seed actually touches dirt, not a crust or old thatch—you’ll thank yourself later when sprouts don’t sit like little boats on top of the lawn. Now, rake out dead grass and debris until you see clean soil, then loosen the top 1 inch with a rake or garden fork to improve seed-to-soil contact. Grade the spot gently so it matches surrounding turf, sloping to shed water, not trap it in a puddle. Something worth pondering: break up compaction with a garden fork or hand aerator, aim for a crumbly tilth, press lightly so seed sits about 1/8 inch deep. Add a thin compost layer if soil’s poor.
Match Seed to Your Lawn: Picking the Right Grass for Spring Repair
Choosing the right seed is the single smartest move you can make when repairing bare spots this spring, because matching what’s already in your yard saves you from a patchy, mismatched lawn down the road. Step 1 — identify your grass type, don’t guess; if you’ve got cool-season turf, pick Grass Seed labeled for Kentucky Bluegrass or a Tall Fescue mix to match texture and color. Now, do this: choose a quality, weed-free seed with good germination and purity numbers, don’t dump a ton of seed on a small patch. Something to ponder: for shade or heavy wear, use blends for shade tolerance or wear tolerance. If unsure, go with an all-purpose cool-season mix. You’ll thank yourself.
Soil Improvements and Topdressing That Boost Success
Now, start by improving soil structure with a light ½–1 inch topdressing of screened compost or a product like CarbonizPN-G™, which holds moisture, cushions young roots against frost heave, and helps seeds stay put — do this, not piling on rich soil that blocks seed contact. Something to keep in mind: blend 10–20% compost into topsoil when filling deep spots, and mix in a little biochar to boost microbial life and long-term soil health, because I’ve learned the hard way that skipping microbes leaves seed struggling. Finally, loosen the top inch, press seed to about 1/8 inch, then cover with a thin compost layer or CarbonizPN™ and, on slopes, anchor that dressing so winter rains don’t wash your work away.
Soil Structure Improvement
If your winter bare spots keep coming back, improving the soil structure is the single most useful thing you can do—because good roots start with good dirt. Step 1: loosen the top inch with a rake or cultivator, work in a handful per square foot of screened compost or CarbonizPN™ Soil Enhancer to break up compacted layers, and don’t skip this—I've learned the hard way. Now mix coarse sand up to 10–20% by volume into heavy clay, or add biochar-amended compost where drainage stalls. Step 2: at seeding, apply a starter fertilizer with phosphorus (for example 14-7-14) to jump-start roots, press seed lightly, and consider a thin extra topdressing or a breathable erosion blanket if frost heave or washout is likely.
Compost Topdressing Benefits
Loosening the soil and topping bare spots with a thin half- to one‑inch layer of screened compost will do more for your seed than fancy fertilizers alone, so do this first and skip the smothering. Now, spread a light compost topdressing over repair bare patches, keeping seed visible and near 1/8 inch depth, then press gently to firm contact. Something to ponder: work compost into the top inch of loosened soil before seeding to break compaction, improve drainage and aeration, and help roots anchor. This conserves moisture, insulates against frost heave, and supplies slow‑release nutrients so seeded areas establish without constant watering. Do this, not that—thin, steady compost, not a burying pile. You'll be glad you did.
Biochar And Microbes
You’ve already done the right thing by loosening soil and topdressing with compost, and now you can take that repair a step further by adding biochar and encouraging the microbes that make it useful. Now, work a 5–10% biochar blend into the top 1–3 inches, or mix about 1/2-inch biochar into your compost topdressing for small patches, and don’t bury seeds too deep — we’ve all overdone that. Something worth noting: inoculate biochar with compost tea or well-aged compost first, it speeds microbial colonization and boosts nutrient cycling around new roots. Use a roughly 10:90 biochar-to-compost mix for light topdressing, or follow product rates with a starter fertilizer for steady phosphorus and nitrogen, and better moisture retention.
Seeding Technique and Starter Fertilizer: Seed Depth, Coverage, and Products
Now roll up your sleeves and get this right: plant cool‑season seed shallow, about an eighth of an inch, so the seed stays in contact with soil but isn’t smothered (burying it deeper than a quarter inch will slow or stop germination). Now, do this: lightly rake or press seed in to set proper seed depth, broadcast evenly to avoid clumping, and match rates for new patches so bare spots don’t get overwhelmed or sparse. Something to ponder: apply a phosphorus‑containing starter fertilizer, like 14‑7‑14 at label rates, or an organic 4‑4‑4, to jump‑start roots. Cover with a thin 1/8–1/4 inch screened compost or light CarbonizPN‑G dusting, and resist the urge to pile it on.
Watering and the First 6 Weeks: Schedules to Encourage Deep Roots
Start by treating the first six weeks like a short apprenticeship: be patient, keep the surface gently moist, and don’t overdo it. Now, for the first 10–14 days, keep the top 1/4 inch of soil consistently moist by watering lightly 2–3 times daily, about 1/8–1/4 inch each time, so seed can germinate without washing away. When seedlings appear, switch to deeper, less frequent watering, 2–3 times weekly, to encourage roots to grow 3–4+ inches; you’ll be tempted to water daily—don’t. Something to bear in mind: water early morning to cut evaporation and disease risk. Protect newly seeded patches from heavy traffic for weeks, watch for pooling or dry spots, and adjust timing so soil stays even, not soggy.
Mowing, Foot Traffic, and Winter-Readiness for New Grass
You’ve done the careful watering apprenticeship, and now it’s time to protect that work as the season cools, so here’s what to do next: when your cool-season grass reaches mowing height, set the deck high—about 3 inches—and never cut more than a third of the blade at once, because short, ragged cuts make young turf lose moisture and invite disease. Now, keep blades razor-sharp, you’ll thank yourself when cuts stay clean and disease stays away. Something to ponder: avoid strolling or playing on bare or newly repaired patches, foot traffic compacts soil and crushes seedlings. If you must cross them, funnel people with temporary walkways. Don’t drive heavy gear over tender spots, and wait until grass has been mowed a few times before full use.
Troubleshooting Slow Recovery and When to Hire a Pro
If a patched area is still bare a month after soil temps have sat above about 50°F, don’t assume the seed simply failed — something else is usually at work, and it’s better to check than to keep throwing seed at the same spot.
Now, start with a tug test and look for grub holes, vole runways, or a thatch layer over ½ inch, because those point to problems beyond seed failure, and you’ll save time. Something to bear in mind: hard, compacted soil often needs aeration before you reseed, not more seed. If repeated patching fails, or roughly 40% of your lawn weakens, call a pro for soil tests, pest scouting, or drainage checks. Call sooner if you spot expanding disease rings, heavy grub damage, or slope erosion — these need expert fixes.
Some Questions Answered
How to Fix Bare Spots in Lawn in Spring?
Paint the patch with patience, start by testing soil, then pick the right seed selection and loosen the top inch. Now remove dead turf, mix in screened compost, sow seed at proper depth, and press gently. Keep irrigation timing regular, light water twice–three times daily until germination, then deeper less often. Something worth weighing: use starter fertilizer, delay weed control until after three mows, and don't rush — you'll get there.
Can I Just Sprinkle Grass Seed on Bare Spots?
Yes — you can, but do it right. Now: choose the proper seed variety for your lawn, avoid tiny seeds that need deep seed depth, and aim for shallow placement so seedlings reach light. Make sure seed-soil contact is firm, press it in or lightly rake, and time the work within appropriate timing windows so seed stays dormant over winter if needed. Something to contemplate: cover with compost or straw, not chemicals yet.
What Is the 1/3 Rule in Lawn Care?
About 70% of a grass plant’s energy stays in the roots, so don’t cut more than one-third of blade length at once. The 1/3 rule means you mow to a safe mowing height, protecting root depth and shade tolerance, and time fertilizer timing after a light cut. Now, do this: raise your mower, trim a bit each session, wait until grass matures. Something to contemplate: I used to scalp—don’t repeat that.
Does Putting Grass Clippings on Bare Spots Help Grass Grow?
Yes — but carefully. You can use fresh clippings for mulch benefits, they hold moisture and add nitrogen, yet they’re not a starter fertilizer, so don’t expect miracle roots. Now remove dead turf, guarantee seed-soil contact, use compost application or screened topsoil thinly, not thick clippings that invite grass diseases or trap moisture. Something to ponder: check soil pH, avoid herbicide-tainted clippings, and don’t smother the seed.