Start by picking one clear goal—shrink the lawn, make a pollinator patch, or a low‑water curb strip—and measure sun, soil texture, and drainage so you match plants to conditions, not nursery hype. Group species by water and light needs into separate zones, choose well‑branched 1–3‑gallon stock, gently loosen circling roots, plant at crown level, mulch thinly, and keep steady moisture for weeks. Now, try a small test bed, tweak spacing, and you’ll learn what works next.
Some Key Points
- Set one clear primary goal (e.g., reduce lawn, create pollinator habitat, or cut maintenance) before selecting plants.
- Map sun exposure, soil texture, and drainage to match species’ light, soil, and water needs.
- Group plants into hydrozones (dry, moderate, moist) and avoid mixing thirsty and drought‑tolerant species.
- Choose locally proven nursery stock, inspect roots and branching, and size plants to desired establishment speed.
- Prep beds months ahead, plant densely as living mulch, and apply appropriate mulch to suppress weeds and conserve moisture.
Define Your Goal and Match It to Local Conditions
Step 1 — Start with one clear goal and match plants to the site you actually have, not the one in your head. You’ll first define a clear primary goal—shrink lawn by 50%, build pollinator habitat, or create a low-maintenance curb strip—because that choice drives species mix, density, and upkeep. Now, measure and note site conditions, then Match plants to measured site conditions: record sun hours, soil texture, and drainage, and pick species adapted to those facts. Group species by water needs and put them on separate irrigation zones, don’t mix thirsty and drought-tolerant in one bed. Something worth pondering: begin with a small test bed, watch for a season or two, and adjust—trust me, you’ll tweak spacing and species. Consider sourcing tools and supplies tailored for organic care, like organic fertilizers and native-friendly equipment for homeowners.
Survey Sun, Soil, Drainage, and Existing Vegetation
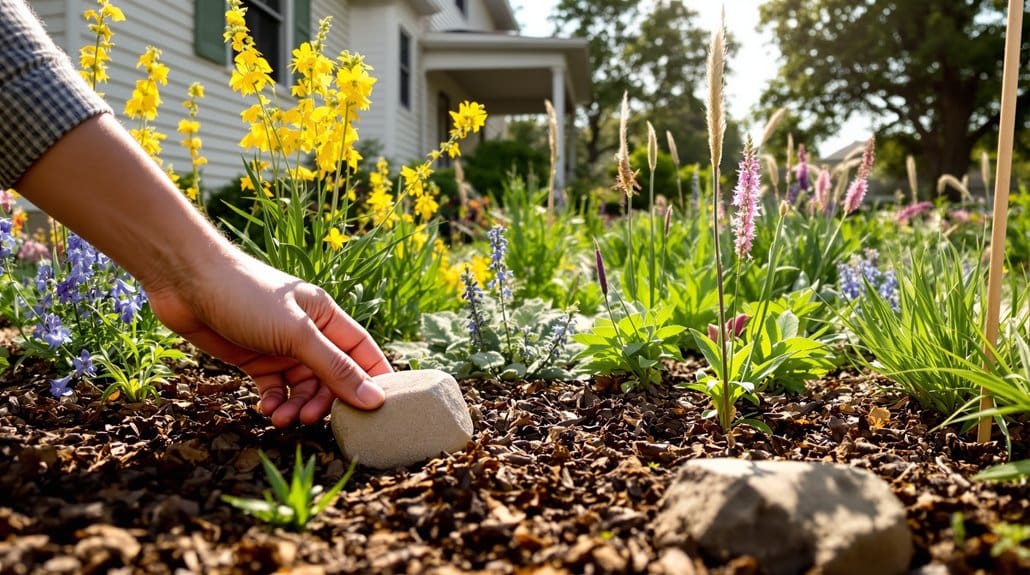
Before you plant a single thing, go walk the site with a notebook and your eyes open, because good intentions won’t save a plant that’s in the wrong spot. Start by mapping sun exposure at morning, midday, and late afternoon across seasons, marking >6 hours as full sun and <4 as shade, so you won’t guess wrong later. Now test drainage by digging a 12‑inch hole, timing refill to classify well, moderate, or poor drainage. Do simple ribbon soil tests to note soil types, sandy versus clay, and record compaction and depth. Inventory existing vegetation, list natives and aggressive weeds, note canopy spread and health. Something to ponder: place drought‑tolerant natives on warm slopes, moisture lovers in low spots. Consider checking soil acidity with an accurate pH test kit to match plant needs and inform any lime or sulfur adjustments.
Use Local Resources (Calscape, iNaturalist, Extension) to Find Regionally Appropriate Natives
Start with regional plant databases like Calscape to pull up ZIP code or place-based lists that tell you each species’ sun, soil, and water needs, then save a short list for nursery runs instead of guessing at pretty labels. Next, check iNaturalist observations and herbarium records in your county to see which natives are actually thriving nearby—this will save you the mistake of buying plants that never settle in. Finally, consult your county or state Extension for local fact sheets and planting calendars, and if you can, grab advice at a native plant sale or plant society meeting so you’re following local wisdom, not just a catalog. Also consider linked resources from local experts to learn region-specific maintenance tips and recommended cultivars.
Use Regional Plant Databases
When you want native plants that actually thrive in your yard, use regional databases and local eyes on the ground to narrow the field — they’ll save you from the classic trap of picking pretty plants that sulk in your soil or vanish after the first dry spell. Step 1: start with Calscape to search by zip, filter for sun, soil, water, and peek at bloom calendars and nearby nurseries, then save a list. Step 2: cross-reference county extension or university databases for planting calendars and pest notes, they’ll stop guesswork. Now, we may contemplate herbarium or natural heritage records to confirm range and size. Something to ponder: visit local botanical gardens and groups to learn what truly supports pollinators in your neighborhood. Also consider choosing plants that fit your maintenance goals and irrigation setup, focusing on low water species to reduce long-term upkeep.
Leverage Citizen Science Observations
Tapping into citizen‑science records is one of the smartest shortcuts you can use, because it shows you which natives are actually doing well in your county right now, not just what looks good in a catalog or on a postcard. Start with iNaturalist, filter to Research Grade and recent years, and save species lists you see thriving nearby, not distant idealizations. Then check Calscape by zip or place to confirm bloom season, soil and water needs, and native range — don’t assume a pretty photo means it suits your yard. Cross‑check observations to build a reliable palette that will attract pollinators and survive local conditions. Now, export those lists, learn from earlier planting mistakes, and plant with confidence. Also consider pairing those choices with the right tools for regular care, like a home core aerator to reduce compaction and promote healthy roots.
Consult Extension Experts
Even if you’ve leaned on catalogs or pretty garden photos before and learned the hard way that “native” can mean many things, now’s the time to lean on local experts and hard data: combine Calscape’s ecoregion filters, iNaturalist’s neighborhood observations, and your county extension or Master Gardener program to build a truly region‑appropriate palette. Step 1 — run your address in Calscape, filter for sun, soil and water, export nursery availability and planting calendars, and don’t ignore provenance. Now, upload or check iNaturalist records nearby to see what actually thrives. Step 2 — contact your county extension office or Master Gardener program for free, localized advice, soil test kits, and interpretation. Something to keep in mind: cross‑reference with local native plant societies to avoid non‑local cultivars. Many homeowners find that combining those resources with basic soil testing produces the best long‑term results.
Group Plants by Water and Light Needs for Low-Maintenance Success
Because plants tell you what they need if you take the time to listen, start by arranging them into clear water and light zones so your schedule actually fits the plants instead of the other way around. Step 1 — map hydrozones: group plants by water and light needs, putting dry, moderate, and moist beds where they belong, which will conserve water and cut chores. Step 2 — match sun and shade: put sun‑loving species together, and shade‑tolerant species in their own pockets, or you’ll be fussing constantly. Step 3 — mind soil drainage and seasonal rhythms; sandy, well‑drained, and wet‑soil plants each get their place. Now, dense compatible plantings act as living mulch, reducing weeds and the urge to overwater. Trust it, you’ll thank yourself. Consider incorporating soil conditioners to improve structure and help native plants establish more easily.
Choose Proven Forms and Sizes : What to Buy at the Nursery
Now, here’s what to do: pick a mature plant size that balances cost and how fast you want it to fill in, knowing 1–3 gallon pots give quick cover while plugs or 4–6 packs save money but take years. When you lift the container, check weight and look for healthy branching and multiple stems, and avoid pot-bound specimens with circling roots or dry root balls—trust me, I’ve battled a few stunted shrubs from bad roots. Something to ponder: match the tag’s mature width to your spacing plan, using about half to two-thirds of the listed size for high-density beds so plants act as living mulch.
Choose Mature Plant Sizes
Start by matching the plant size to your timeline: if you want quick structure, pick a 5–15 gallon specimen and expect to pay two to five times more, but if you can wait a season or two, a 1–3 gallon pot will establish in one to two growing seasons and save you money. Step 1 — Choose nursery stock you trust, favor locally proven forms for hardiness, and buy plants at sizes that fit your plan. Now, check the plant label for mature height and spread so you don’t overcrowd. Step 2 — Inspect root systems; healthy white roots are good, tight circling roots get teased or scored. Something worth weighing: a well-branched shrub beats a single leggy shoot every time.
Look For Healthy Structure
Look for a strong, balanced shape when you pick plants at the nursery—plants with multiple stems or a clear central leader get established faster and stand up to wind and foot traffic better than a single spindly stem. Step 1: choose well-branched specimens, multiple stems near the soil line, no dead leaders, firm but not waterlogged root systems, and press the root ball to feel for vigor. Step 2: match the plant’s mature size on the tag to your site; many perennials outgrow pots, shrubs often double, so plan space now. Now, we may weigh stock size: opt for 1–3 gallon for quicker establishment, fewer headaches later. Something to ponder: your Low-Maintenance Landscape starts with smart buys, not impulse grabs.
Avoid Pot-Bound Specimens
You’ll want to pick through the pots with a practiced eye, because a healthy root system makes or breaks a planting. Step 1 — inspect for healthy roots: pull a plant gently, you want white to light-tan roots that you can tease apart, not dark, mushy threads or a dry brick. Now, we may weigh container size: choose plants in 1–3 gallon pots for faster establishment, avoid tiny packs unless you have patience. Something to weigh — don’t take pots with roots matted around the bottom or spilling from drain holes; that's severe root-binding. If you see circling roots, ask the nursery to slice and straighten them, or pick a specimen with outward-growing roots. You’re choosing native plants, so choose plants wisely.
Prep Soil and Control Weeds Without Over‑Amending
If you want native plants to thrive, do the simplest prep that actually works, not the well‑meaning overkill that invites a giant weed party. Step 1 — prepare beds gently: mow existing growth, rake thatch to expose soil, and limit disturbance to the top inch or two so you don’t bring buried weed seeds up. Now, match soil conditions to plant needs instead of dumping rich garden soil or manure that lures weeds and floppy growth; many natives prefer native soil. Step 2 — suppress weeds over time: use repeated spot controls, clear‑plastic solarization in sunny spots, or hand‑pull roots for stubborn perennials. Something to keep in mind: prep beds months ahead, then mulch appropriately to conserve moisture and reduce weeds once plants go in.
Planting Technique, Mulch, and Early Establishment Care
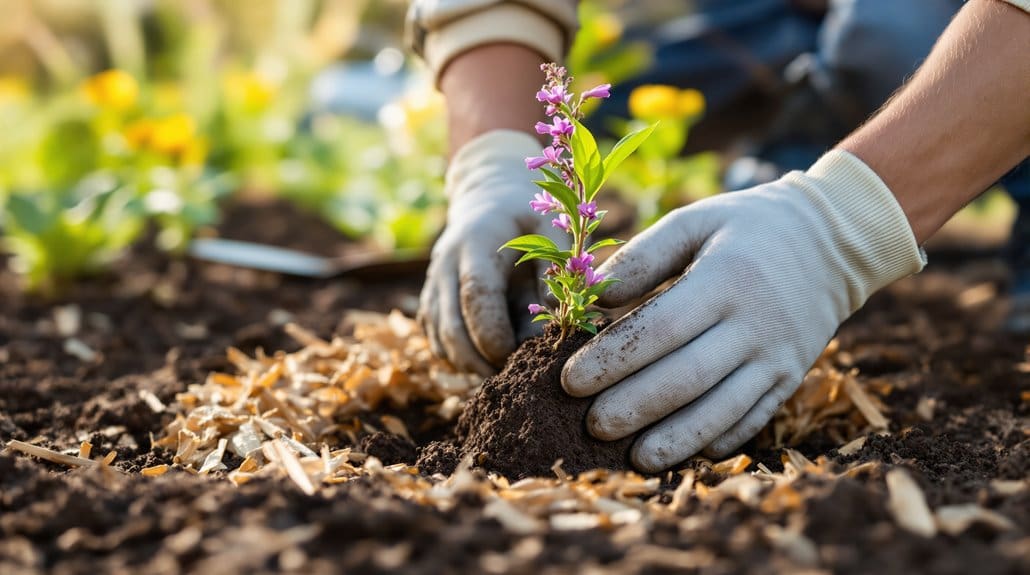
Start by treating planting day like a first date—be gentle, honest, and don’t smother them. Step 1: Dig planting holes wider than the root ball, at least 1.5–2× the pot diameter, and set the root crown level with surrounding soil, don’t bury stems. Step 2: If you’ve wrestled with pot-bound roots before, gently cut and loosen circling roots so they can spread—yes, you can be firm and kind. Now, we may consider mulch: use a light, 1-inch or less layer of organic mulch around perennials, more for trees, and keep it pulled back an inch from stems to avoid rot. Step 3: Water new native plants thoroughly at planting, keep moisture steady for weeks, and avoid rich backfill unless a species really needs it.
Plan Phases, Maintenance, and How to Expand Over Time
When you’re ready to move beyond planting day, think in phases so the whole project doesn’t eat your weekends or patience; phase work into 2–5 year steps, starting with invasives and structural plants and gradually filling in perennials, grasses, and groundcovers. Step 1: remove invasives, prep soil, plant trees and shrubs, mark species and dates on a simple map so you won’t forget. Step 2: add perennials and grasses, use dense planting—1.5–2× mature spacing—to act as living mulch and cut weed time. Step 3: infill with bloomers and groundcovers after 3–5 years, expect weekly weeding early, then taper. Now, expand gradually from a 25–100 sq ft pilot bed near daily paths, double area each success, learn, adjust, and belong to this native landscapes community.
Some Questions Answered
How Do Native Plant Choices Affect Local Wildfire Risk?
Native plant choices lower wildfire risk when you pick fire adapted species, reduce fuel, and create ember resistant zones. Now, we may contemplate this: choose plants with low resin and waterwise habits, avoid dense continuous shrubs — do mosaic planting instead, space groups to break fire spread. Something to ponder: thin fuels, prune dead material, and don’t crowd flammables near structures. You’ll learn from mistakes, and you’ll get safer, prettier results.
Can Native Landscaping Reduce Mosquito Breeding in Standing Water?
“A stitch in time saves nine.” Yes — native water plants and drainage plants can help reduce mosquito breeding by encouraging mosquito predators and reducing shaded puddles, but it’s not automatic. Now, we may contemplate this: plant species that support dragonflies, frogs, and birds, improve soil and drainage, and avoid stagnant containers. Something to ponder: do this, not that — provide moving water or sealed features, don’t leave debris.
Will Native Plants Attract Deer or Other Pest Wildlife?
Yes — native plants can attract deer and other pests, but you can manage it. Now, we may contemplate this: choose deer resistance species, stagger plantings, and avoid tender seasonal browse hotspots; herd herbivore behavior by placing less-palatable plants near paths, more tasty ones farther away. Something to contemplate, I’ve learned the hard way: fencing, repellents, and added scent barriers work when needed, and patience helps you fine-tune urban foraging pressures.
How Do Native Gardens Affect Nearby Property Values?
Yes — native gardens often boost curb appeal and can earn a resale premium, even if neighbors once thought wild meant messy. Now, we may ponder this: plant tidy edges, choose blooms for season-long color, and show maintenance costs are lower with natives. Something to contemplate, don’t overdo native thickets that block views. Here’s what to do now: tidy pathways, label plants, and share care tips to shape neighborhood perception.
Can I Legally Remove Nonnative Plants From Public/Right-Of-Way Areas?
Yes, you can sometimes remove nonnative plants in public/right-of-way areas, but permits required often apply, and utility easements may restrict work, so check first. Now, we may contemplate this: contact your city, ask about historic districts or community covenants, get written approval, and avoid cutting near buried lines. Something to ponder, I’ve learned the hard way—document approvals, follow rules, and only remove when you’re sure it’s allowed.