Winter’s thaw is your map: walk the yard, note where snow melts first (south slopes, heated driveways) and follow thin melt channels to puddles that linger past 48 hours, they’re repeat trouble; check gutters, short downspouts, and icy troughs that dump water near foundations. Now, probe soggy spots with a screwdriver, mark rills and frozen refreeze lines, and extend downspouts 6–8 feet as a quick fix. Something worth pondering: persistent pooling or water within 3–5 feet of a wall means call a pro to design lasting fixes, and keep going to learn practical next steps.
Some Key Points
- Melt patterns and thin runoff channels show the exact downhill routes water follows during thaws.
- Persistent puddles or squishy turf after thaw indicate low spots, compaction, or poor infiltration.
- Ice along gutters, eaves, or downspout exits signals clogged troughs or improper discharge locations.
- Early-melting strips by paths, driveways, or warm pavement reveal concentrated runoff corridors.
- Repeating icy patches and erosion lines across winters mark chronic drainage failures needing fixes.
Winter Water Patterns: Where Snow Melts First and What That Reveals
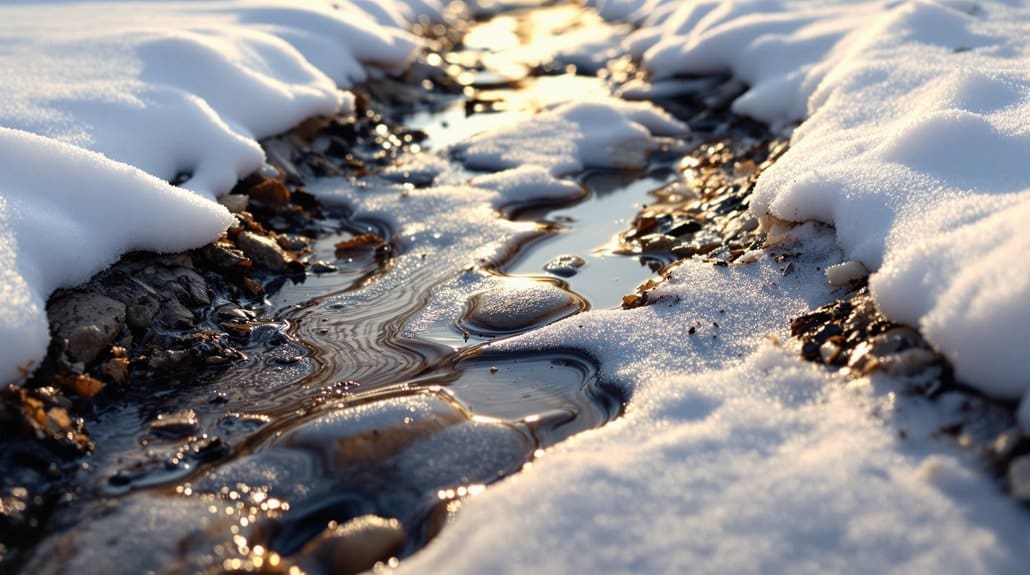
Often you’ll notice snow vanishing first on the sunny, south- and southwest-facing slopes and on warm pavement, and that pattern is one of the simplest clues you’ve got about where water will move when it melts. Now, watch those early-melting strips along driveways and compacted paths, they show how snow melts faster on warm, impervious surfaces and force runoff toward low points. Something worth pondering: thin meltwater channels and feathered snow edges trace natural flow paths downhill, they’re the map you missed last spring. Do this, not that—use those repeated patterns to place swales or French drains where water actually runs, not where you hope it won’t. I’ve guessed wrong before; learning from the thaw saves headaches and fixes drainage problems. Consider adding or adjusting irrigation system components to complement your drainage fixes and protect vulnerable areas.
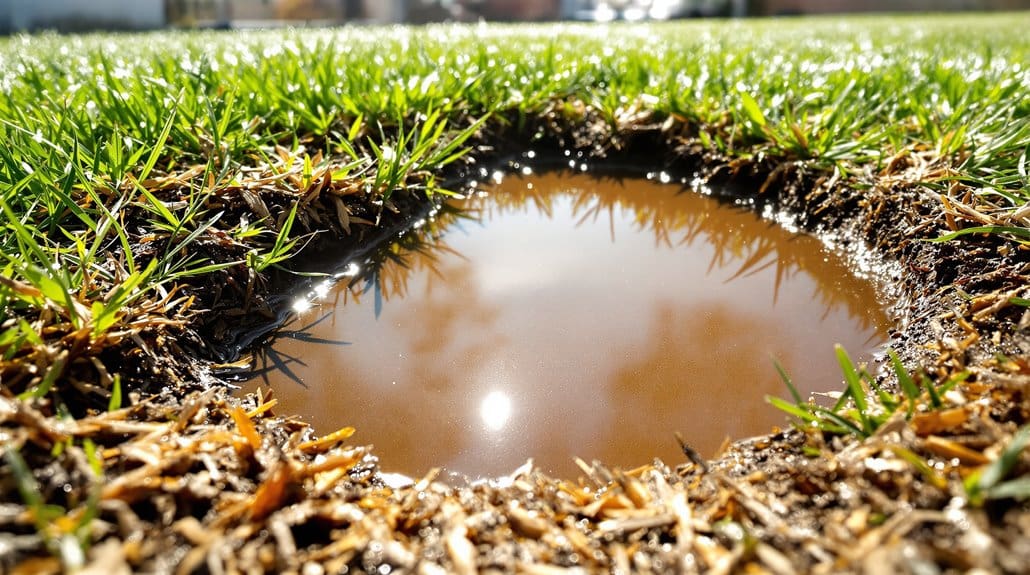
Lingering Puddles After a Thaw: How Long Is Too Long?
You’ll notice right away when meltwater won’t budge: puddles that hang around more than a day or two are a clear sign something’s wrong with how water’s getting away, and that’s your cue to act. Now, check where standing water collects and whether the ground freezes around it—if soil stays squishy after a thaw, you’ve likely got compacted soil or poor permeability. Something to keep in mind: if puddles linger 3–10 feet from a foundation, move fast, because water can creep toward walls and cause trouble. Do this: probe soil, improve grading away from the house, aerate or amend heavy clay, and open blocked flow paths. Don’t ignore repeat spots. You’ll save headaches later, trust me. Consider renting a lawn aerator to relieve compaction and improve water movement in these trouble spots; lawn aerator use can make a big difference.
Repeating Icy Patches: Why Refreeze Spots Indicate Runoff Paths
Because meltwater follows the easiest path, repeating icy patches tell a clear story about where your runoff is really going — and why you should care before it wrecks a walkway or creeps toward your foundation. Heading: Spot the trail. When you see repeating icy patches after thaws, those refreeze cycles show runoff paths where water pools, often pooling near the foundation or along a hardscape edge. Now: measure the slope and watch streaks; if ice hugs a driveway or walk, the surface is directing water wrong. Do this, not that: extend drainage away from the house, loosen compacted soil, and clear any nearby channels. Something to keep in mind: lingering ice over 24–48 hours means more water, fix it before concrete suffers. Consider installing drainage solutions to direct water safely away from your home.
Gutters and Downspouts in Winter: Overflow Signs That Point to Drainage Failure
Now check your gutters for backing up at the seams and overflowing during thaws, because clogged troughs or too-small capacity will spill right onto frozen ground and create lasting puddles and ice. Something worth noting: follow each downspout and see where it discharges—if it ends too close to the foundation or onto packed snow, you’re directing repeat pressure at the basement and begging for leaks. Don’t ignore ice buildup in the troughs and along the eaves; frozen dams force water under shingles and into walls, so plan fixes like longer rigid extensions or added catch basins before spring. Also consider installing downspout extensions to move water away from foundations and reduce seasonal drainage issues.
Gutters Backing Up
When gutters start to back up in thaw or storm conditions, don’t shrug it off as just messy — it’s a clear sign your system’s not moving water where it needs to go, and that can mean big trouble for the foundation and roof over time. Now, check for gutters overflowing, frozen blockages and ice dams that push melt under shingles; you’ve probably let leaves build up before, we all have, and that’s often the culprit. Something to ponder: inspect seams for spillage and look for standing water near the house after a melt, it shows where flow fails. Do this: clear debris, tighten fasteners, add downspout extensions and plan heated or insulated gutters if ice keeps returning. Don’t ignore repeated overflow. Consider installing hose reel and other organized lawn-care equipment to keep gutters and drains clear and make seasonal maintenance easier.
Downspout Discharge Problems
Start by tracing where your downspouts dump water, because that’s where winter drainage problems usually show themselves first: short outlets that spill within 3–6 feet of the foundation, blocked pipes that force melt down siding, or ends sitting on frozen ground that won’t soak up a drop. Now, walk each downspout and watch after a thaw, you’ll see overflowing gutters send streams where they shouldn’t, staining foundations or pooling at discharge points. Here’s what to do: extend or reroute downspout outlets away from the house, add splash blocks or buried lines, clear blockages so water follows the path you intend. Something to keep in mind—don’t ignore frozen soil; it won’t absorb, and that’s how basements get wet. Consider installing or checking proper sprinkler valve placement to ensure surface and subsurface water is directed away from the foundation.
Ice Buildup And Flow
If you've ever chased meltwater across a frozen yard, you know ice buildup and odd flow patterns don't happen by accident, they happen because water's finding the easiest path off your roof and your gutter system isn't guiding it away. Now, check where downspouts end—if they dump onto frozen ground near the foundation you'll get water pooling, ice sheets, and repeat freeze-thaw cycles that wreck walkways. Do this: extend downspouts, keep gutters clear, and aim for that slight 1–2% slope away from the house. Not that: don't let short extensions or clogged gutters reroute runoff onto pedestrians. Something to ponder: recurring icicles or rings on siding mean you missed a problem before—fix it now, before the next thaw ruins more concrete. Consider installing proper drainage and routine maintenance to keep runoff directed away from your foundation and prevent damage.
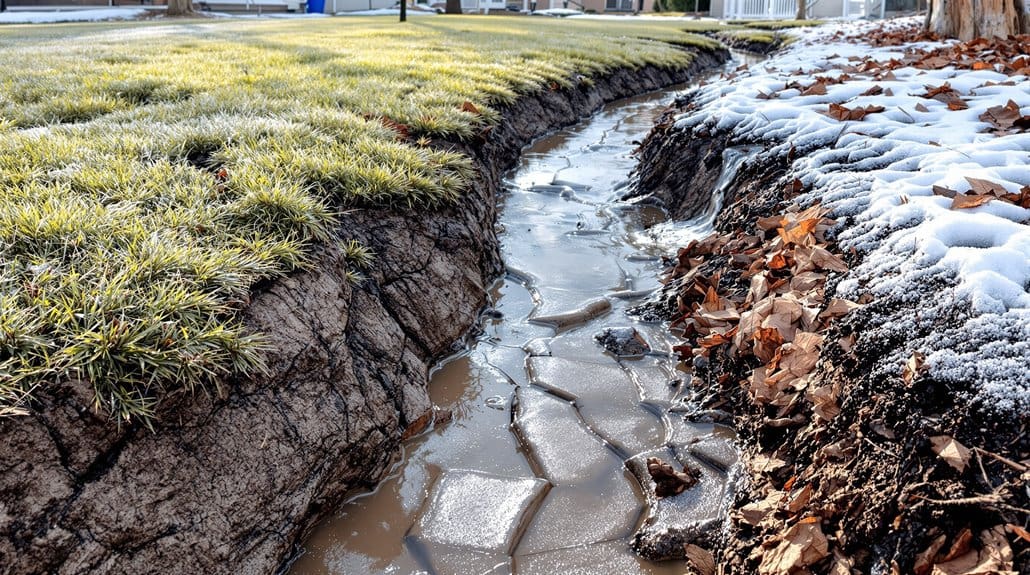
Visible Erosion Lines and Meltwater Channels: Mapping Downhill Flow
Walk the slope and look for those thin, dark lines where the soil’s been stripped away—they show exactly where meltwater concentrates and repeats the same downhill route, and you'll kick yourself if you ignore them until the spring flood. Step 1 — Observe: follow meltwater channels from rill to run, note where snow melts first, those narrow bare streaks tell you warmer microclimates and repeated flow. Step 2 — Record: mapping repeated channel locations across winters helps you count problem spots, you’ll stop guessing and start fixing real weak points. Now, act: prioritize swales or check dams at low points near foundations and drives, do this, not that—don’t patch one spot while the main channel keeps coming back.
Soft, Spongy Lawns and Bare Spring Patches: What Trapped Winter Moisture Means
Now, if your lawn feels soft and spongy this spring, it usually means roots were starved of oxygen by prolonged saturation during thaw, so check for areas that stayed wet more than 48–72 hours and stop hoping it’ll just fix itself. Something to ponder: repeated pooling and freeze–thaw compacts soil and crushes pore spaces, which causes bare patches where roots died, so prioritize fixing grading, easing subsurface flow, or amending heavy clay rather than just seeding over the problem. Do this: walk the yard after the next thaw, note soggy low spots and mossy thin turf, and plan targeted drainage or aeration—don’t just topdress and wait.
Root Suffocation Signals
You’ll notice a lawn that feels soft and spongy underfoot long before the grass shows obvious decline, and that squishy give is a clear signal that winter meltwater has replaced the air in the soil, leaving roots suffocated. Root suffocation happens when trapped water cuts oxygen below the critical level, and you’ll see bare spring patches where weakened crowns and fungi like snow mold finish the job. Now, do this: check saturated spots after a thaw, time how long water lingers, and mark clay-prone low areas that hold moisture for days. Don’t ignore puddling. Something to bear in mind: if standing water stays past 48 hours, test for poor drainage and compaction, then plan grading, aeration, or drainage fixes before green-up.
Compaction And Drainage
Recognizing compaction and poor drainage early will save you a lot of headaches come spring, so let’s start with what to look for and what to do now: if parts of your lawn feel soft and spongy after a thaw, especially near driveways, paths, or low, clayey spots, that’s often trapped meltwater filling the tiny soil pores that roots need for oxygen, and when water sits for more than 48–72 hours you’re inviting root rot and bare patches. Now, check for hard soil by pushing a screwdriver in, note where water collecting sticks around, and admit we’ve all walked on soggy spots too soon. Do core aeration to 2–3 inches and add organic matter to rebuild soil structure, not compaction. Something to ponder: fix grading if water pools near foundations.
Thaw-Time Turf Loss
Often you’ll find thin, brown patches and a soft, spongy feel underfoot where snowmelt got stuck, and that trapped water is exactly what’s quietly killing roots over the winter; here’s what to do now, and yes, we’ve all trodden on soggy spots too soon and made things worse. Now, soft and spongy turf after thawing means saturation cut off oxygen, roots suffocated after 48–72 hours, and repeated freeze-thaw cycles made things worse by forcing water into pores. Something to ponder: compacted clay holds water near the home and in low spots, so don’t just reseed. Do this: aerate, topdress with sand or compost, and regrade drainage. Not that: pack it down or ignore visible mud on siding.
Frozen Ground and Freeze–Thaw Cycles: How They Change Surface Flow
When ground freezes even a few inches down, water stops soaking in and has to run across the surface instead, so you’ll suddenly find meltwater and winter rain racing to the lowest spots and along old, hardened flow paths. You’ll notice frozen ground turns normal infiltration to near zero, so surface runoff forms, icey patches appear, and drains or puddles get all the water. Now, freeze–thaw cycles work on soil, they crack and shift, and you’ll see tiny rills where concentrated flow carved new channels. Something worth weighing: clay or compacted areas tighten when frozen and stay slow to recover, so you’ll get repeat puddles. Do this: follow visible flow, address hardened paths, don’t ignore recurring low spots. You’ve learned this before, right?
Quick On-Site Checks: A Winter Walk-Through Checklist to Map Problem Spots
Start by walking your property right after a thaw and follow the water — you’ll see where meltwater prefers to run, where it pools, and where old flow tracks have come back to life, and that gives you the quickest map of trouble spots. Step 1 — mark puddles that stick around more than 48 hours; those long-lived pools usually mean compacted soil, poor grading, or blocked paths. Now trace thin erosion lines and muddy streaks to learn downhill routes, so you know where to aim changes. Step 2 — check gutters during winter rain and note downspout discharge locations, especially if water lands near the foundation. Something to ponder: probe soggy beds; hard-to-penetrate turf hints at compression and slow drainage.
Simple Temporary Fixes You Can Do Now (Downspout Extensions, Ice-Safe Channels, Clearing Drains)
Now start by extending downspouts at least 6–8 feet from the foundation using rigid 4–6 ft extenders or flexible corrugated pipe, so meltwater discharges onto stable, sloped ground instead of pooling by your basement wall — do this, not just point the spout toward the yard and hope. Next, clear an ice‑safe channel along the usual runoff paths by splitting 2‑3‑inch PVC or digging a shallow sand/gravel trench to guide water away from walkways, and yes, I know you’ve skipped this before and paid for it with a flooded doorstep. Something to keep in mind: before thaw events, clean gutters and catch basins so hundreds of gallons don’t suddenly overwhelm your makeshift channels, and use sand or calcium chloride sparingly on icy spots to help traction without wrecking plants.
Downspout Extensions Now
You’ll want to get your downspouts extended and secured before the next thaw, because letting meltwater pour out near the foundation is an easy mistake to make and one that comes back to haunt you in spring. Step 1: do this — choose rigid PVC or corrugated extensions, aim for at least six feet so runoff leaves the typical wet zone, and fasten with brackets or landscape staples; don’t fling water onto frozen compacted soil. Now, something to ponder: during freeze-thaw cycles use insulated collars and slope the extension at 1–2% to avoid standing water and ice dams. Clear outlets of debris and ice, and direct discharge toward permeable ground or a catch basin, not a low spot. You’ll thank yourself later.
Clear Ice-Safe Channels
If meltwater’s going to find a way, make sure it goes where you want it to—don’t let it turn your walkways into skating rinks. Now, start by extending downspouts at least six feet with a temporary rigid or flexible extension so runoff leaves the frozen house line, not pooling and creating ice patches. Next, lay narrow gravel-filled ice-safe channels, about 3–6 inches wide and 2–3 inches deep, across walkways to give meltwater a protected route to a safe discharge. Something to keep in mind: mark temporary channels and extensions with bright stakes or flags so plows and feet don’t crush them. Keep gutters and drains clear, use short corrugated pipe to route flow, and yes, check weekly—less heroic, more effective.
When to Call a Pro: Signs That Need Grading, Added Drains, or Professional Remediation
When meltwater or rain keeps sitting in the same low spot for more than 48–72 hours, don’t shrug it off as “just winter”—call a pro, because that’s often the sign you need grading or a subsurface (French) drain to fix the problem for good. Now, if standing water, repeat ice patches, or pooled runoff shows up, don’t tinker alone; you’re likely looking at regrading, catch basins, or added drains. Something to take into account: water within 3–5 feet of foundation walls or overflowing window wells is high risk, so get help evaluating grading and extending downspouts. Do this, not that—don’t ignore erosion channels or soggy spots after thaws. Admit past DIYs, learn, and get an expert to design lasting fixes.
Some Questions Answered
What Are the Drainage Problems?
Soggy spots, slow streams, sinking soil. You’re seeing grading issues, downspout placement errors, soil compaction, and a failing sump pump. Now, start by regrading for proper slope, move or extend downspouts away from foundations, aerate compacted soil, and test or replace the sump pump. Something to keep in mind: you probably ignored small signs before—do this now, don’t wait—patch the problem early and you’ll save time, money, and headaches.
How to Solve Drainage Problems?
Now, regrade soil to a 5% slope away from foundations, use grading systems to map runoff, and extend downspouts into 4-inch PVC with a slight grade. Install French drains, add swales or channel liners where flow concentrates, and try permeable paving to cut surface runoff. Something to contemplate: add root barriers near trees, test percolation before amending soil, and don’t skip maintenance — you’ll thank yourself later.
What Happens to Well Water in the Winter?
Like a sleepy dragon, your well slows and can snarl: frozen pump, pressure fluctuation, ice blockage, and wellhead freezing can cut your water. Now, check insulation and bury lines below frost depth, heat the pump room, and test water after thaws. Something to keep in mind: monitor static levels so pumps don’t run dry. Do this, not that—don’t ignore vented caps or let tanks sit uninsulated; you’ll thank yourself.