You can turn winter leaves into “black gold” by shredding them, layering about 2–3 parts shredded leaves with 1 part greens or a scoop of garden soil, keeping the pile roughly 3×3×3 ft, and maintaining moisture like a wrung-out sponge; turn it every 1–2 weeks to avoid sour smells and compaction. Now, don’t toss whole leaves or meat scraps, and consider a cup of finished compost per cubic foot to jump-start microbes. Something worth noting: follow a few simple tweaks and you’ll have usable compost by spring — keep going for timing and application tips.
Some Key Points
- Shred leaves into 1–2 cm pieces to prevent matting and speed decomposition.
- Build a 3x3x3 ft pile, layering about 2–3 parts shredded leaves to 1 part greens.
- Keep moisture like a wrung-out sponge and turn the pile every 1–2 weeks for aeration.
- Inoculate with a cup of finished compost or a scoop of garden soil per cubic foot to seed microbes.
- Fix soggy or smelly piles by adding dry shredded leaves, increasing aeration, and rebalancing browns:greens.
What Problem Does Composting Winter Leaves Solve?
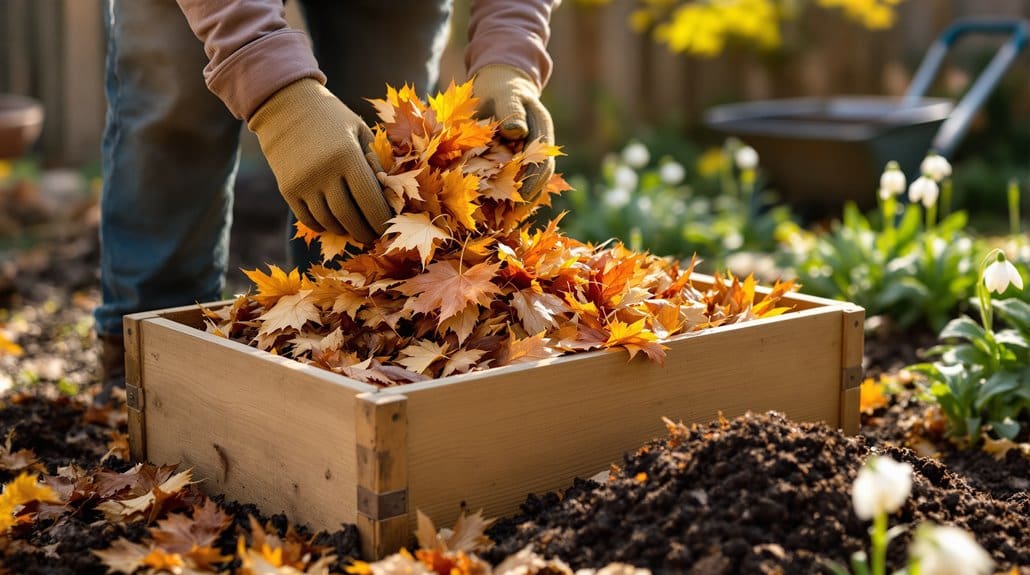
When your yard fills with a carpet of leaves, you’re not just looking at a chore—you’re staring at wasted nutrients and extra trash bills, so composting them fixes several problems at once. You’re solving landfill bloat by keeping half your household organic waste out of the dump, and you’re reclaiming brown material that, when mixed properly in a compost pile with greens, becomes garden-ready black gold. Now, do this: shred or mow leaves first so they don’t mat, keep the pile slightly moist like a wrung-out sponge, and turn it every one to two weeks so oxygen speeds breakdown. Something to bear in mind: skip big wood and pet waste, chip branches instead. You’ll thank yourself in spring. Adding a small amount of garden lime can help balance pH and improve nutrient availability in your finished compost, making it more beneficial for your lawn and beds; learn about lime products for home yards.
Quick Overview : How Leaf Composting Turns Brown Leaves Into Black Gold
Think of leaf composting as turning a backyard mess into garden gold, and start by shredding leaves so they break down fast instead of forming a soggy mat—trust me, I’ve let whole leaves sit and it’s slow and gross. Step 1: Build a 3x3x3-foot pile, that mass heats up in about two weeks if you’ve got moisture right. Step 2: Layer roughly three parts shredded browns to one part greens, that nitrogen feeds microbes, don’t skimp. Step 3: Keep it like a wrung-out sponge, water when dry, add browns if mushy. Step 4: Turn weekly to aerate, or wait months for a cold process. Now screen the dark, crumbly compost and mix into beds; that’s your black gold. Consider using a compost tumbler to make turning and aeration easier and cleaner.
What Leaves and Yard Materials Work Best (And Which to Avoid)
For getting the best results, start by knowing which leaves are your friends and which ones will slow you down; you’ll want mostly dry, shredded leaves as your brown, carbon-rich base, mixed about two to three parts to every one part green material like fresh grass clippings or kitchen scraps. Now, use dry fallen leaves for bulk, they give carbon and structure, help aeration, and won’t rot into slime if you balance moisture. Something to keep in mind: don’t toss in big woody prunings or thick branches, they take ages—chip them or set them aside. Also avoid pet waste, meat, dairy, and oily scraps; they bring pests and pathogens. Do this, not that: keep the pile moist, turn it, and shred when possible. Consider using a core aerator occasionally to reduce compaction and improve air and water flow in lawn areas.
How to Collect and Prepare Fall Leaves for Faster Breakdown
You’ll want to grab those leaves before they knit into a soggy carpet, so run a mower or leaf shredder over them until the pieces are mostly under 1–2 cm—shredding speeds things up from weeks to months, trust me. Step 1: collect and mix. Aim for about three parts brown leaves to one part green clippings or kitchen scraps, or toss in a handful of garden fertilizer if leaves are all you’ve got, that balance feeds microbes that make black gold. Step 2: pile smart. Build at least a 1 m³ pile so it keeps heat, moisten to a wrung-out sponge texture, then layer in a bit of finished compost or garden soil to inoculate. Now cover and turn every 1–2 weeks when warm. For best results at home, have a few essential composting tools on hand to make collection and maintenance easier.
Choosing a Method: Pile, Bin, Tumbler, or Sheet-Composting on Beds
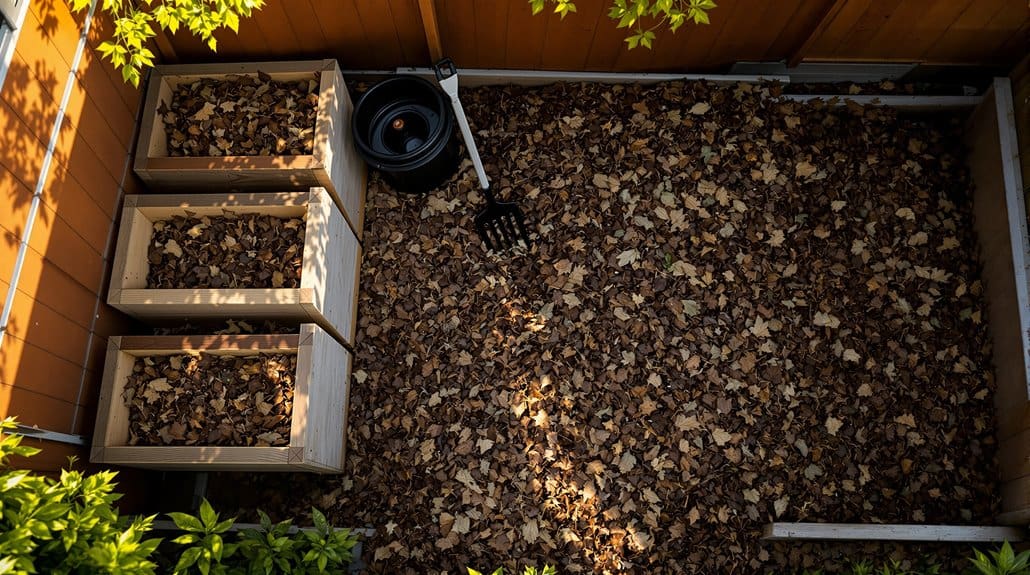
Choosing how to handle all those shredded leaves comes down to a few simple trade-offs, and once you see them side-by-side it’s easier to pick what’ll actually work in your yard. Step 1 — pick by space and patience: a big leaf pile or bin suits heavy volumes, you’ll turn and monitor moisture like a wrung-out sponge, and you’ll get compost by spring or fall. Step 2 — want speed and less fuss? Use a tumbler, add coffee grounds or fertilizer, spin several times weekly, expect compost in weeks, not months. Step 3 — low-effort option: sheet-compost on beds, cover with 2–6 inches, top with some nitrogen or soil, let worms do the work. Many homeowners find that choosing the right container type from a local lawn care equipment supplier makes managing volume and maintenance easier.
Layering and the Ideal Brown-to-Green Ratio for Leaf-Heavy Piles
You’ve picked the method, so now get the layering right and you’ll actually see those leaves turn into rich compost instead of an awkward, slimy pile you swore you’d fix last year. Step 1: aim for about 2–3 parts brown materials—mostly shredded or mown leaves—to 1 part green, like grass clippings or kitchen scraps, by volume, that gives microbes carbon and nitrogen in balance. Step 2: layer roughly 4–6 inches of leaves, then 1–2 inches of greens, repeat until the pile is at least 3x3x3 feet. Something to keep in mind: whole leaves slow things, so shred them first. If greens are scarce, add a measured nitrogen boost, and don’t panic—this is how communities learn together. For homeowners maintaining their property, choosing the right tools can speed the process, including using a dethatcher to help prepare the lawn and collect leaf debris efficiently.
Moisture, Aeration, and When to Turn the Pile for Best Results
When your leaf pile looks more like a soggy brown pancake than a steamy composting tower, stop and check moisture and airflow—these are the two things that make or break the whole process. Step 1 — Test moisture: squeeze a handful; aim for a wrung-out sponge, only a few drops. Too wet, it goes anaerobic and stinks; too dry, microbes nap. Step 2 — Improve aeration: build at least 3x3 feet, add a stick base or perforated PVC to make air channels, and resist packing it down. Now, when to turn: during active heat, every 1–2 weeks to refresh oxygen and even warmth. Something to ponder: if temps drop under 100°F, add some greens like grass clippings or a light touch of fertilizer, water, then turn. For better yard protection and to keep leaves contained while composting, consider using protective netting around the pile to prevent wind scatter and animal disturbance.
Speeding Up Decomposition: Shredding, Adding Starter Microbes, and Fertilizers
Now, shred your leaves down to about 1–2 cm with a mower or shredder so microbes can get to more surface area — I learned the hard way that whole leaves can sit for a year while shredded ones finish in a few months. Next, mix in a cup of active compost or a scoop of garden soil per cubic foot and add a nitrogen source like fresh grass clippings or a light organic fertilizer to aim for a C:N near 25–30:1, because starters and nitrogen are what actually jump-start the pile. Something to bear in mind: keep the pile like a wrung-out sponge, turn it every 1–2 weeks to let oxygen in, and you’ll speed conversion instead of watching a cold, dry heap sulk for months.
Shred For Faster Breakdown
Shred those leaves down and you’ll save yourself months of waiting—run them over with a mower or a shredder until most pieces are about 1–2 cm, because smaller bits give microbes a lot more surface to work on and can cut breakdown from a year to a few months. Now, do this: mow or shred, don’t pile whole leaves. You’ll thank yourself when the pile heats and smells earthy, not sour. Something worth noting, I once skimped and got a wet, compacted mess—lesson learned, mix in twigs or bulky browns to keep air flowing. Keep the pile as damp as a wrung-out sponge, turn every 1–2 weeks, and avoid big woody chunks that choke decomposition.
Use Starters And Fertilizer
If you want the fastest, stink‑free leaf compost, kick the pile into gear with a little help: run shredded leaves through a layer of moist finished compost or a scoop of garden soil, sprinkle in a measured bit of high‑nitrogen fertilizer or fresh grass clippings, and turn regularly to keep air and microbes working, because I’ve learned the hard way that dry, carbon‑heavy piles just sit there and sulk. Now, build or open your compost bin and add 1–2 cups of finished compost or garden soil per cubic foot of leaves to seed microbes, sprinkle about 1/2 cup 10‑10‑10 per bushel or mix one part greens to three parts leaves, keep it damp like a wrung sponge, turn every 1–2 weeks, and don’t overdo it.
Troubleshooting Common Problems (Odor, Pests, Slow Breakdown, Soggy Compost)
Now you’ll troubleshoot the usual headaches—if your pile smells, turn it and add bulky dry browns to bring air back, aim for a wrung-out sponge moisture and expect the odor to ease within a couple days. If critters keep showing up, don’t blame the leaves: stop adding meat, dairy, or oily scraps, bury kitchen waste or use a closed bin or hotter, insulated pile, and seal openings so rodents don’t make it their buffet. Something to ponder for slow or soggy breakdown is to boost nitrogen-rich greens and chop materials finer, add dry shredded leaves or cardboard to soak up excess water, and turn regularly to speed things up and keep the compost aerobic.
Fixing Foul Odors
Nothing’s worse than opening a compost bin and getting hit with a rotten smell, but you can usually fix it quickly if you act right away; that sour, heavy odor almost always means the pile’s gone anaerobic, so your first move is to turn it and add dry “browns” — shredded leaves or straw — at about two to three parts brown to one part green to restore oxygen and carbon balance. Now, turn the pile thoroughly, fluffing pockets to reintroduce air, and add more green material sparingly if it seems carbon-poor. If it’s soggy, mix in bulky dry bits like twigs or shredded cardboard and improve drainage. Something to keep in mind: remove fats or dairy, bury new kitchen waste deep, and avoid big clumps of fresh grass. Keep turning regularly.
Keeping Pests Out
You’ll want to get ahead of pest problems before they start, because once raccoons, rats, or flies find a good snack they’ll tell all their friends — and cleaning that up is no fun. Step 1: bury kitchen scraps at least 6–8 inches deep in the leaf pile and cover each addition with brown leaves, that simple move cuts odors and deters rodents and flies. Step 2: do this, not that — skip meat, dairy, oils, greasy foods; stick to fruit and veg scraps, coffee grounds, eggshells, all organic matter that composts cleanly. Now, secure the base with hardware cloth or wire mesh buried a few inches, keep the mix 2–3 parts dry leaves to 1 part greens, moist like a wrung sponge. Something to weigh up: if pests show up, turn the pile, add more browns, or cap fresh scraps with finished compost or soil to mask scents.
Accelerating Slow Decomposition
When pests are under control, the next thing you’ll probably notice is how slowly that winter pile breaks down, and that’s fixable if you take a few targeted steps. Step 1: shred and size-reduce—run those leaves through a mower or chipper, use shredded leaves, not whole ones, so microbes can eat faster. Step 2: build mass and insulate—make a 3×3×3 ft pile and top with 6–12 inches of straw or finished compost to hold heat; I learned the hard way that tiny piles stay cold. Now, if it’s soggy, add coarse browns like twigs or shredded cardboard and turn to fluff, not tamp. Something to bear in mind: if things still stall, add greens or a bit of blood meal to feed microbes.
When Is Leaf Compost Finished and How to Test Its Readiness?
Now that you’ve let your leaf pile do its work, it’s time to check whether it’s actually finished, because compost that looks good can still surprise you. Step 1 — look and feel: finished compost is dark, crumbly, earthy-smelling, with no leaf pieces, the kind that hints at rich soil; if it’s still stringy, wait. Step 2 — squeeze test: grab a handful, squeeze; it should feel like a slightly damp sponge and not drip. Step 3 — hand-and-nose: the pile should be cool and smell like fresh soil, not sour or ammonia. Step 4 — germination check: put a spoonful on a damp towel with radish seeds; if they sprout and no mold appears in 5–7 days, you’re good.
Practical Uses for Finished Leaf Compost and Tips for Applying It in Spring
Now, spread a thin topdressing of finished leaf compost on your lawn—no more than a quarter inch—then rake lightly or let the microbes do the work so you don’t smother the grass. For beds, work a 1–2 inch layer into the top 6–8 inches of soil or mix about one part compost to three parts native soil in planting holes for transplants, that’s what gives new roots a gentle boost without frying them. Something to bear in mind: use 2–3 inches as mulch around shrubs and trees, and don’t overdo containers—replace only 20–30% of peat or coir with leaf compost to keep moisture and microbes happy.
Top Dressing Lawns
If you want a greener, healthier lawn without piling on synthetic fertilizer, spread a thin layer of finished leaf compost in spring—think a generous dusting, not a blanket—and you'll feed the grass, improve soil structure, and help seedings take hold. Step 1: Prepare material and measure; one cubic yard at 1/4 inch covers about 1080 sq ft, so calculate to avoid waste. Step 2: Apply 1/4–1/2 inch evenly with a broadcast spreader or shovel and rake; don’t smother turf. Now, for thin spots, rake compost into bare patches to 1/4–1/2 inch and overseed for better seed-to-soil contact. Something to ponder: water lightly, then walk or roll to settle, but don’t bury crowns.
Mulching Garden Beds
You’ve just top-dressed your lawn, so take that same goal—feeding soil and improving structure—and move it into the beds where your perennials and veggies live. Step 1: lightly spread a 1/4–1/2 inch layer of finished leaf compost in early spring, don’t smother seedlings, and keep compost a few inches from crowns and stems. Now, when preparing new beds, work 1–2 inches into the top 4–6 inches of soil to boost water retention and organic matter over time. Something to ponder: mix compost 1:3 with native soil for raised beds to balance drainage and fertility. Do this, not that—avoid uncomposted leaves; they can mat, repel water, and tug nitrogen away. Trust Mother Nature, and join the soil-loving club.
Soil Amendment Mixing
When you’re ready to give beds a real boost this spring, start by working finished leaf compost into the topsoil so plants get steady nutrients and better structure instead of a quick burst that fades; I’ve learned the hard way that dumping a pile on and hoping for the best just leads to mats and hungry seedlings. Step 1 — Mix: spread 1–2 inches of leaf compost and work it into the top 6–8 inches of soil, that’s the sweet spot. Now, for new vegetable beds, blend one part compost to two parts native soil. Something to ponder: top-dress lawns with 1/4–1/2 inch, use 2–3 inches in clay, or 10–20% in sandy soils. Don’t overdo it.
Some Questions Answered
How to Compost Leaves Over the Winter?
You compost leaves over winter by shredding them, then Winter Layering shredded browns with kitchen or garden greens in about a 3:1 ratio, keeping the pile moist like a wrung-out sponge. Now insulate with whole leaves, straw, or a tarp, shelter it, and turn every 2–4 weeks so it heats and breathes. Something worth pondering: I’ve waited too long before—turn early, don’t let it freeze solid, and you’ll have black gold by spring.
What Are Two Mistakes That We Should Avoid When We Prepare Compost?
Mistake one: packing leaves too tight, which suffocates microbes — Avoiding Anaerobicness means you turn the pile every 1–2 weeks, mix in greens, and water until it feels like a wrung‑out sponge. Now, mistake two: leaving whole, unshredded leaves — they’ll sit for years; shred or mow them so they break down fast. Something to keep in mind: don’t add meat or pet waste, unless you’ve got a hot, managed system.
Which Leaves Should Not Be Composted?
Don't compost sick foliage, leaves with persistent herbicide residues, heavily infested or diseased material, oily evergreen masses, or pet‑feces–contaminated leaves. Now, bag those sick foliage and herbicide‑tainted leaves for disposal, not your pile. Something to bear in mind: if you can reach 55–65°C and sustain it, you can sanitize some problems, but that's tricky. Do this, not that—protect your future garden, and don’t learn the hard way again.
How to Make Black Gold Compost?
You make black gold by shredding leaves, layering three parts browns to one part greens, keeping the pile moist like a wrung-out sponge, and using aeration techniques like turning with a pitchfork every 1–2 weeks to keep it hot. Now, monitor temperature so it hits 130–160°F, and be patient — I’ve overcompacted piles before, don’t do that. Something to ponder: finished compost looks dark, crumbly, and smells earthy.